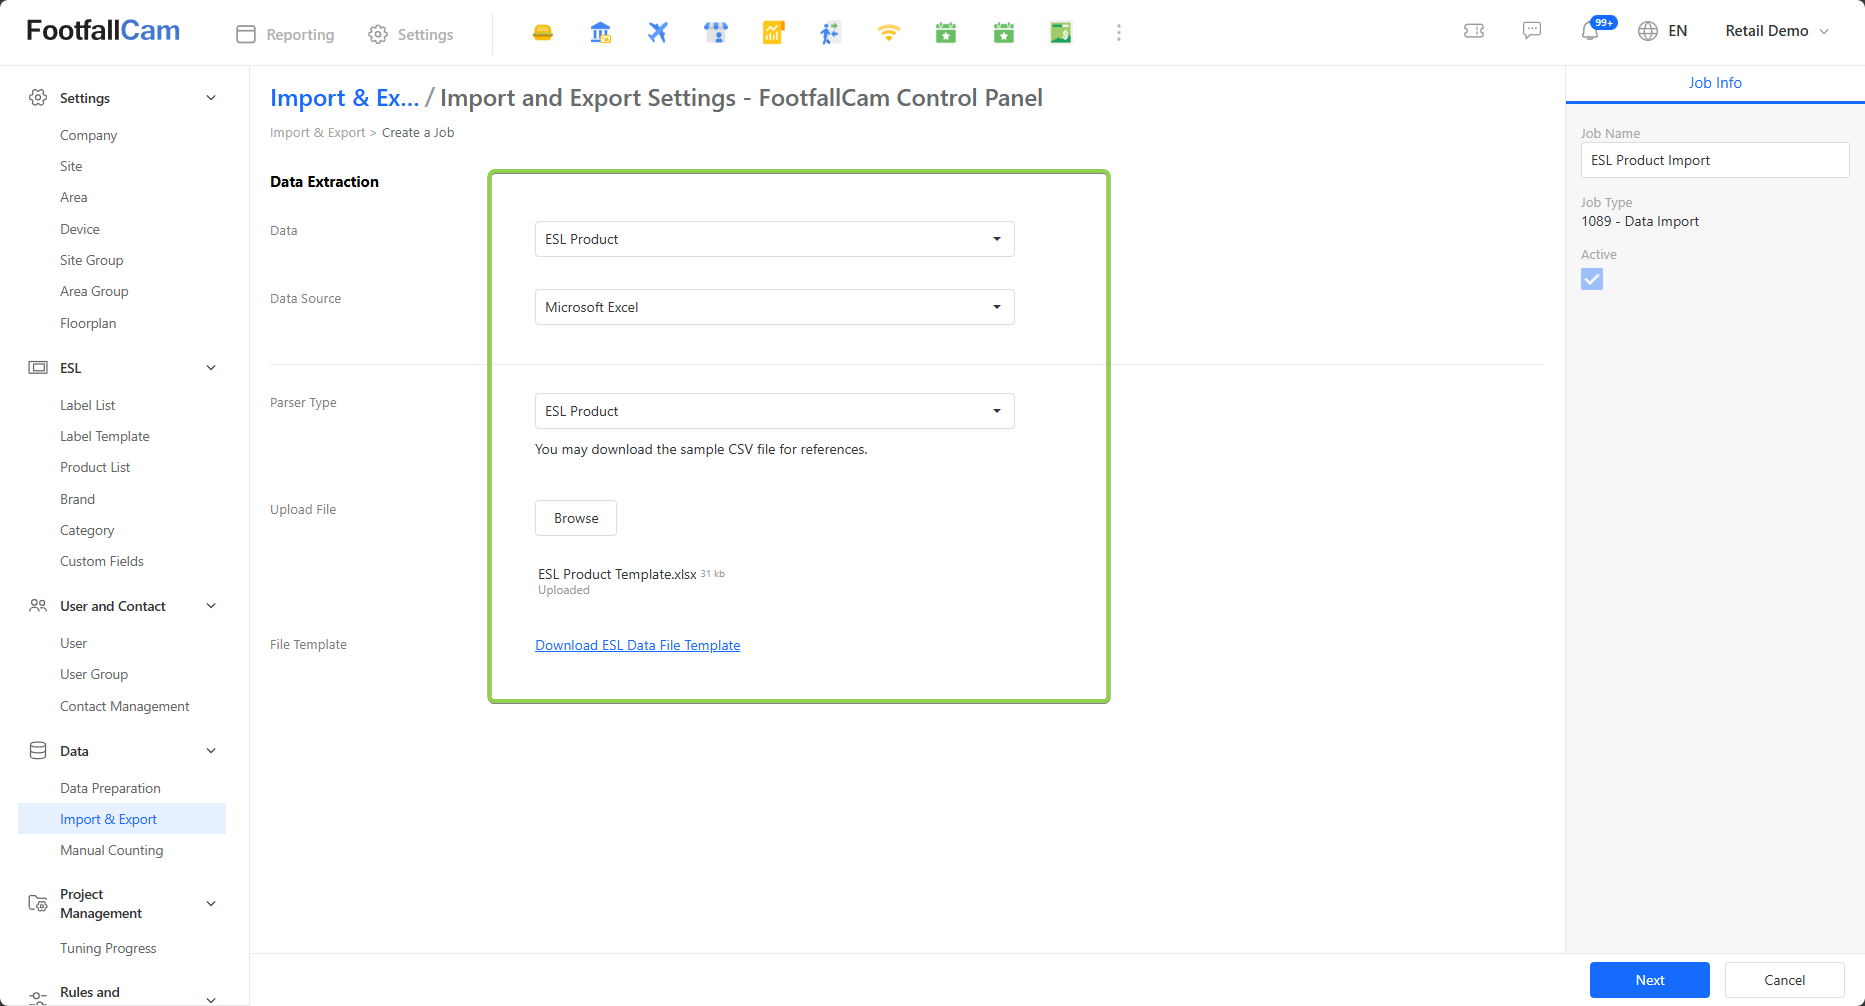
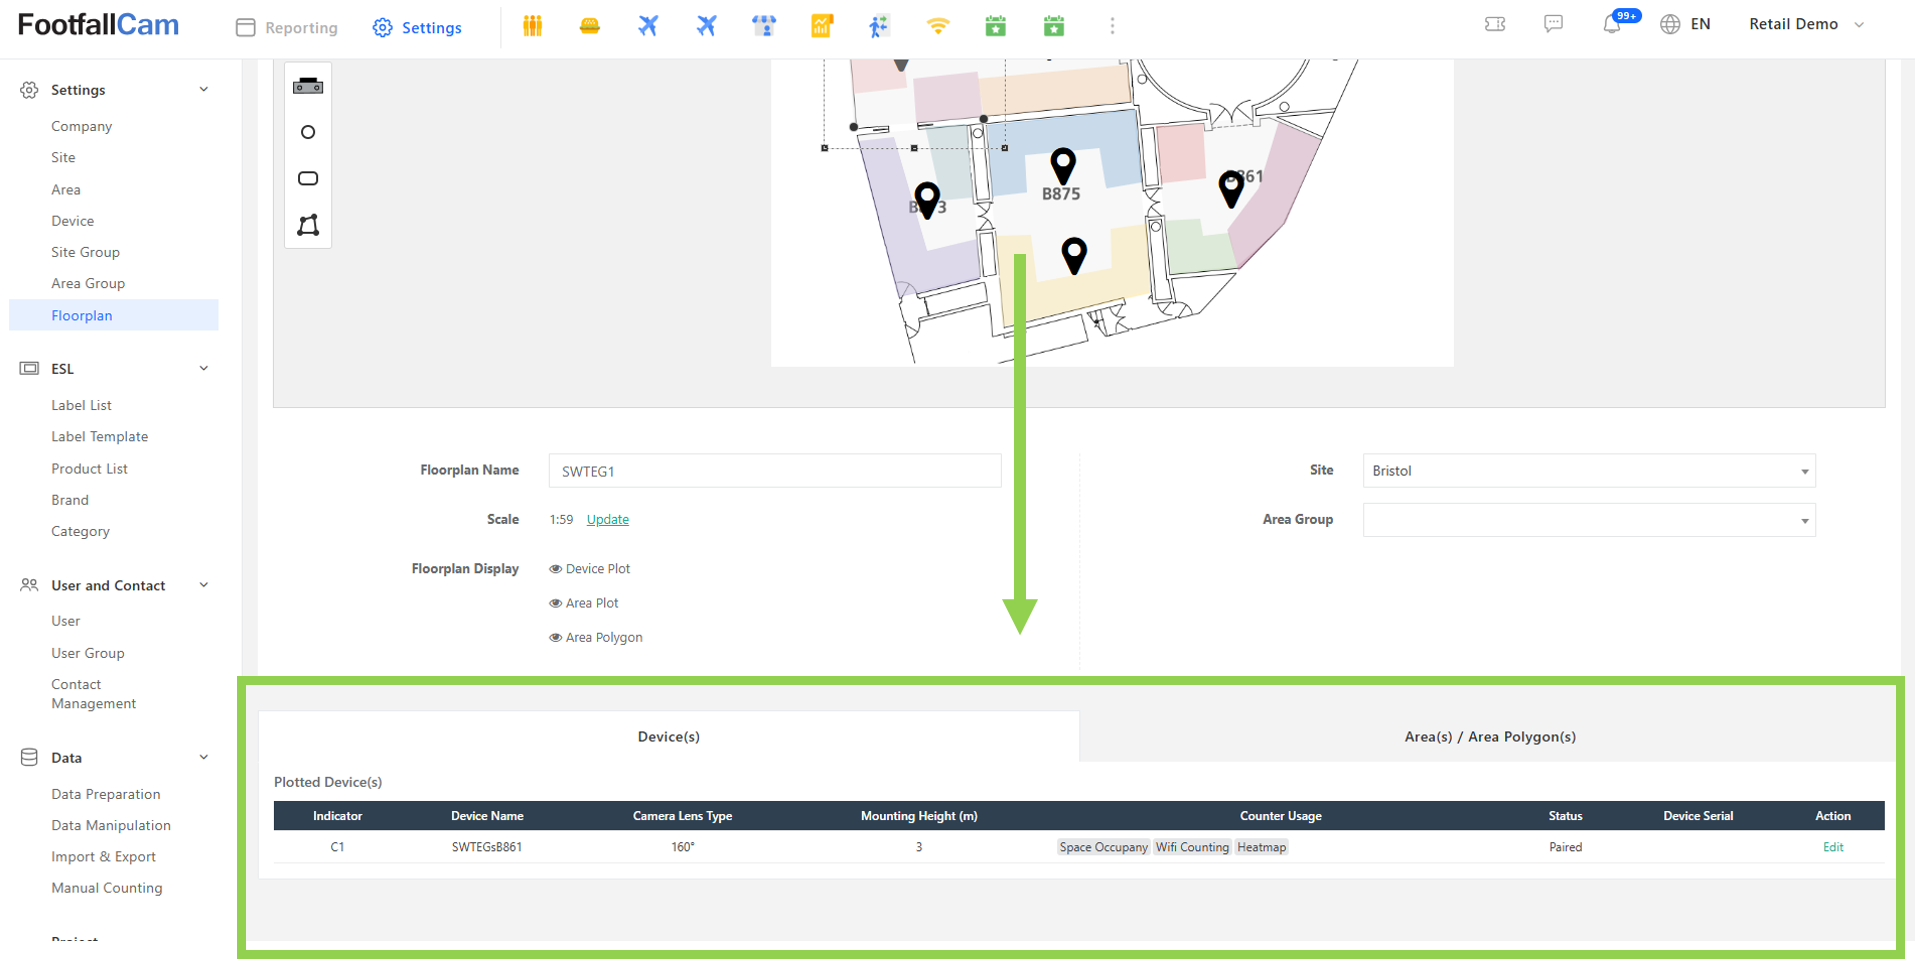
This chapter provides a comprehensive guide on the various methods available for importing data into the portal, including sales data, staff data, and bulk site creation. It covers the configuration steps required to set up and automate import jobs, ensuring efficient data integration and management. By following the instructions in this chapter, users will be able to streamline their data import processes, maintain data accuracy, and enhance overall operational efficiency.
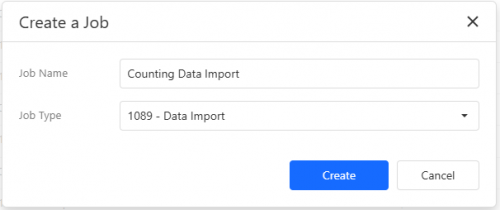
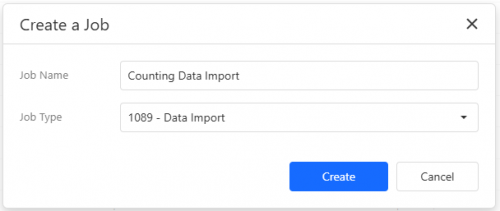
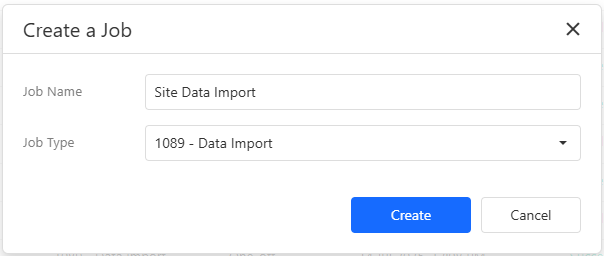
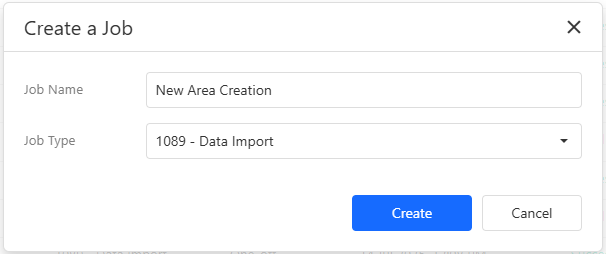
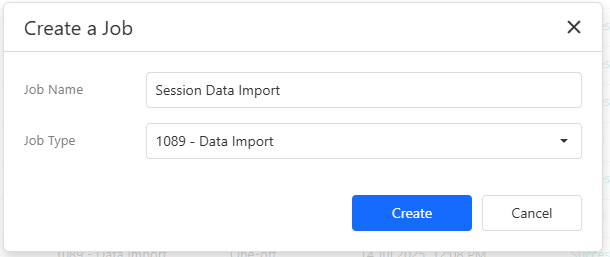
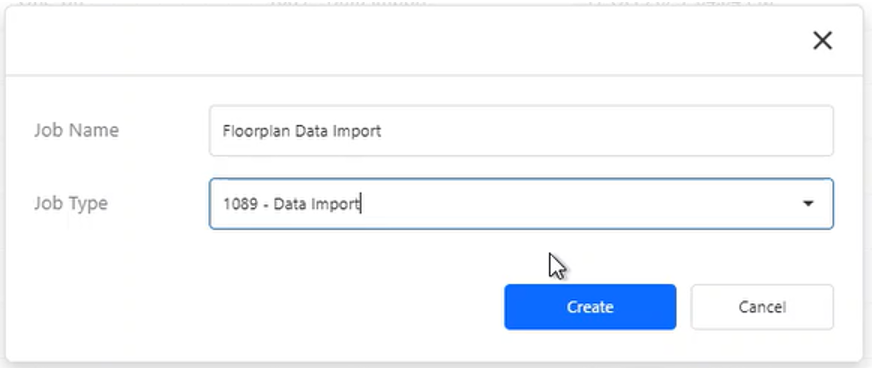
Please refer to step 1 to step 3 of Chapter 3.3 Data Import and Export to create a job and select 1089 - Data Import as the Job Type.
3.1 Sales Data
3.1.1 One-off Sales Data Import
3.1.1.1 Sales Data Import via Portal
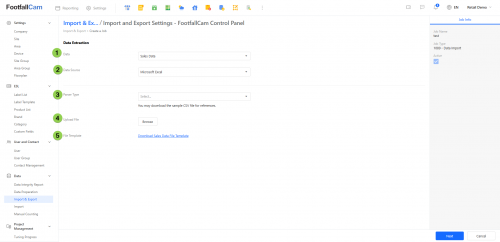
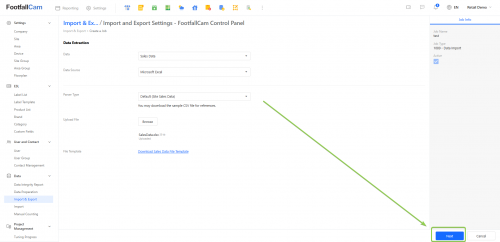
Step 1 - Please refer here to create an import job. After select the JobType of "1089 - Data Import", click on the Create button and it will be navigated to the page below.
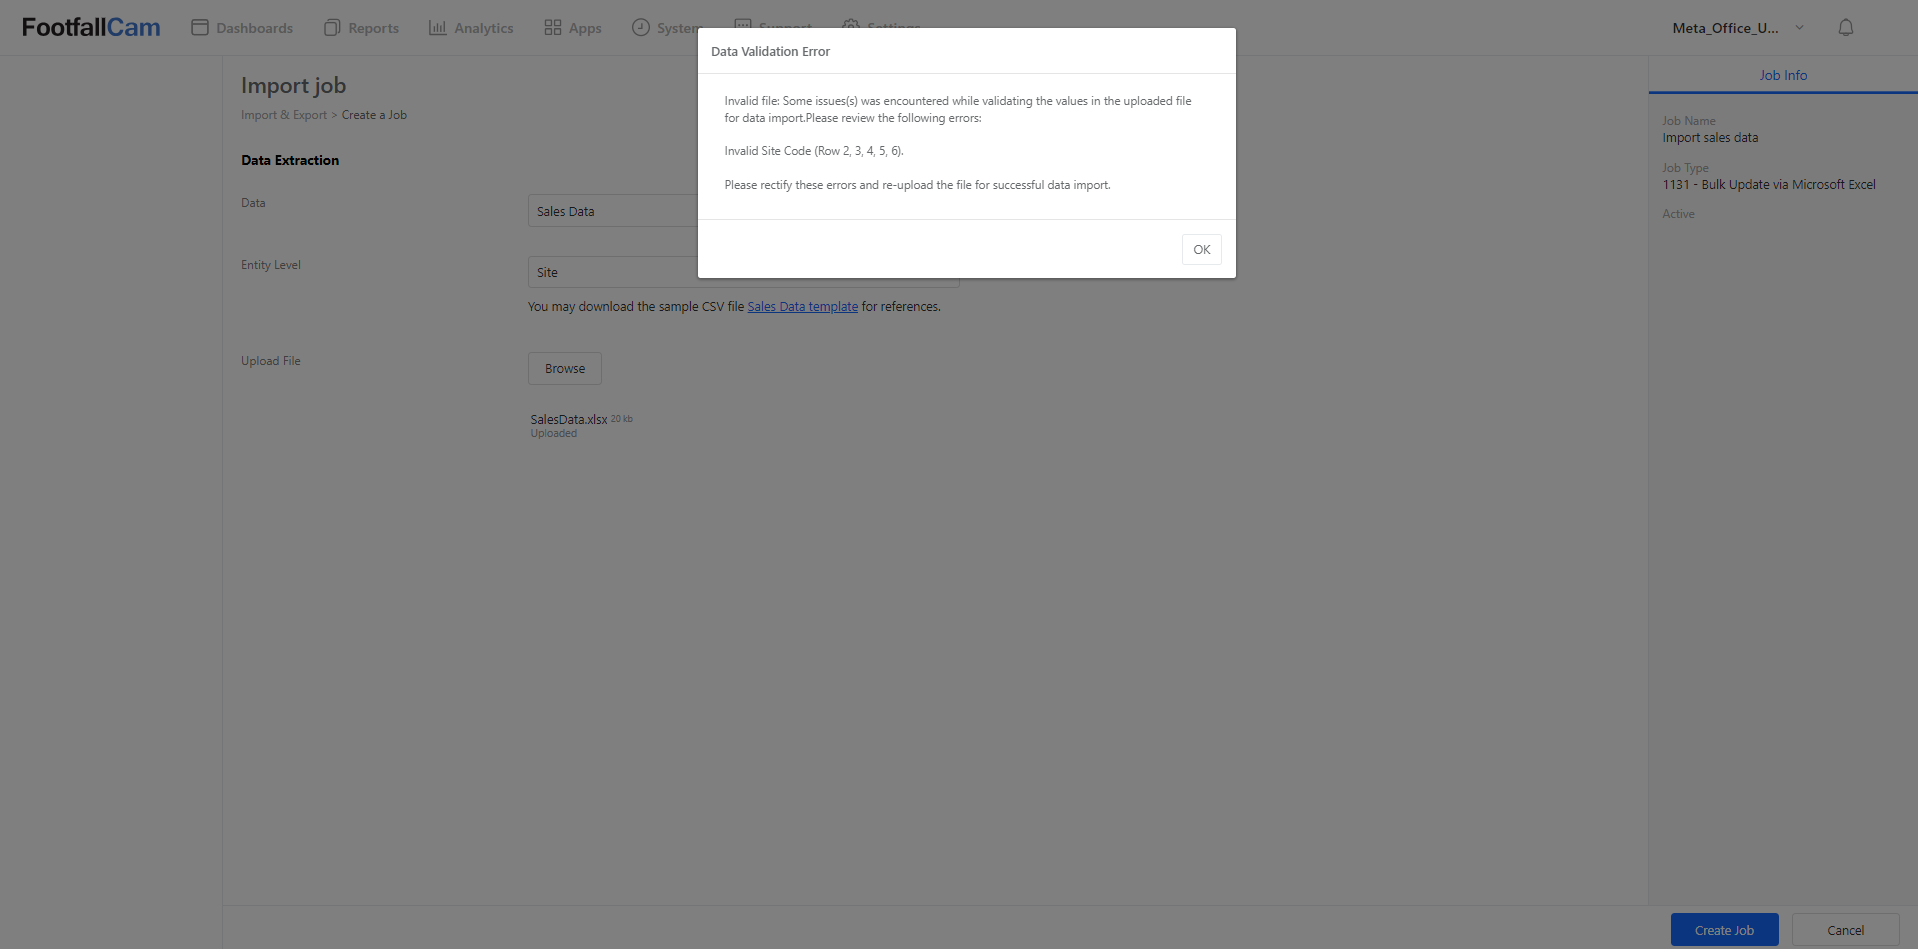
Noted: An error message will pop out if there are errors in the Excel file, read the error message and make changes to the uploaded file to resolve the problem.
Step 2 - Click on the Next button and go to the next page.
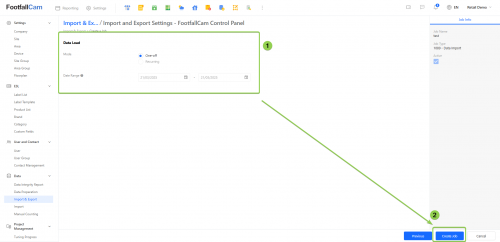
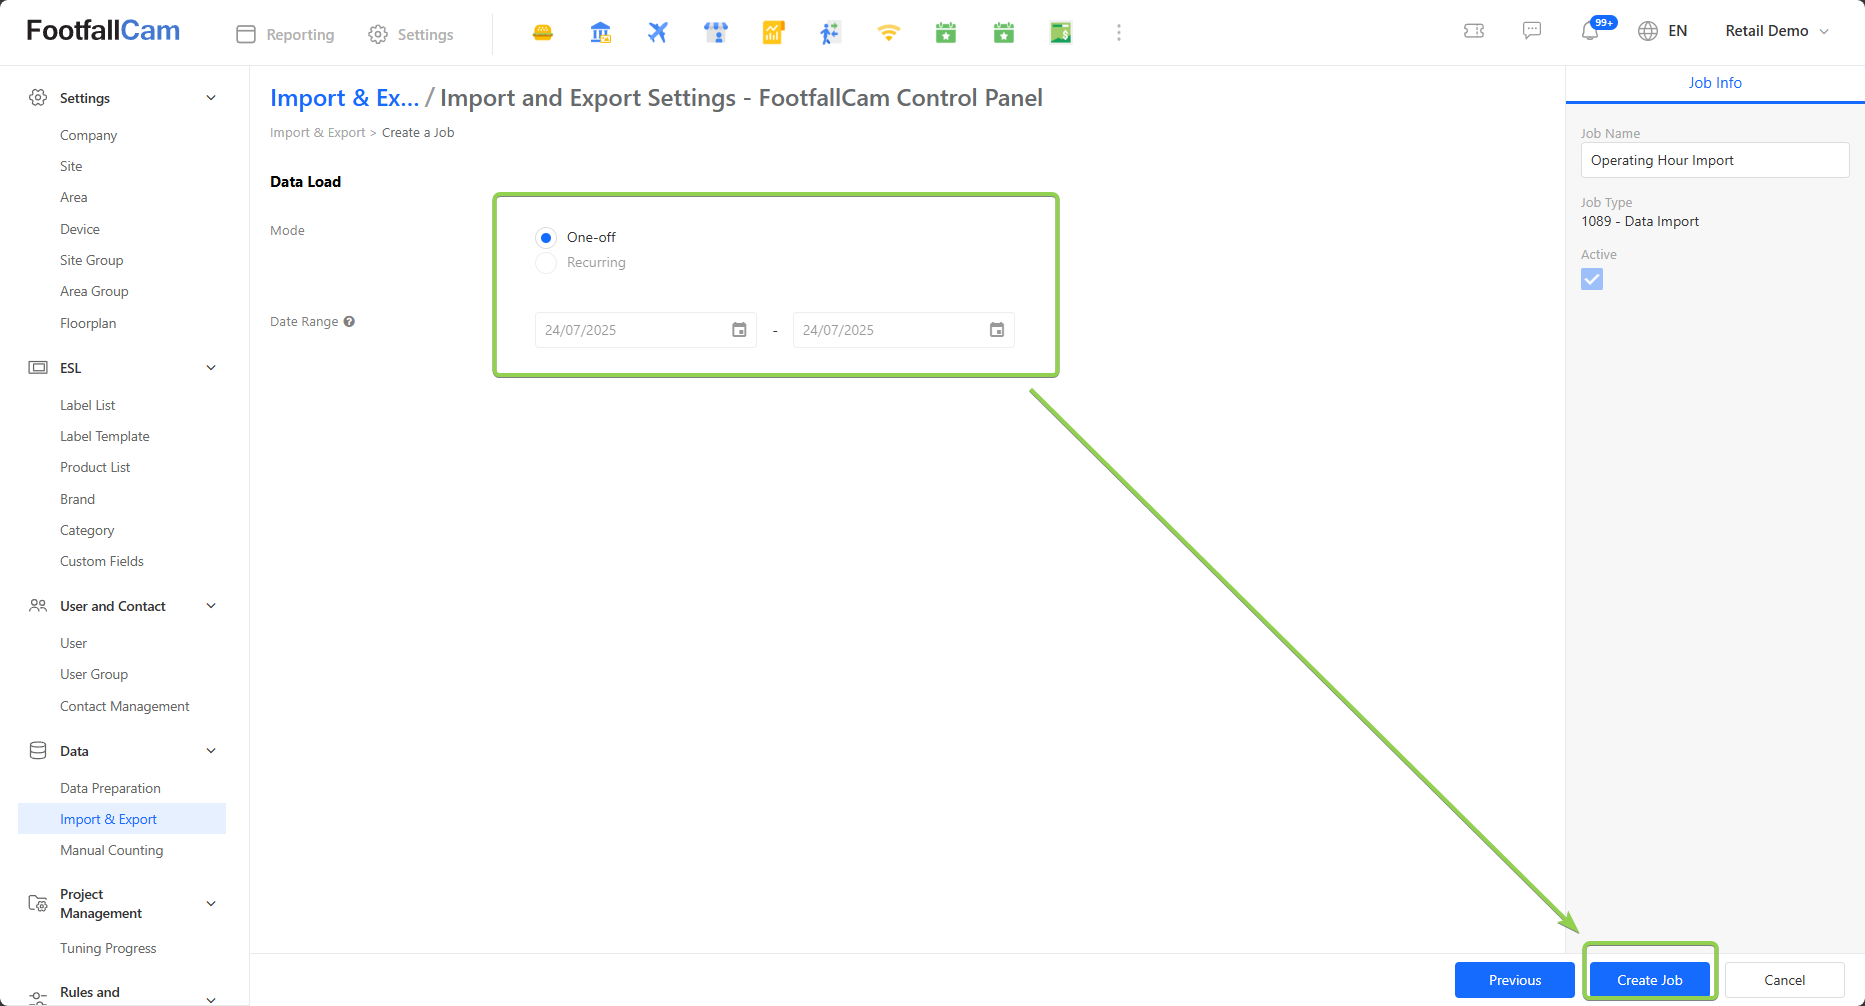
Step 3 - Please select One-off as the Mode and click on the Create Job button.
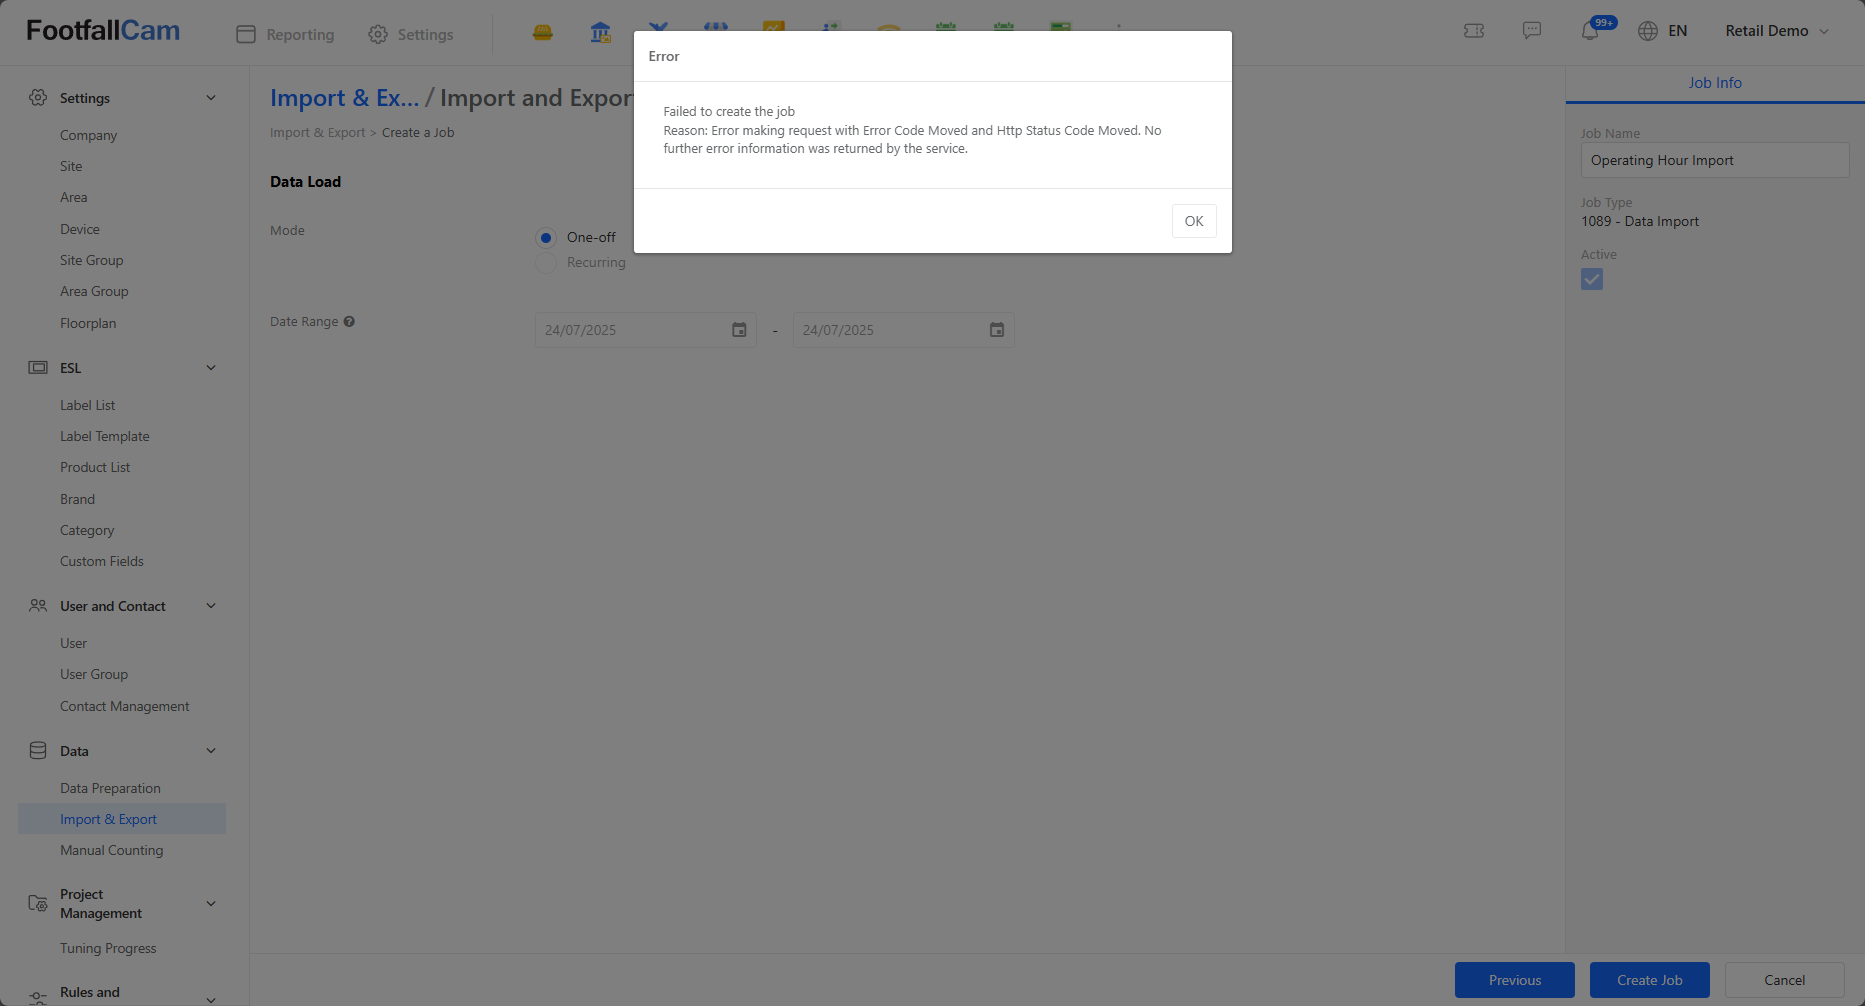
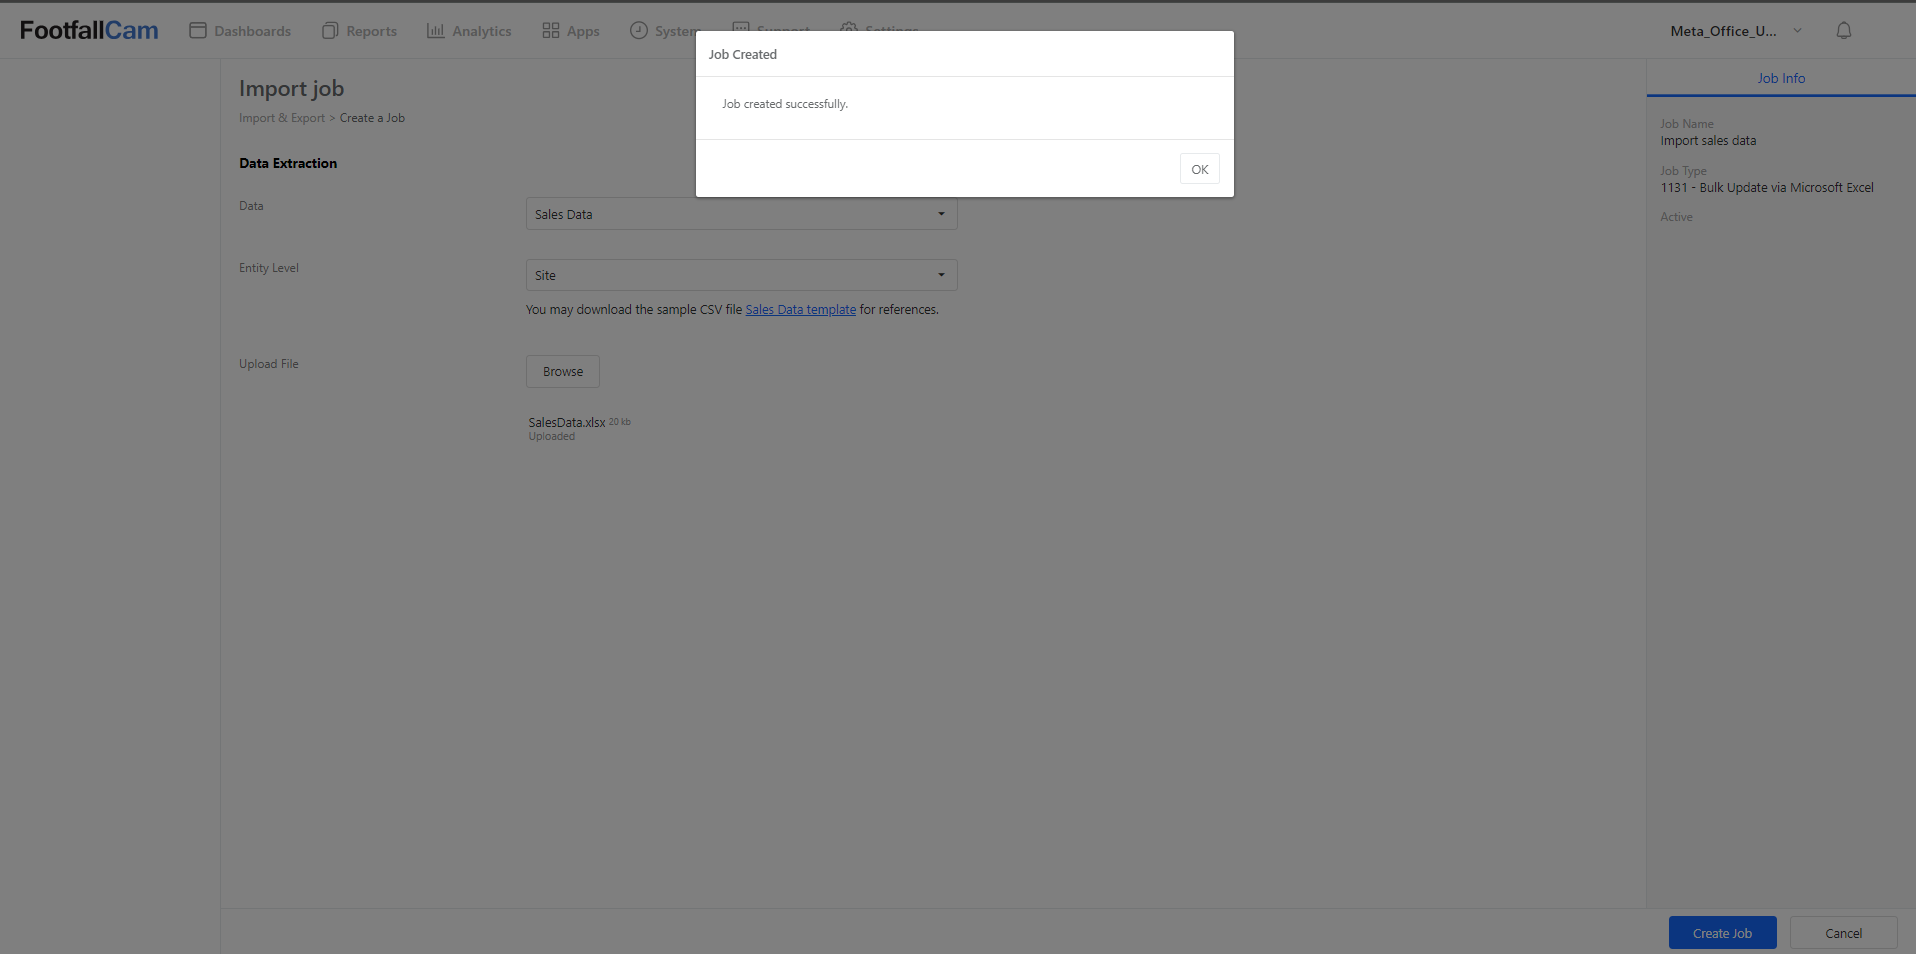
Step 4 - A 'Job Created' message box will pop out once the job has been created.
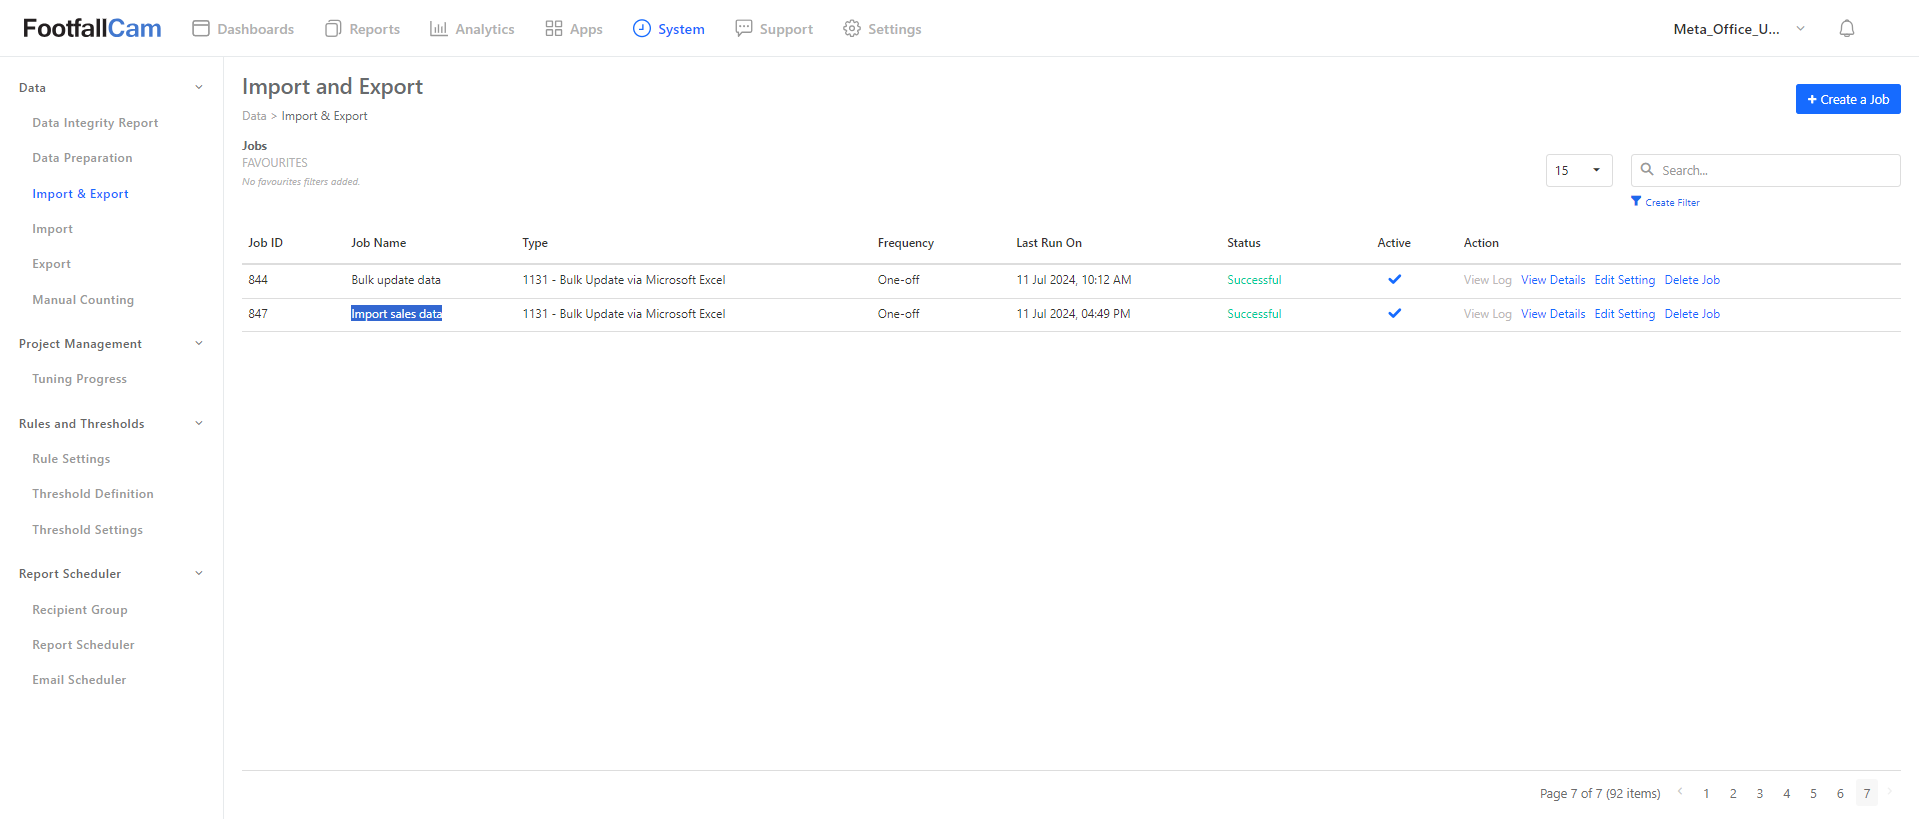
Step 5 - The data from the Excel file will be updated and the created import job details will be shown on the Import and Export page.
3.1.1.2 Sales Data Import via API Endpoint
Step 1 - Please refer here to import sales data via API endpoint.
3.1.2 Automate Sales Data Import
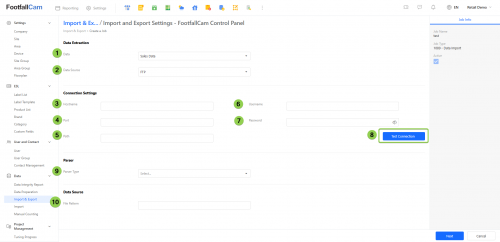
Step 1 - Please refer here to create an import job. After select the JobType of "1089 - Data Import", click on the Create button and it will be navigated to the page below.
| Fields | Description |
| 1. Data | Please select Sales data. |
| 2. Data Source | Select your expected data source (SFTP or FTP). |
| 3. Hostname | Set up the host for the SFTP/FTP server. |
| 4. Port | Enter the port number. |
| 5. Path | The path is where the sales data in the CSV format is stored. |
| 6. Username | The username required to access the SFTP/FTP server. |
| 7. Password | The password required to access the SFTP/FTP server. |
| 8. Test Connection | After entering all connection settings, click this button to test the connection (if necessary). |
| 9. Parser Type | Select the parser type to import sales data: Default (Site Sales Data), Area Sales Data, or V8 Sales Data. (refer 3.1.2.1, 3.1.2.2 and 3.1.2.3) |
| 10. File Pattern | This is to get the file pattern (filename) for the output file. (Note: Uploaded files must have unique names, which can be achieved by adding suffixes such as the current date. E.g., sales_data_20250314, sales_data_20250315) |
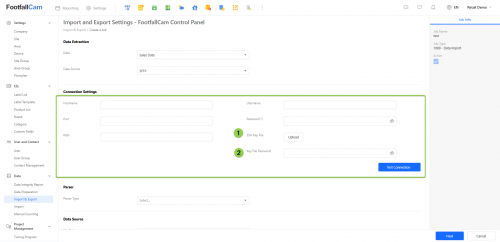
Note: The image above shows FTP, when SFTP is selected it will add two additional columns of fields, SSH Key File and Key File Password.
Step 2 - Click on the Next button at the bottom, it will test the connection before go to the next page.
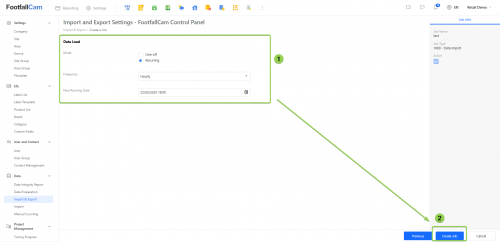
Step 3 - Now, please set up the frequency for the job to run. Select Recurring, Frequency, and Next Running Date. After that, click 'Create Job' and the job will be created successfully and import the sales data automatically based on the frequency and interval selected.
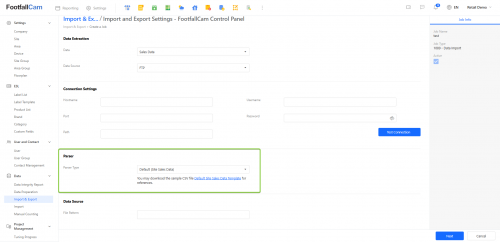
3.1.2.1 Parser Type: Default (Site Sales Data) - Automate the import of site sales data
Step 1 - To import Site Sales Data, select 'Default (Site Sales Data)' for the parser type.
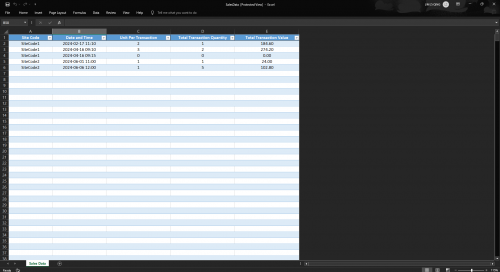
Below is the sample file template for Site Sales Data. Ensure the imported file matches the provided Site Sales Data template format exactly.
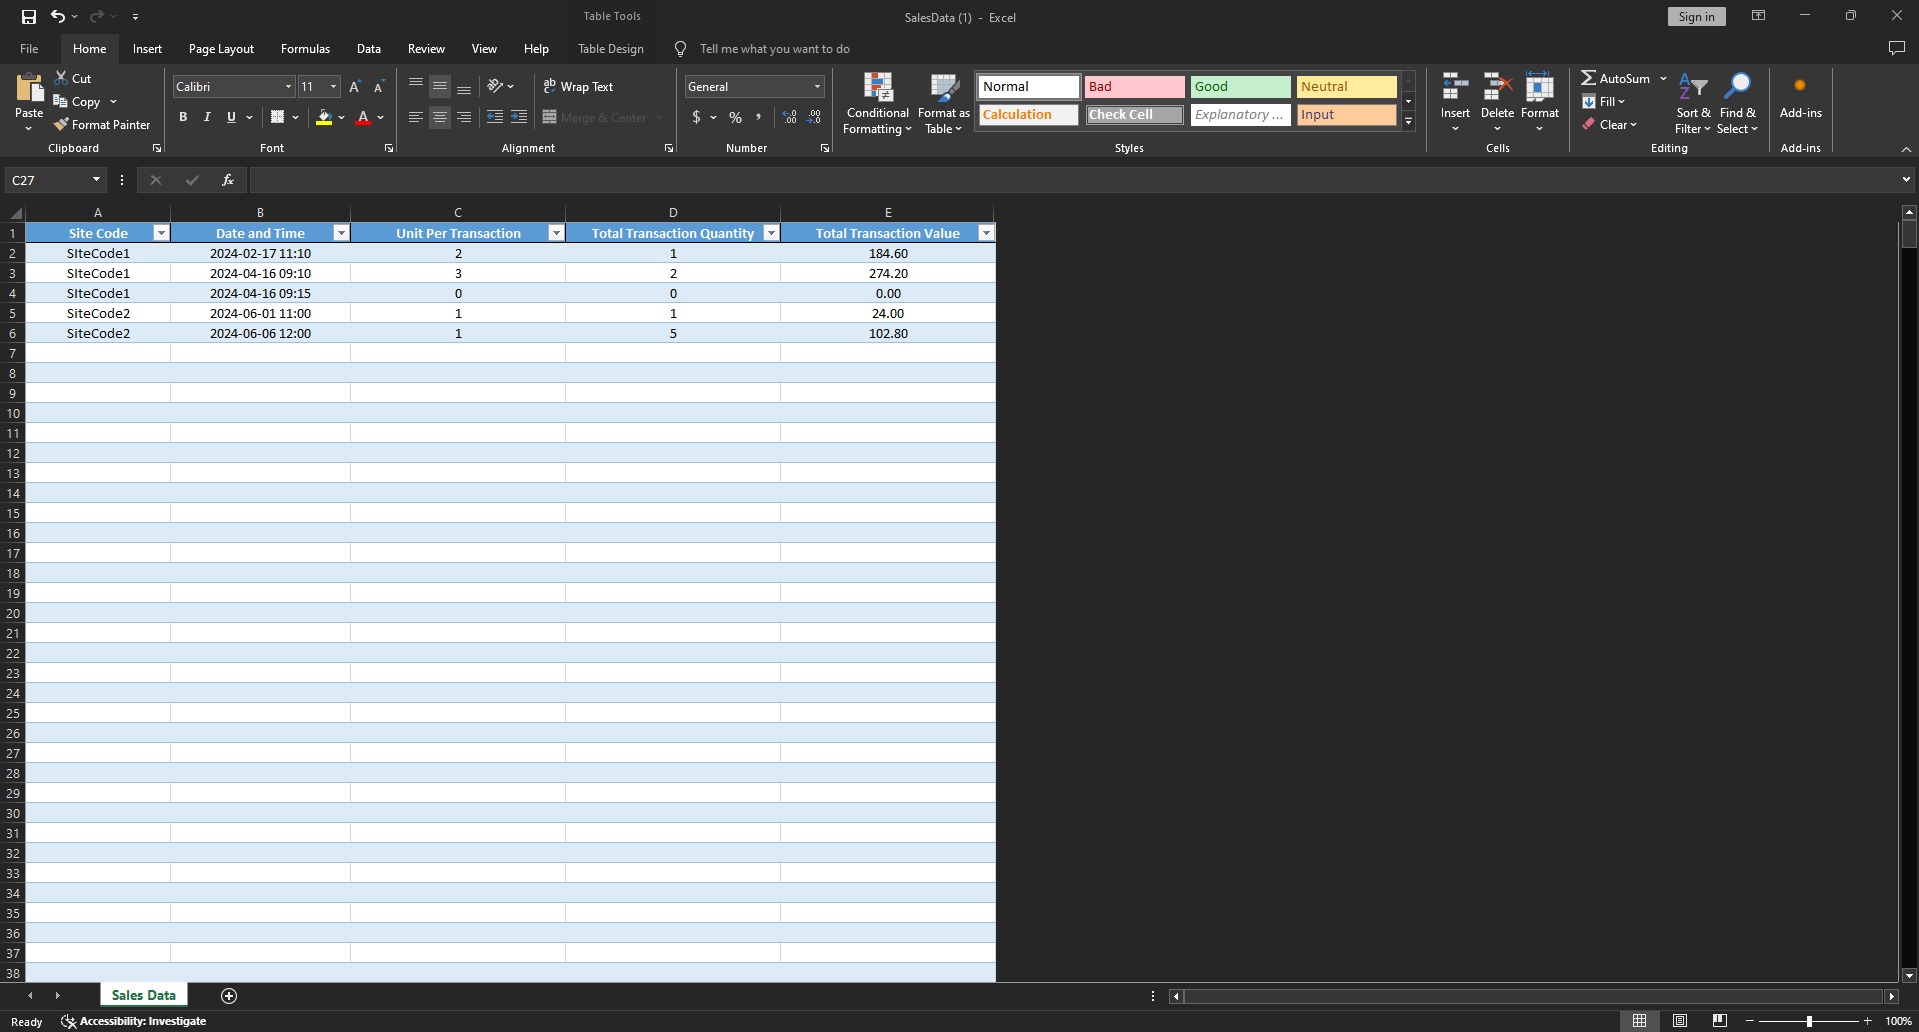
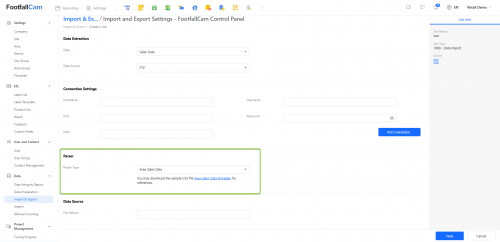
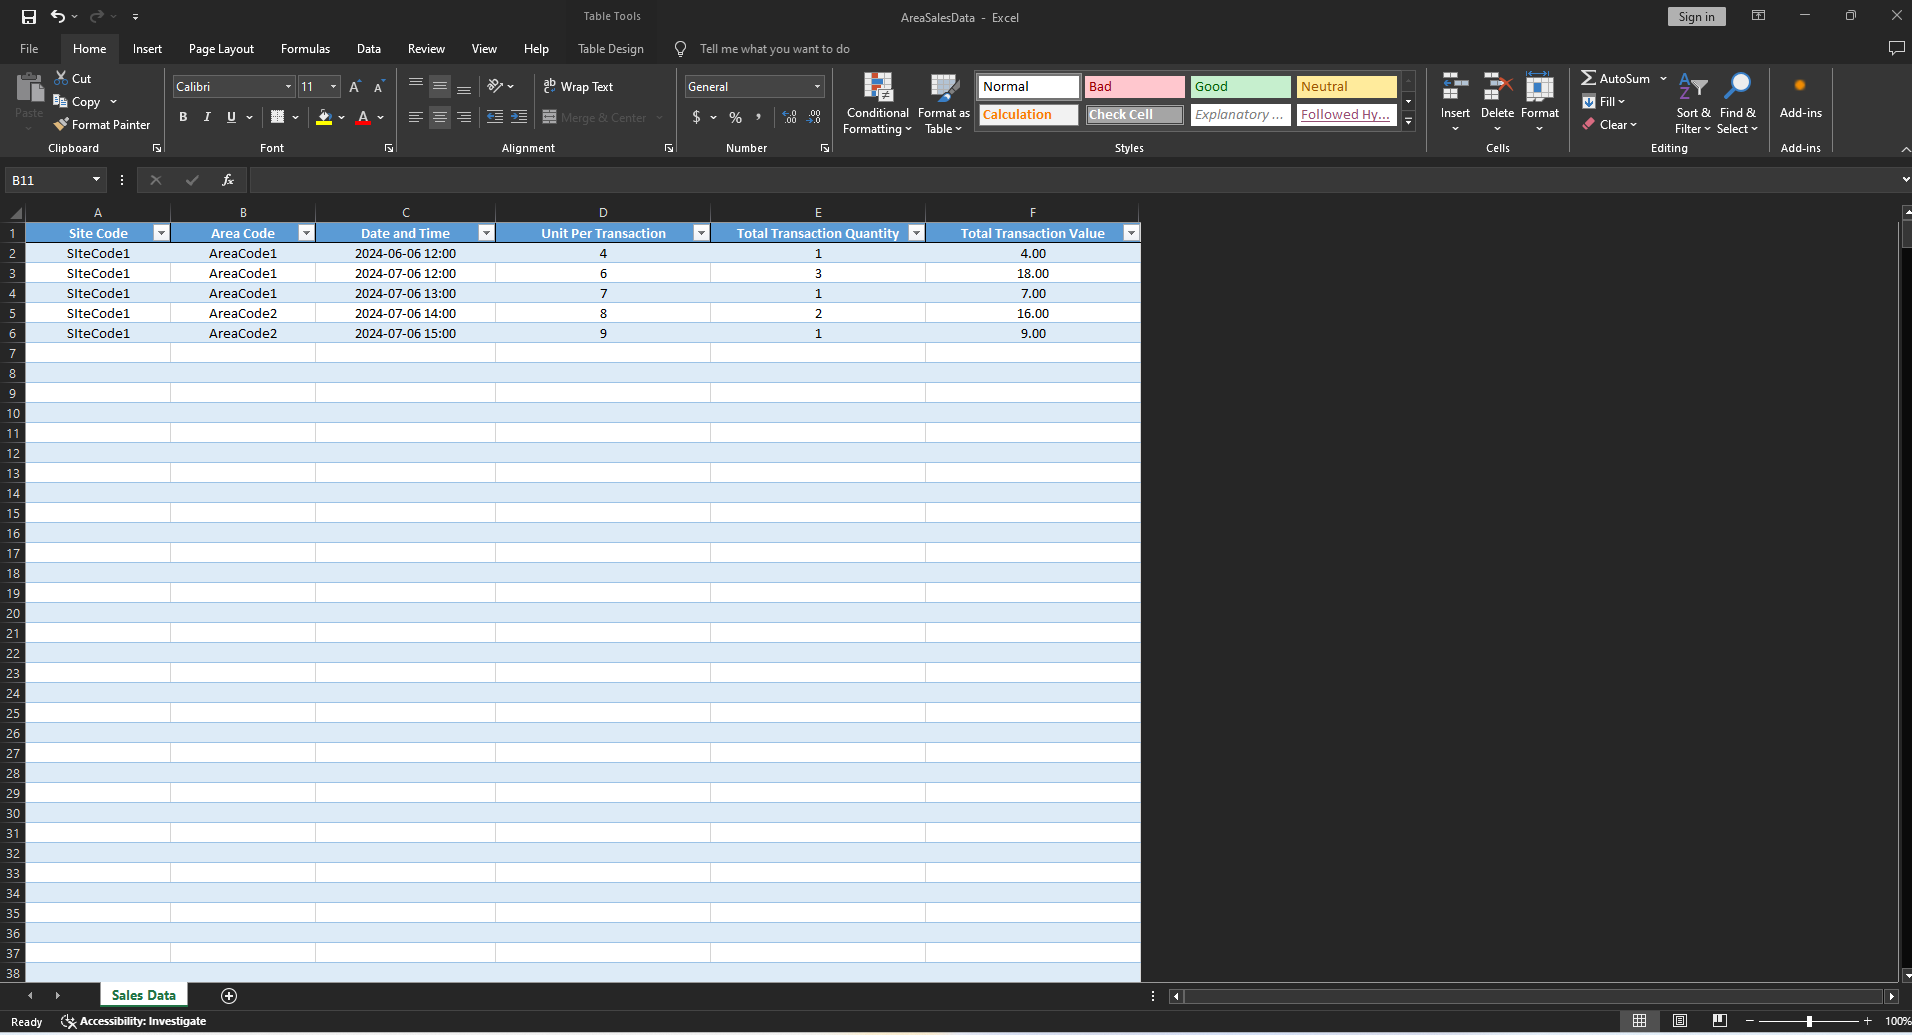
3.1.2.2 Parser Type: Area Sales Data - Automate the import of area sales data
Step 1 - To import Area Sales Data, select 'Area Sales Data' for the parser type.
Below is the sample file template for Area Sales Data. Ensure the imported file matches the provided Area Sales Data template format exactly.
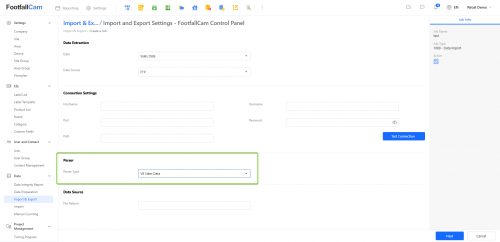
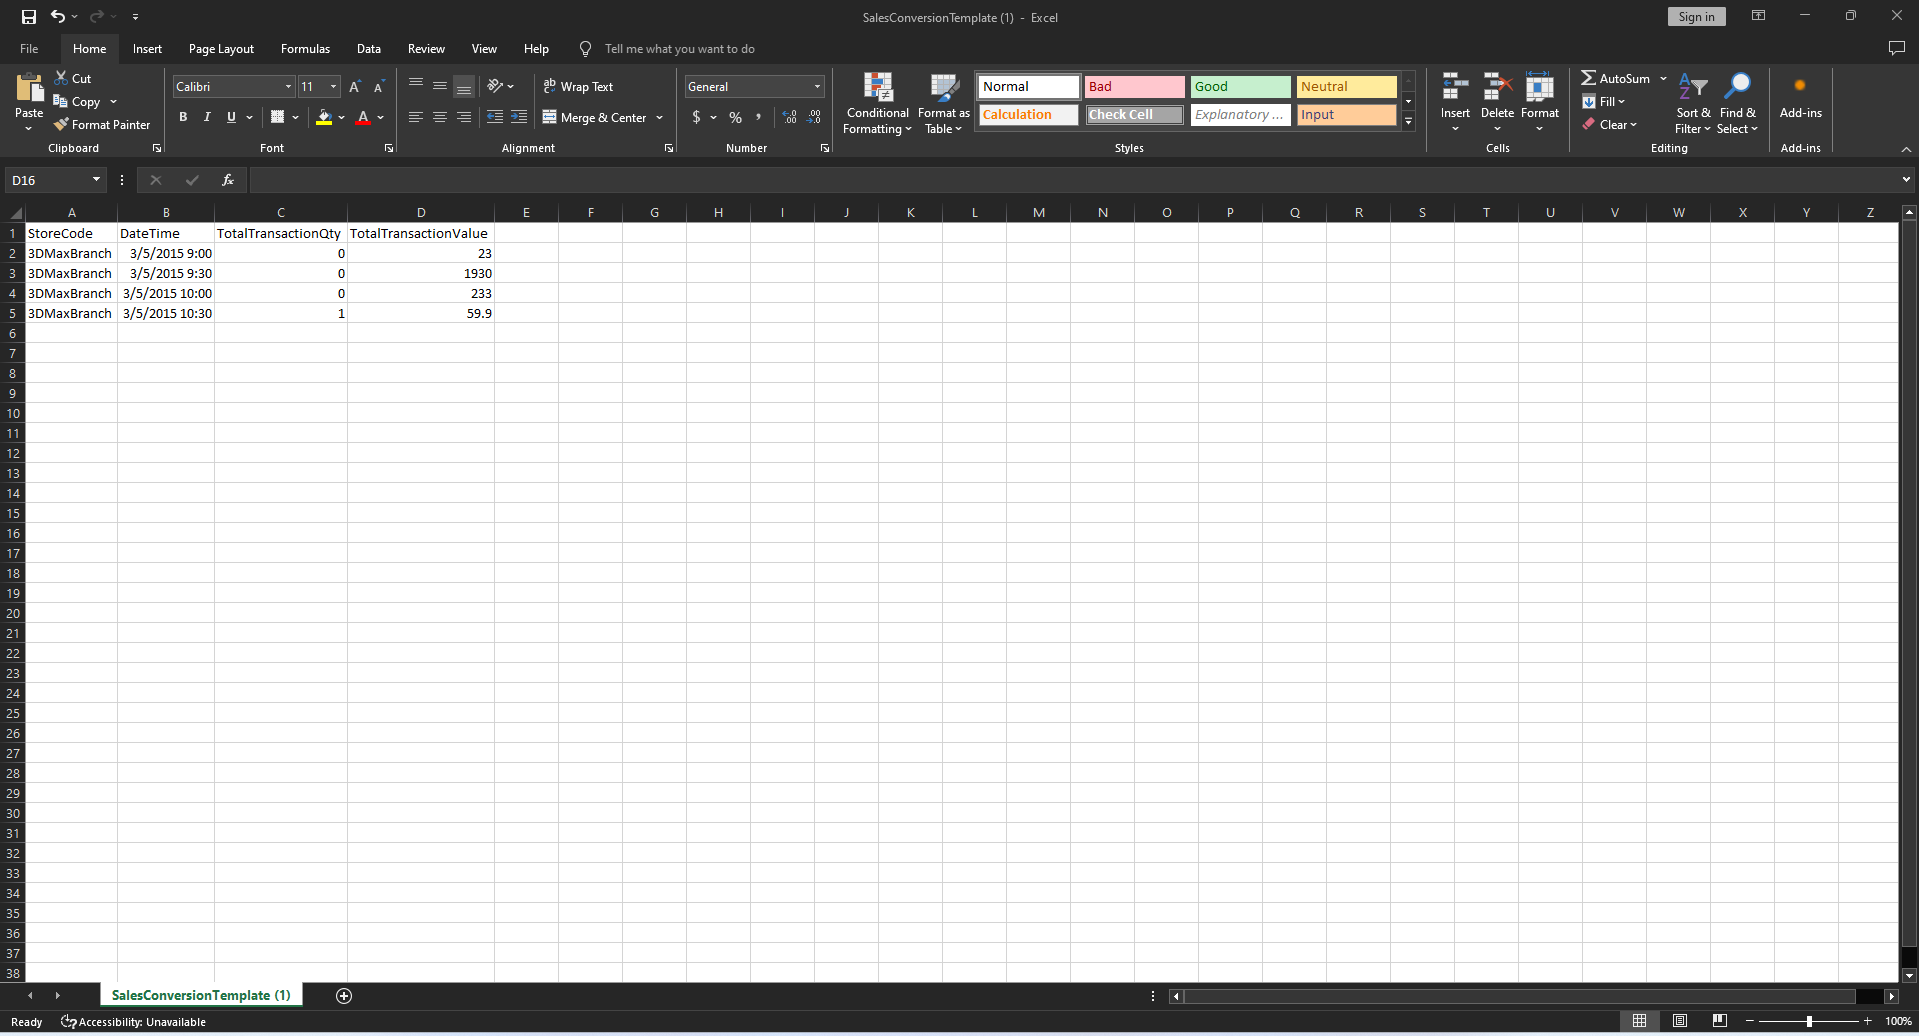
3.1.2.3 Parser Type: V8 Sales Data - Automate the import of V8 Site sales data
Step 1 - To import V8 Site Sales Data, select 'V8 Sales Data' for the parser type.
Below is the sample file template for V8 Site Sales Data. Ensure the imported file matches the provided V8 Site Sales Data template format exactly.
3.2 Third-Party Device Historical Data
3.2.1 Registering the Third-Party Device as a Virtual Device
Before a third-party device can be accessed in FootfallCam V9™, it must be registered as a Virtual Device.
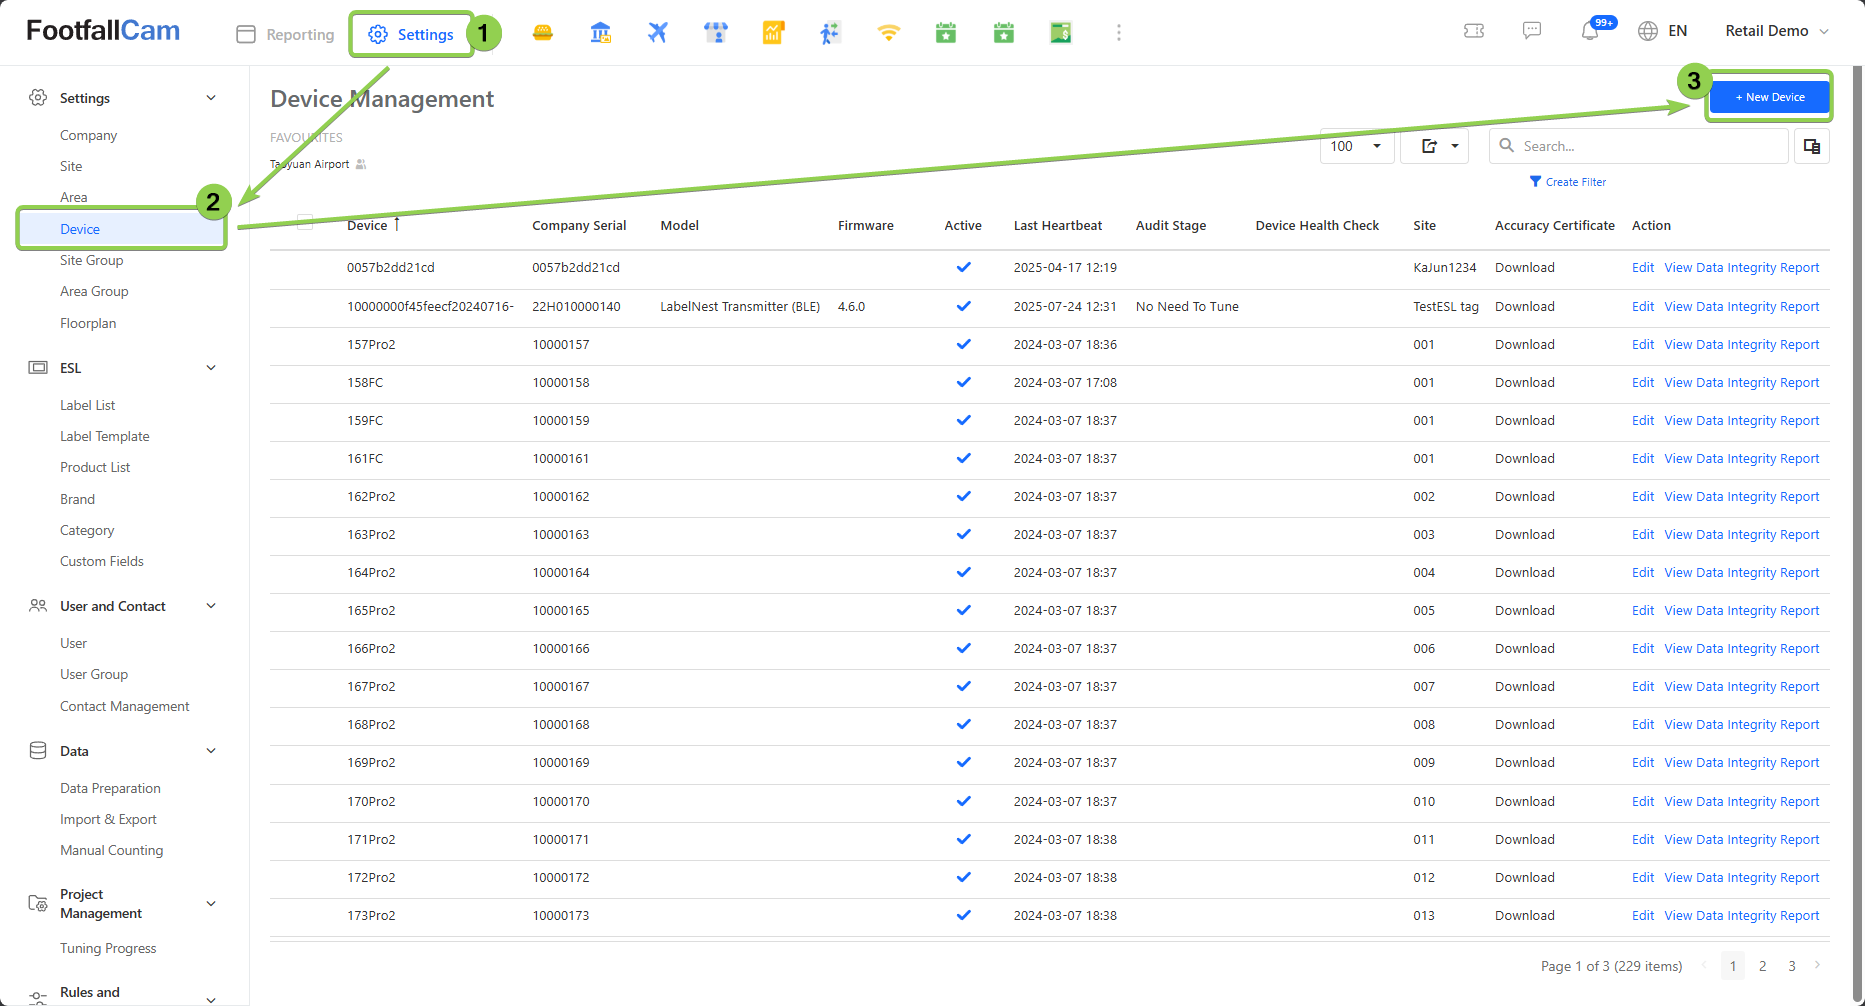
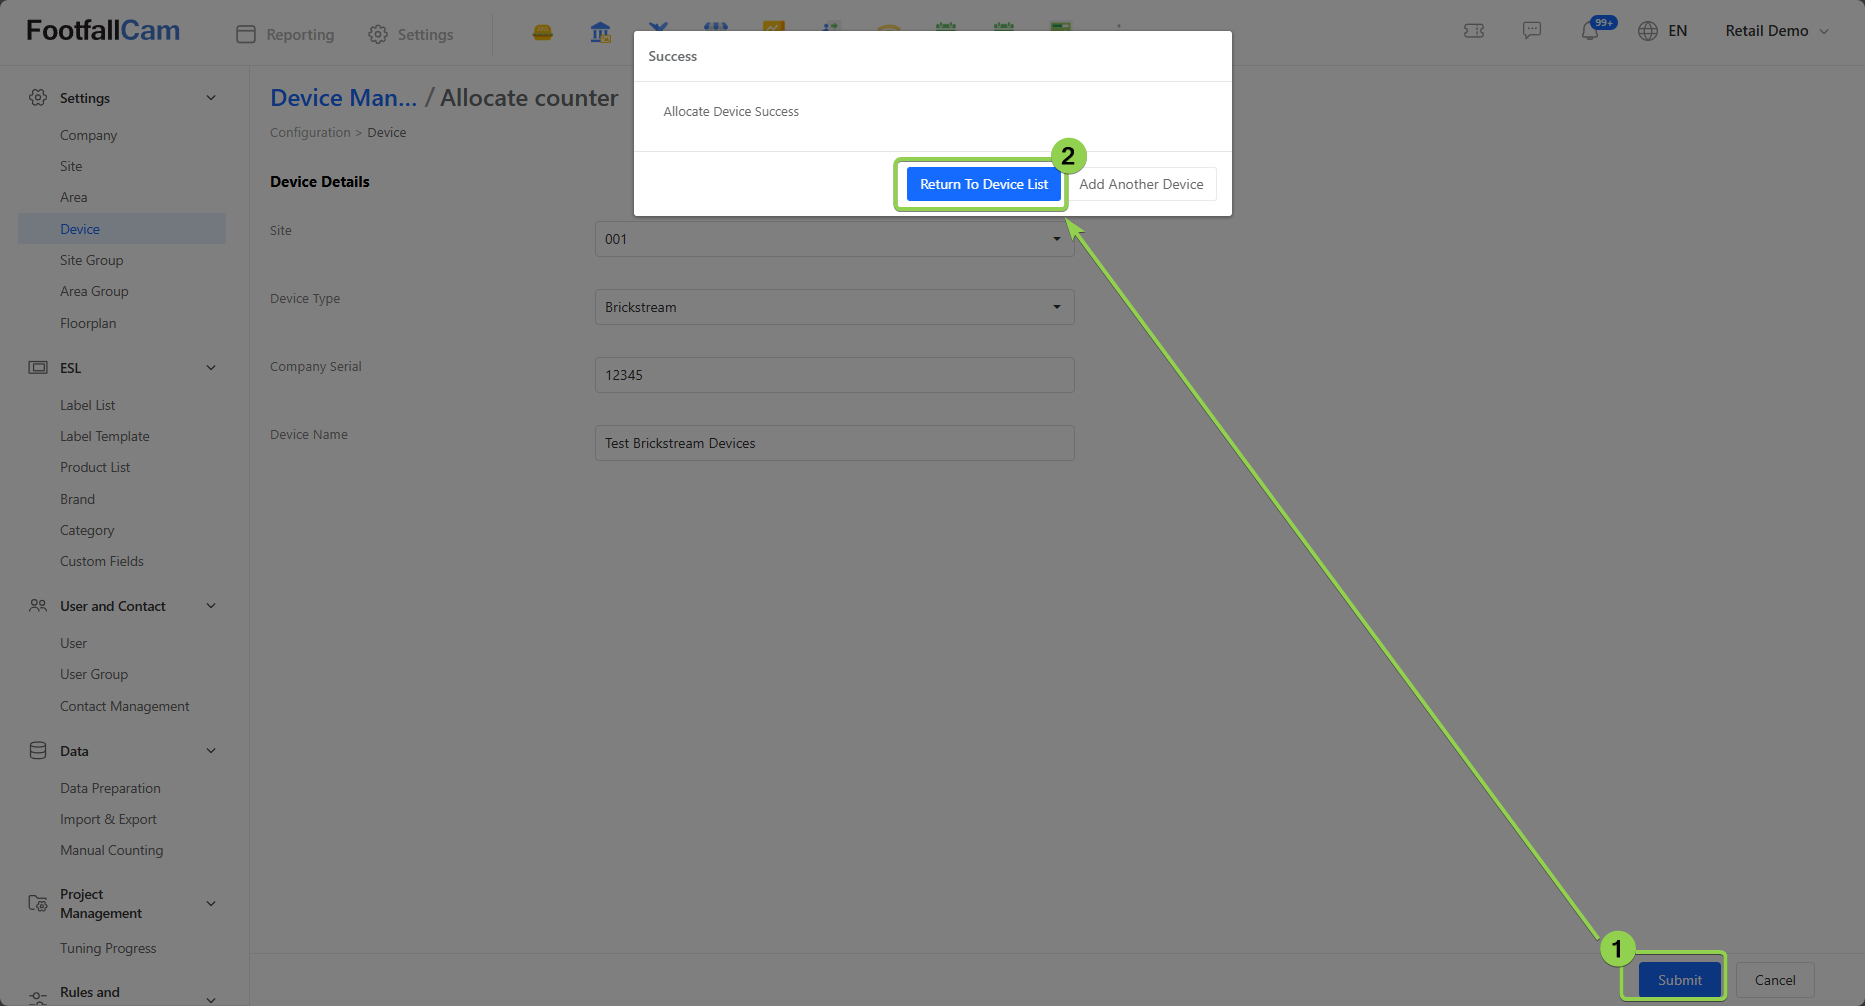
Step 1 - Go to Settings > Device > click "+ New Device".
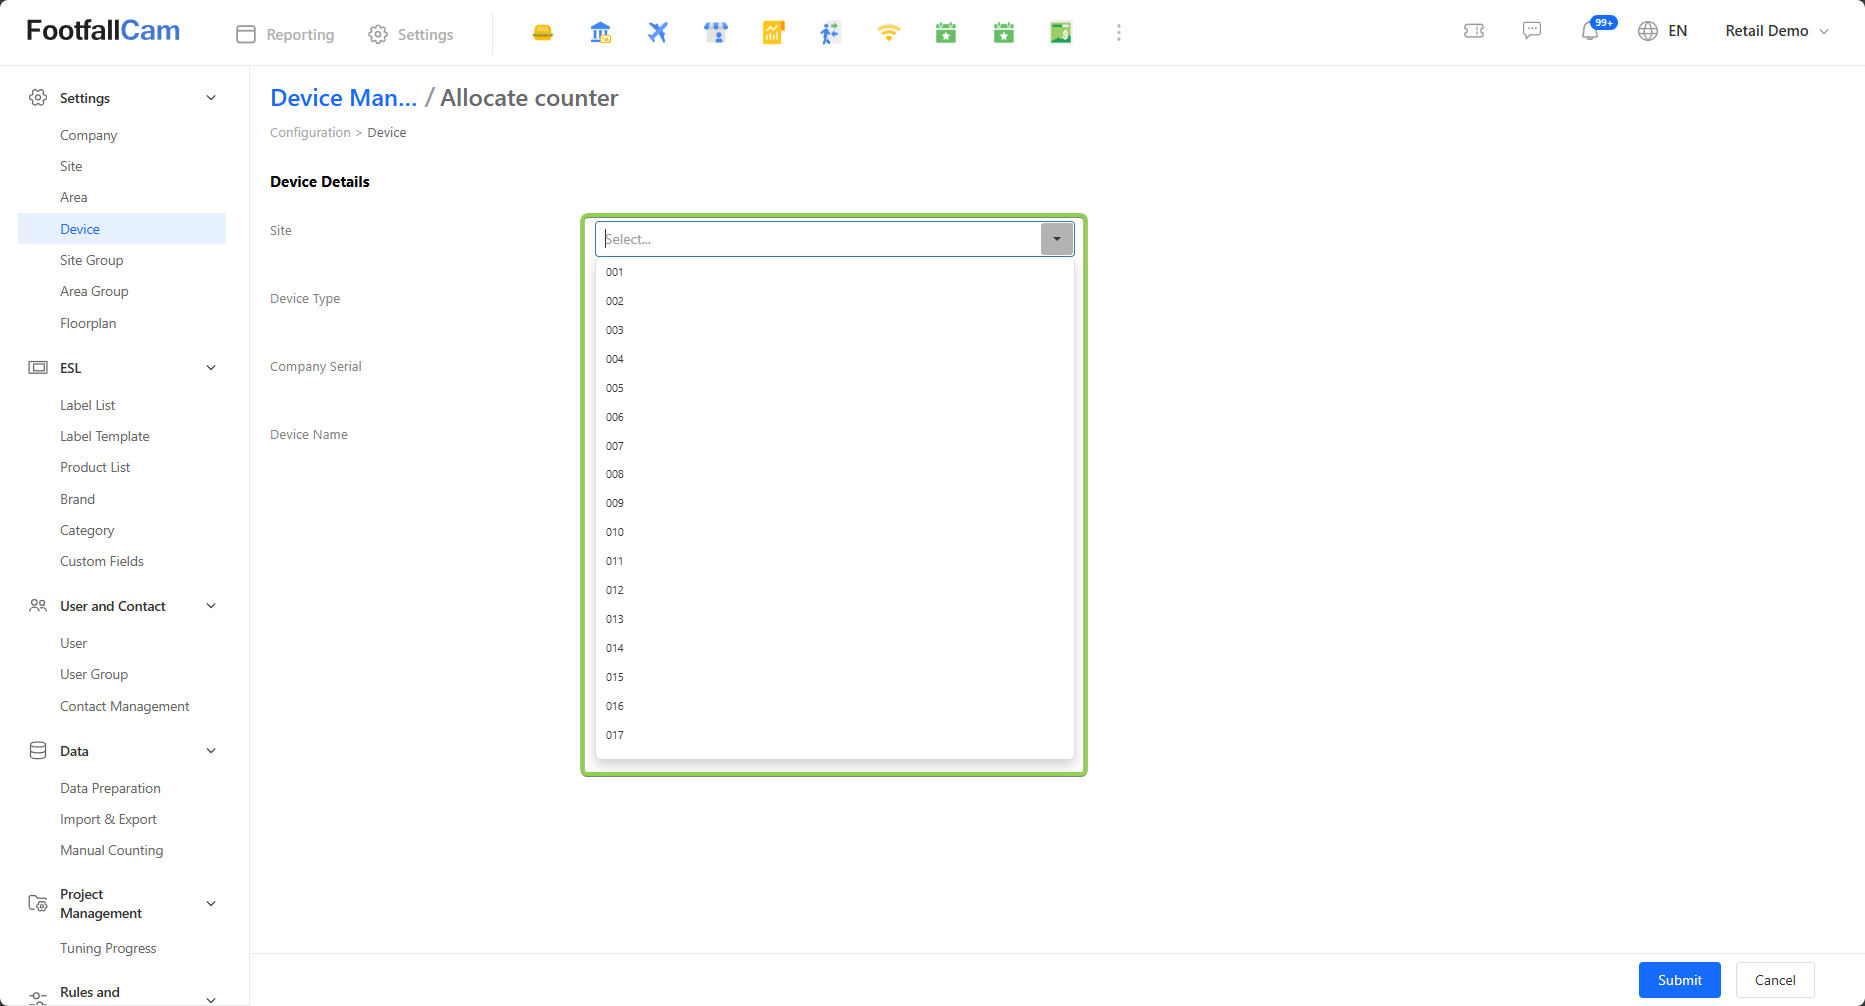
Step 2 - Select the site to which the virtual device is allocated.
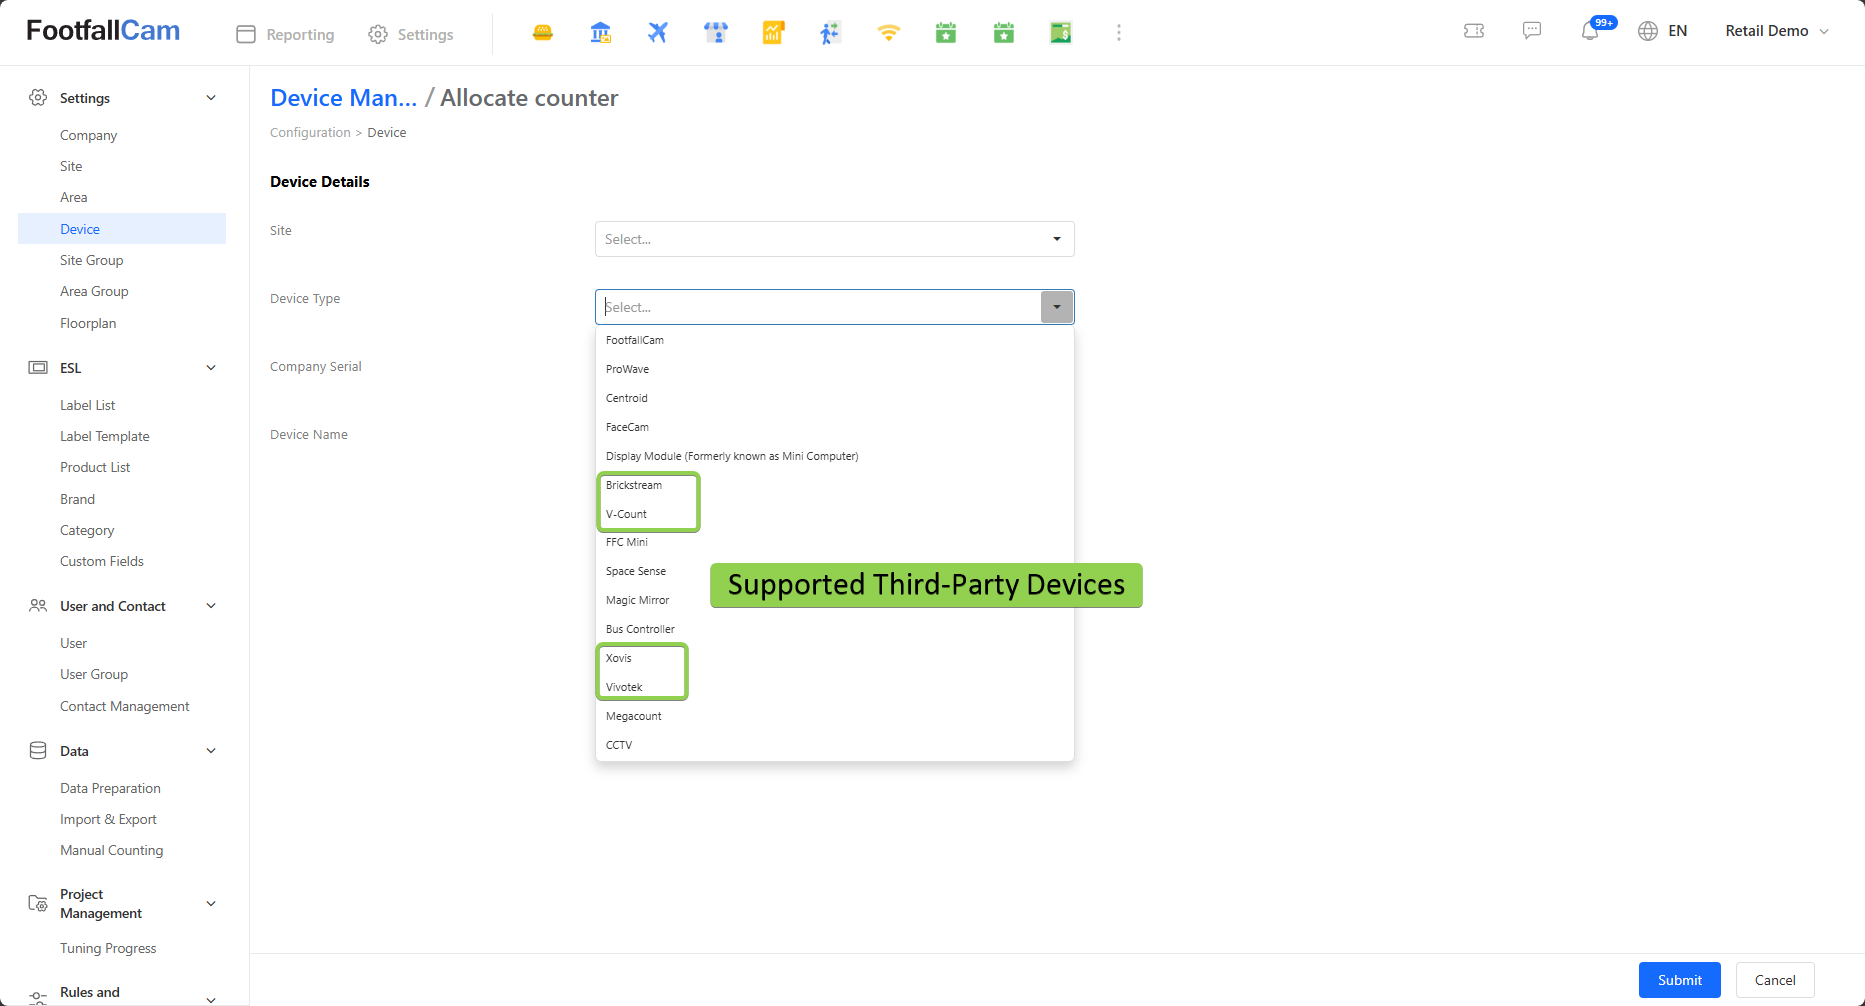
Step 3 - Select the type of virtual device. The third-party devices supported as of 2025 are Brickstream, V-Count, Xovis and Vivotech.
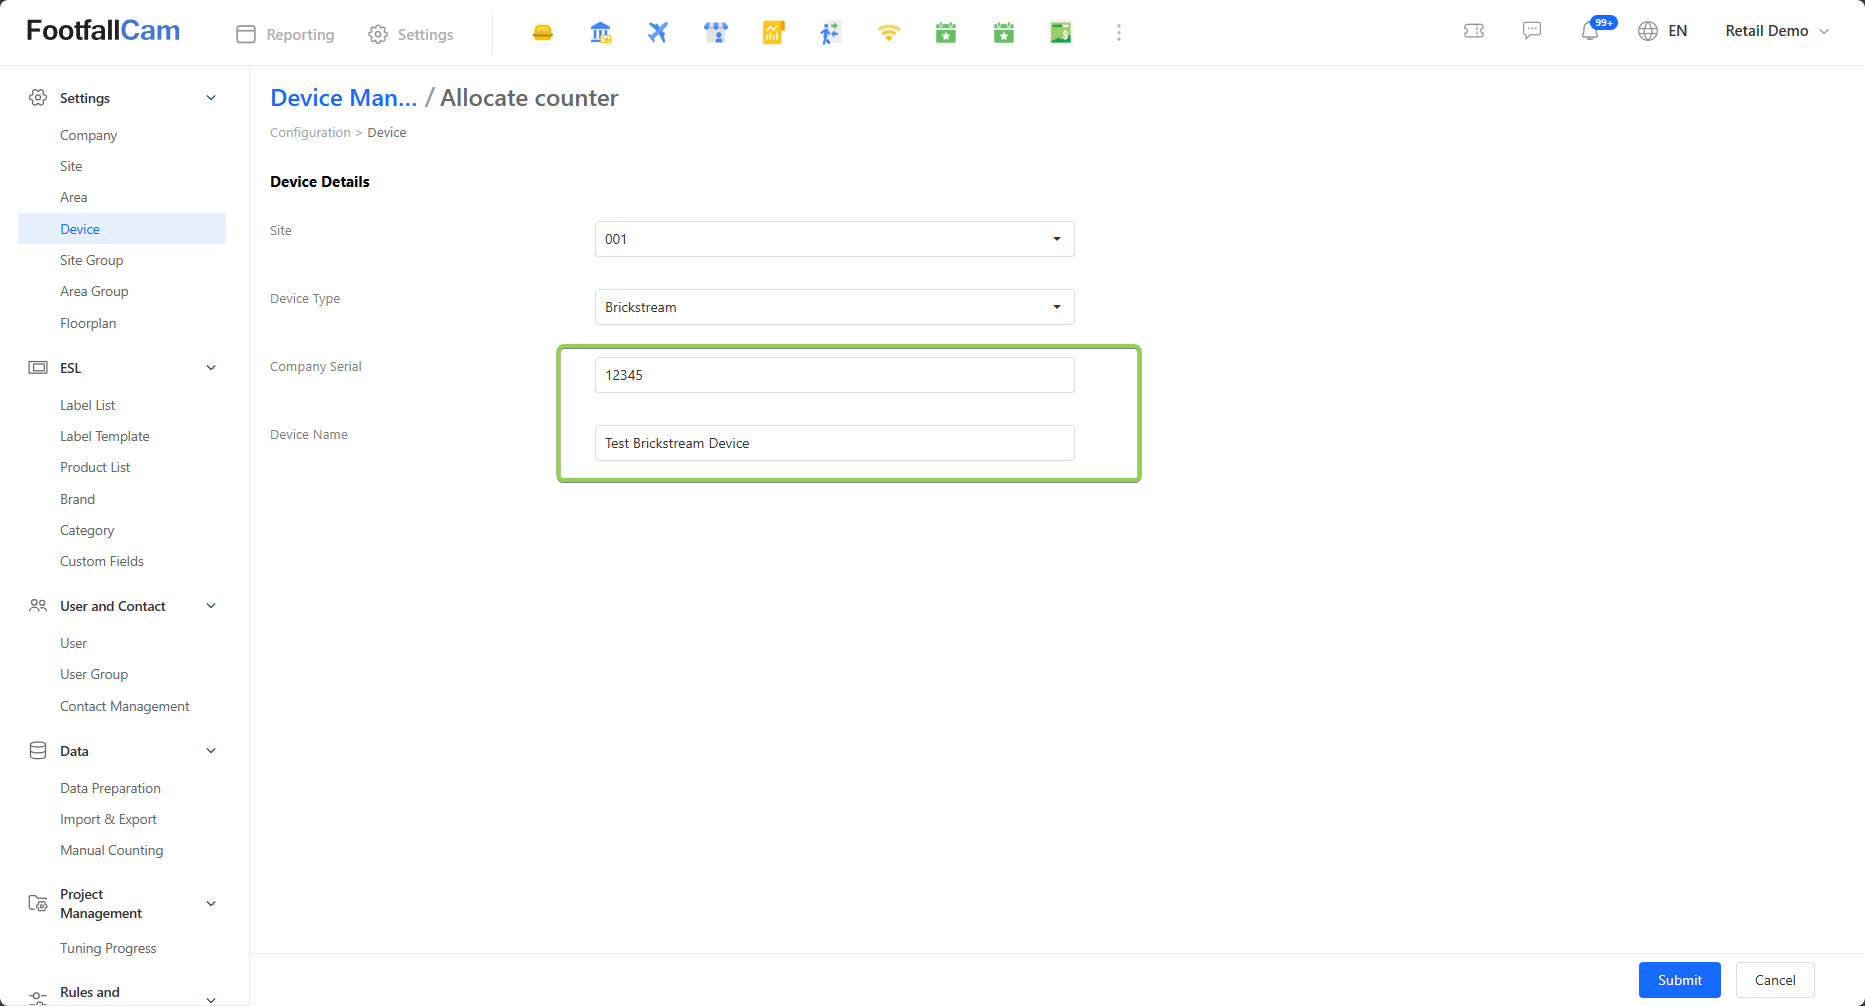
Step 4 - Key in the serial and the name of the virtual device.
Step 5 - Click "Submit" and return to the Device List.
Step 6 - Search for the virtual device in the Device List to confirm its existence.
3.2.1.1 Preparing a Brickstream Device
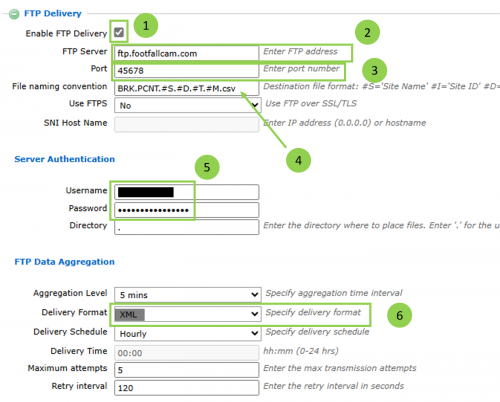
After registering a Brickstream Device as a Virtual Device, it must be configured to upload its counting data to the FootfallCam V9™ server.
Step 1 - Enter the "Configuration Page" of a Brickstream Device.
Step 2 - Navigate to the "FTP Settings" page.
Step 3 - Update the settings as such:
| No. | Field | Action |
| 1 | Enable FTP Delivery | Tick to enable |
| 2 | FTP Server | Update to "ftp.footfallcam.com" |
| 3 | Port | Update to "45678" |
| 4 | File naming convention | Update the format to ".csv" |
| 5 | Username and Password | Use the credentials provided by FootfallCam |
| 6 | Delivery Format | Update to "Pipe Delimited" |
3.2.2 One-off Counting Data Import
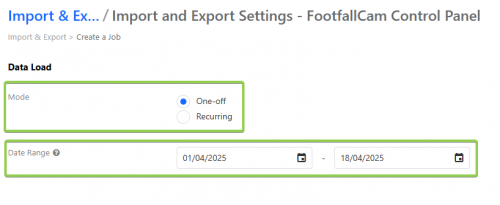
All steps remain consistent with those outlined in section 3.2.2, 'Automate the Import of Counting Data,' with the exception of the final step, Step 12, which differs. Initially, the user must select the one-off option and then specify the desired date range before proceeding with the remaining steps.
3.2.3 Automate Counting Data Import
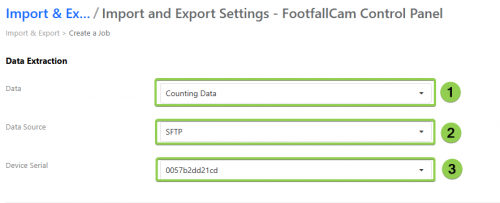
Step 1 - Please refer the step1 to step 3 of Chapter 3.3 Data Import and Export to create a job and select 1089 - Data Import as the Job Type.
Step 2 - After click on the Create button, it will bring you to the Settings Page. Please fill in the necessary details required for the export, and do not leave blank for the mandatory field.
For the Data Extraction Section, both FTP and SFTP are the same:
| Category | Field | Description |
| Data Extraction | 1. Data | The available data that you can export. |
| 2. Data Source | Specifies the import mode. Please select 'SFTP' or 'FTP'. | |
| 3. Device Serial | Select the target device |
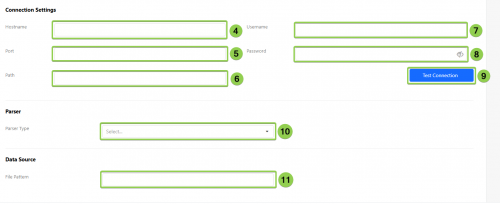
FTP
| Category | Field | Description |
| Data Extraction | 4. Hostname | The hostname of the target. |
| 5. Port | The port to access it | |
| 6. Path | The path to the folder (Can leave blank) | |
| 7. Username | The username to access the data | |
| 8. Password | The password to access the data | |
| 9. Test Connection |
Can test the connection before create the job. A success message will show on the top right side |
|
| Parser | 10. Parser Type | Select the parser type to import counting data: Vivotek, Xovis, VCount, or Brickstream. |
| Data Source | 11. File Pattern | This is to get the file pattern (filename) for the output file. It will go to retrieve the file that contains the filename that the user input. For example, user input "test" in the file pattern, it will able to retrieve file that have name such as "test_1", "1_test", "1_test_1". |
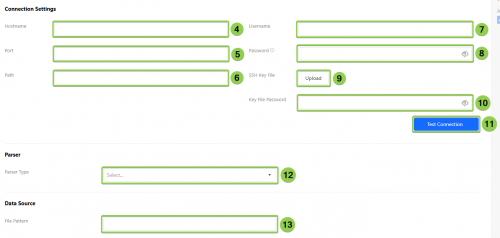
SFTP
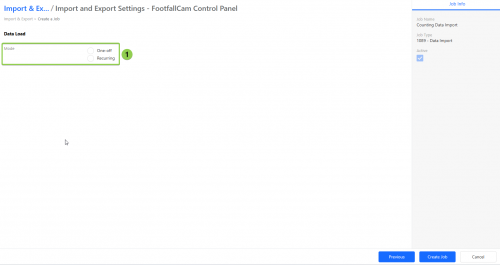
Data Load (One-Off or Recurring)
| Category | Field | Description |
| Data Load | 1. Mode | Specifies if the recursiveness of the data export. Available data load mode: - One-off - Recurring |
| Date Range | For 'One-off' export, specifies the range of the dates for the export data. | |
| Frequency | For 'Recurring' export, specifies the frequency of the data export. Available frequency: - Daily |
|
| Next Running Date | For 'Recurring' export, specifies the next running date time, which need to be at least 1 hour after current time. |
3.3 Marketing Data
Stay tuned! The new feature will be ready soon.
3.4 Site Settings Data
3.4.1 New Sites Creation
Step 1 - Please refer to step 1 to step 3 of Chapter 3.3 Data Import and Export to create a job and select 1089 - Data Import as the Job Type.
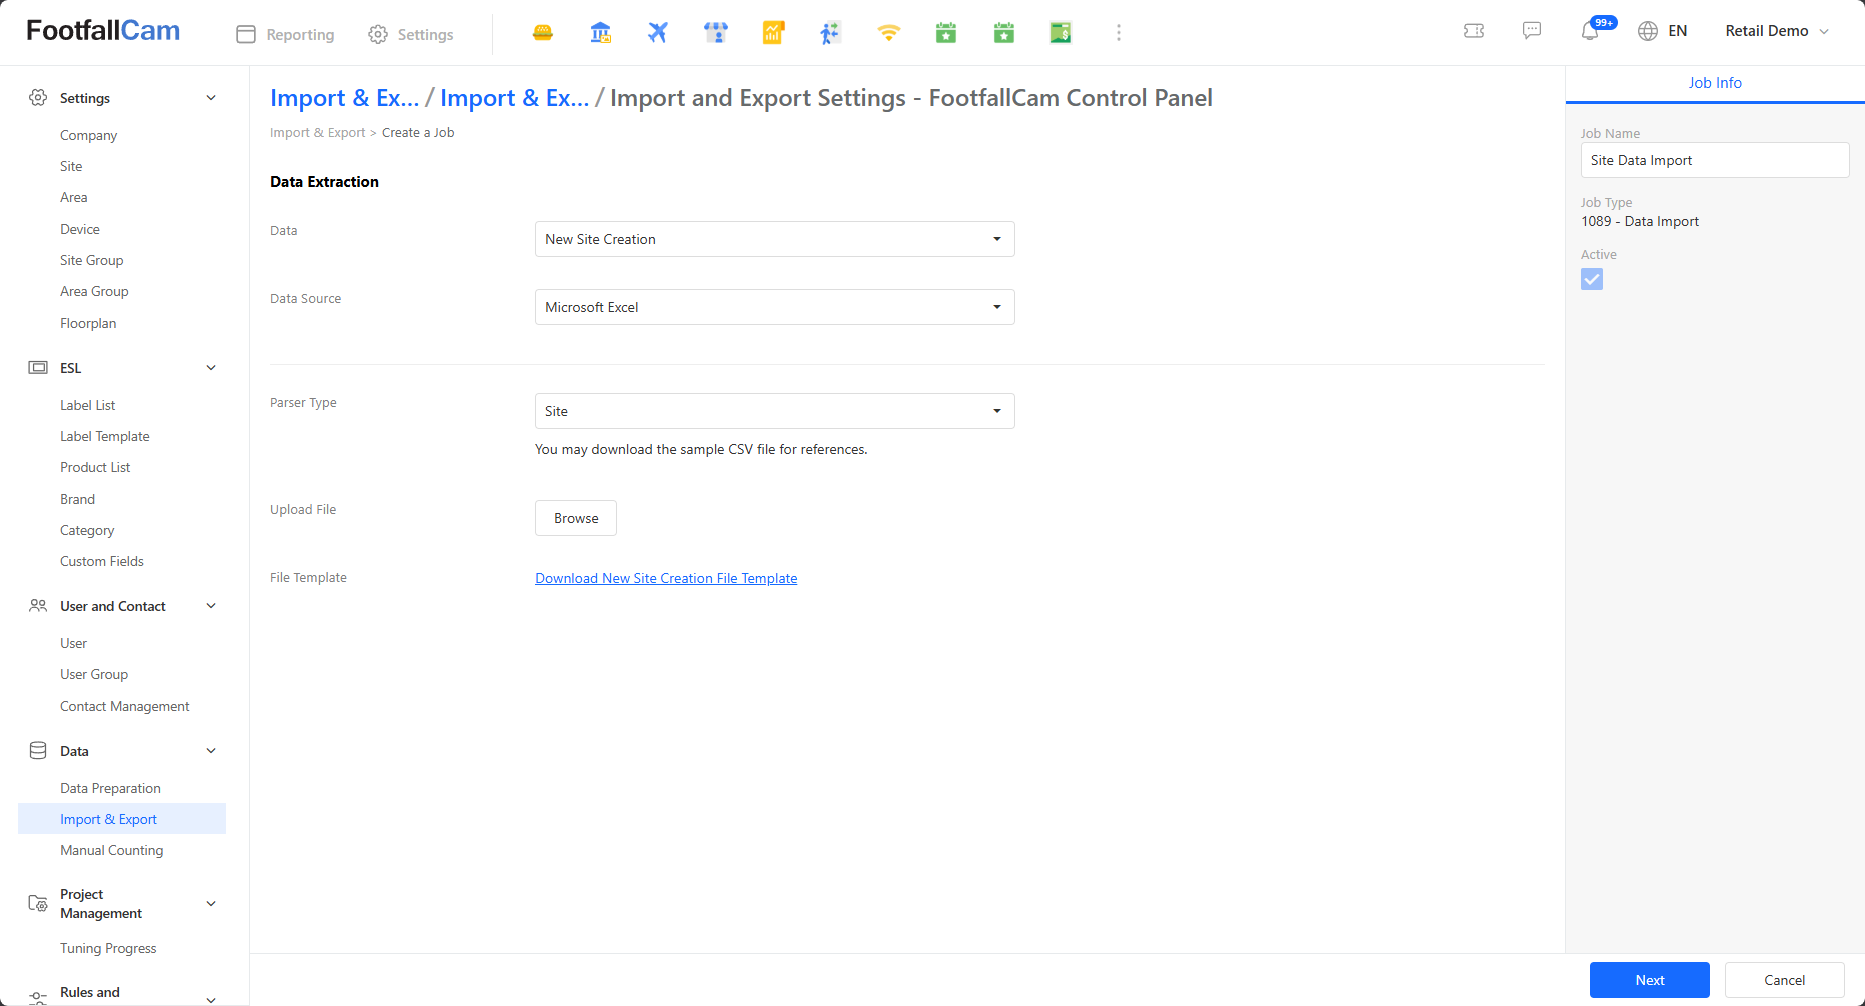
Step 2 - To import New Site Creation Data, select 'New Site Creation' for Data. Then, select 'Microsoft Excel' for the data source and 'Site' for the parser type.
Below are the fields found in the page:
| Field | Description |
| Data | The category of data to be imported to the database. |
| Parser Type | Choose the Parser Type for data import. |
| Upload File | To browse the file to upload for data import. Note that only one file can be uploaded at a time. |
Step 3 - A sample template for New Site Creation data can be downloaded via the hyperlink. After downloading the template, edit the data in the Excel file based on the provided format.
Below shows the available columns found in the template:
| Category | Column | Description |
| Site Info | Site Code | The Site Code of the new Site. |
| Site Name | Name of the new Site. | |
| Country | The country in which the Site is located. Select the country from the drop down list. | |
| Time Zone | The time zone in which the Site will be using. Select the time zone from the drop down list. | |
| Advanced Settings | Download Bandwidth Limit | Sets the download speed limit (kB/s). Set "0" to use default value. |
| Upload Bandwidth Limit | Sets the upload speed limit (kB/s). Set "0" to use default value. | |
| Video Upload Start Time |
Sets the hour of the day in which the device will attempt to upload recording(s) (for accuracy tuning purposes) to the server. The device will perform the upload at the 2nd minute of the hour. For instance, if value is set to "9", then device will start uploading recording(s) at 9.02AM. This column must have a value, otherwise the entire row is considered invalid. |
|
| Video Upload End Time |
Sets the hour of the day in which the device will stop upload recording(s) (for accuracy tuning purposes) to the server. The device will stop the upload at the 2nd minute of the hour. For instance, if value is set to "18", then device will stop uploading recording(s) at 6.02PM. This column must have a value, otherwise the entire row is considered invalid. |
|
| Minimum Visit Duration |
Sets the minimum visit duration (in minutes). Set value to "0" to set no limit for this property. This column must have a value, otherwise the entire row is considered invalid. |
|
| Maximum Visit Duration |
Sets the maximum visit duration (in minutes). Set value to "0" to set no limit for this property. This column must have a value, otherwise the entire row is considered invalid. |
|
| Latitude |
Specifies the latitude of the site. For default value, set it to "0". This column must have a value, otherwise the entire row is considered invalid. |
|
| Longitude |
Specifies the longitude of the site. For default value, set it to "0". This column must have a value, otherwise the entire row is considered invalid. |
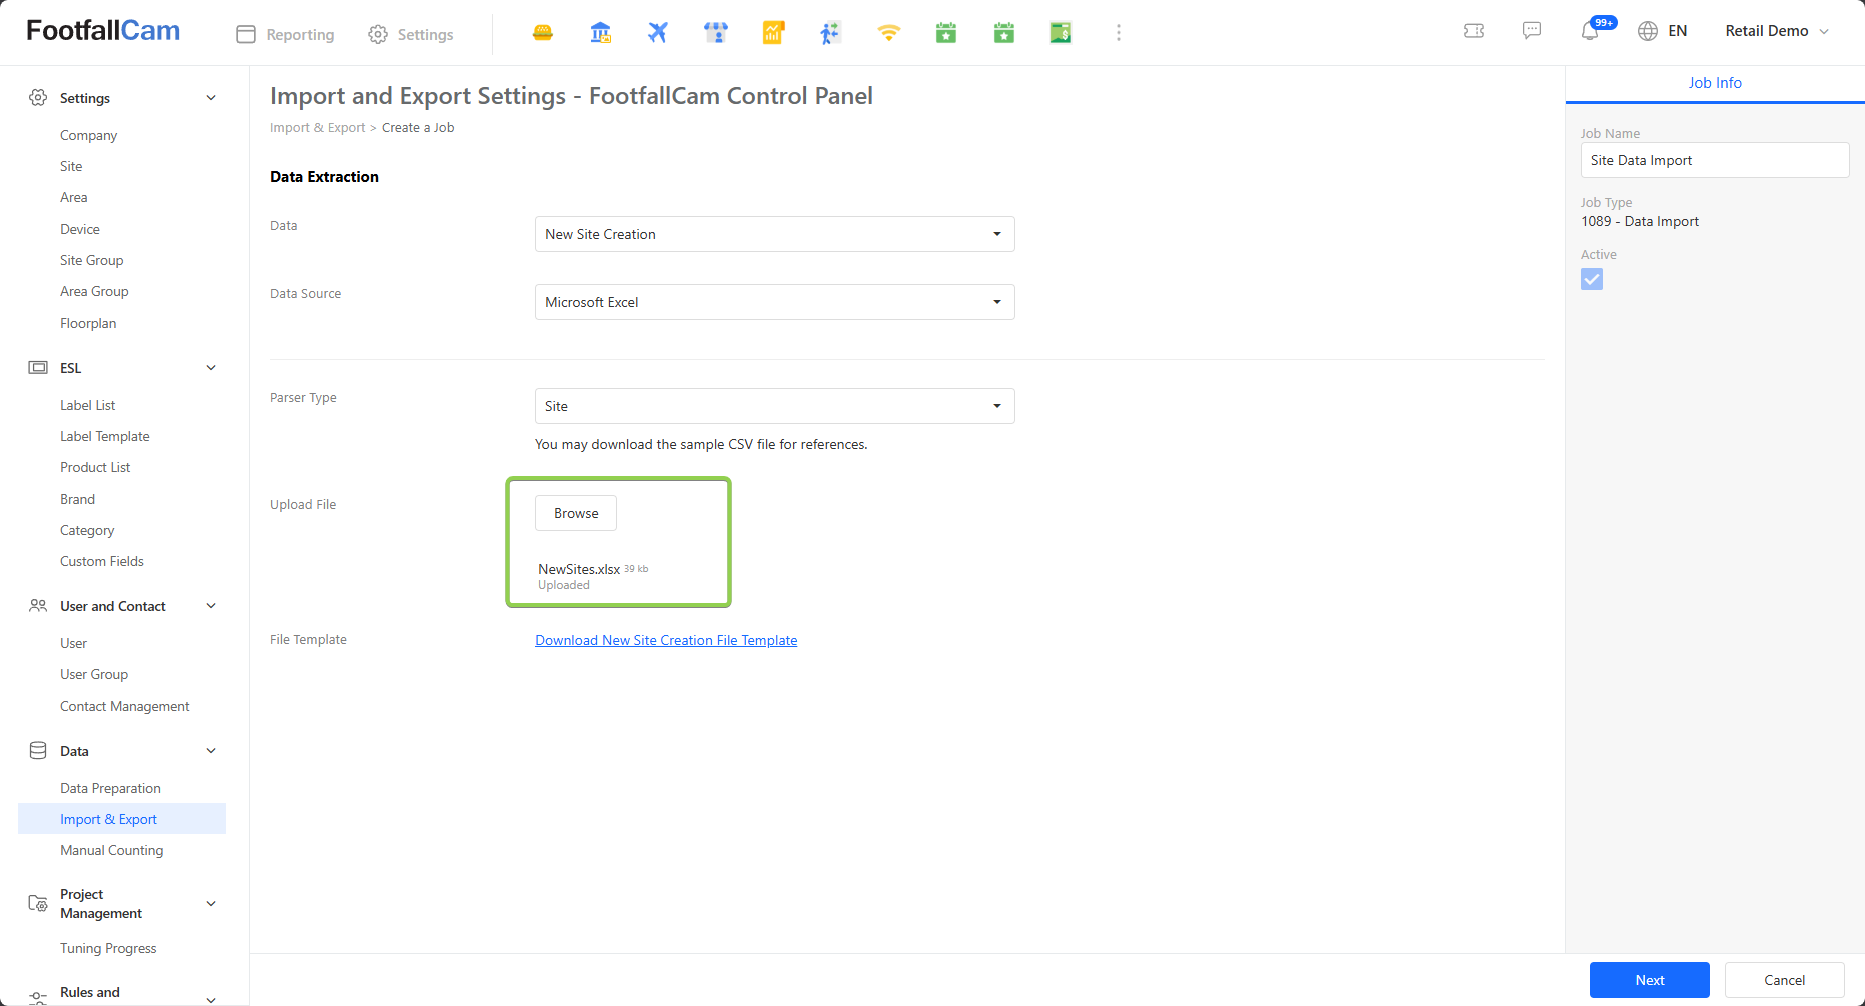
Step 4 - Upload the New Site Creation Excel file by clicking on 'Browse' and selecting your Excel file. If the file upload is successful, there will be an indicator stating that the file is uploaded.
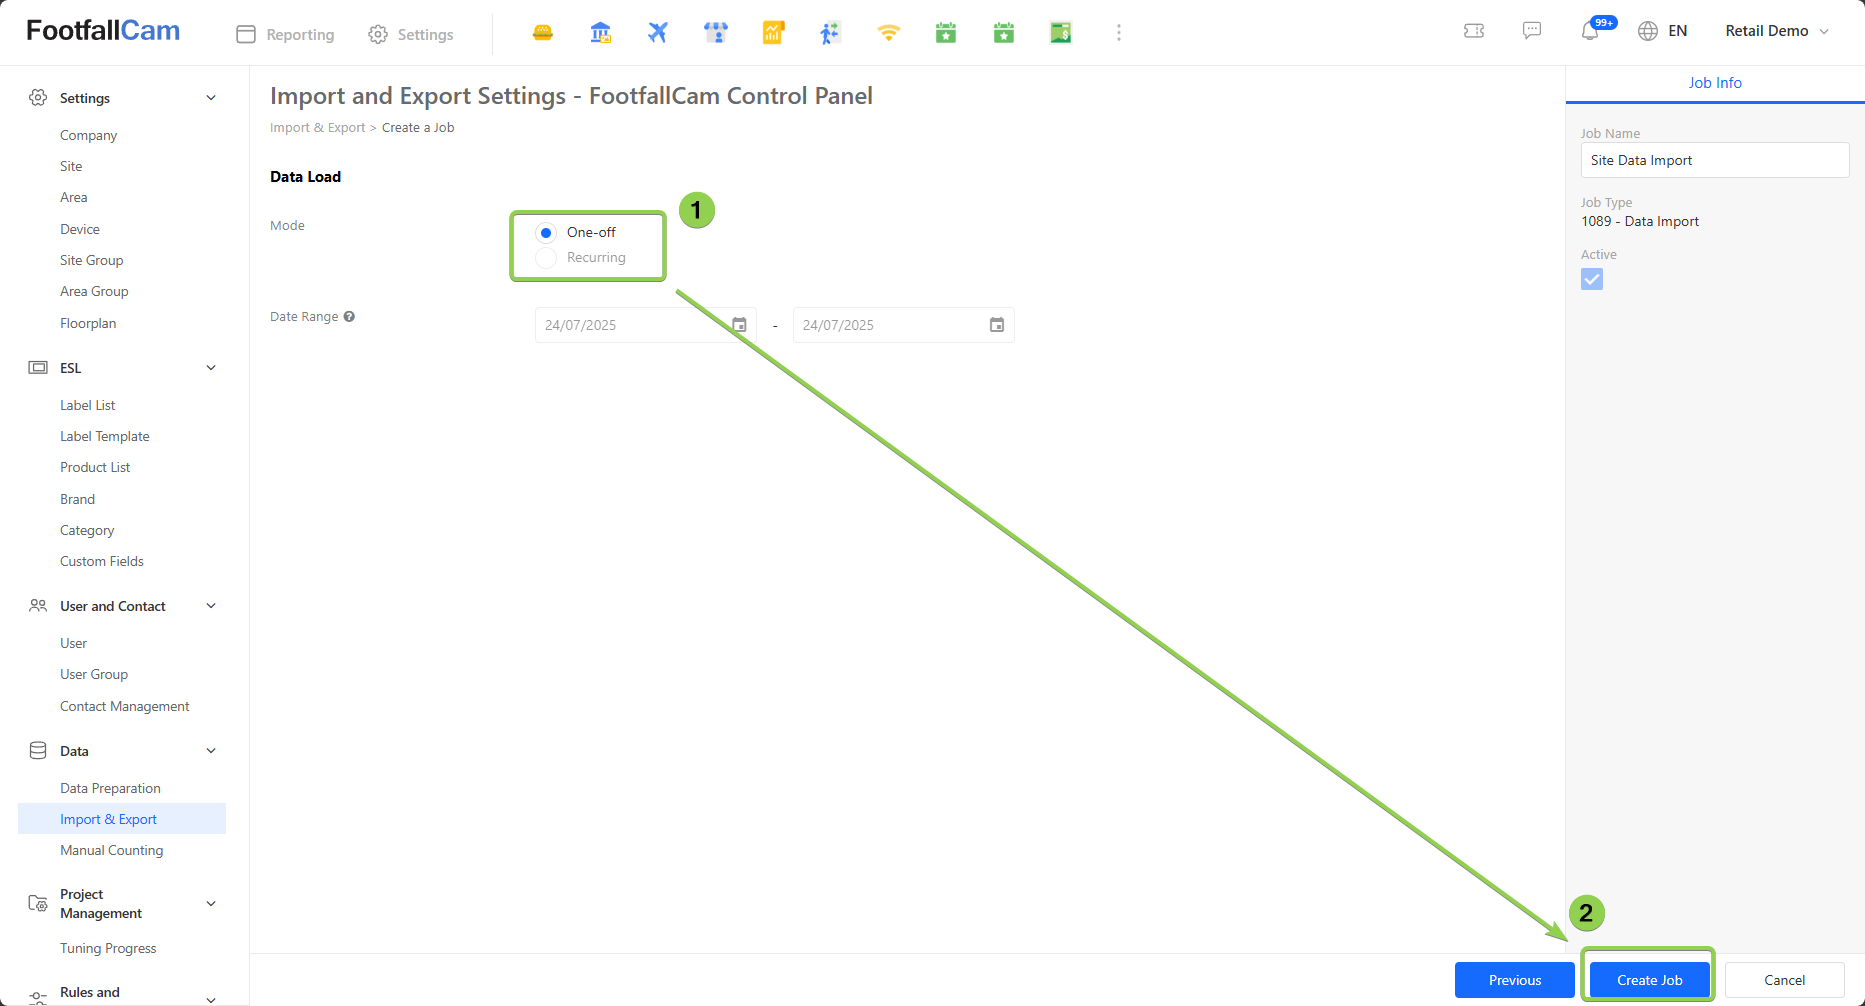
Step 5 - Click on 'Next', set up the data load to One-off. Then click on 'Create Job' to begin the import process.
Step 6 - A popup message would appear indicating that the job has been successfully created.
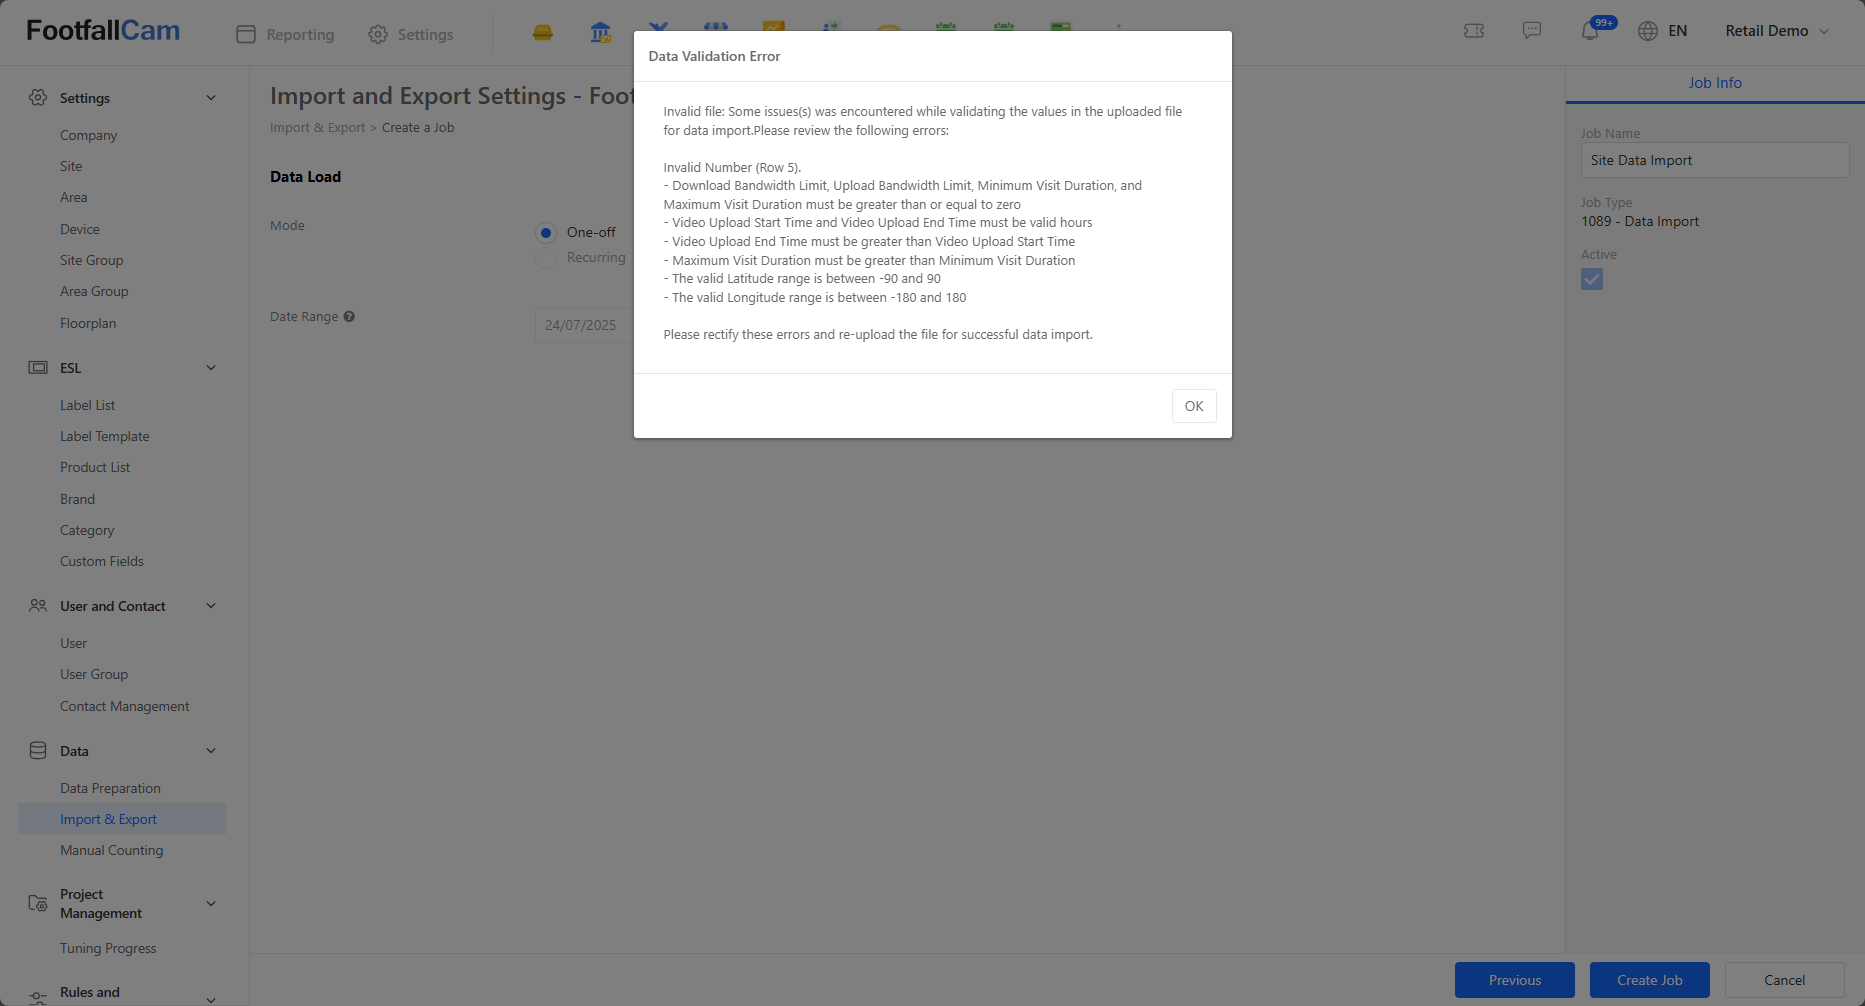
Noted: If there are issues in the import process, a popup will appear with the error message. Read the error message and rectify the errors if needed. Below is an example of an error message.
3.4.2 Standard Operating Hours Update
There are two steps to bulk update the site operating hours: first, export the current operating hours to an Excel file and make the necessary changes; then, import the updated file back into the portal to apply the new operating hours across the selected sites.
3.4.2.1 Standard Operating Hours Export
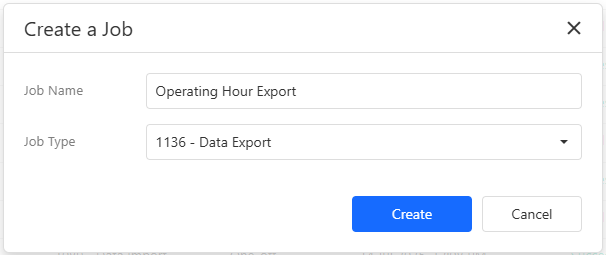
Step 1 - Please refer to step 1 to step 3 of Chapter 3.3 Data Import and Export to create a job and select 1136 - Data Export as the Job Type.
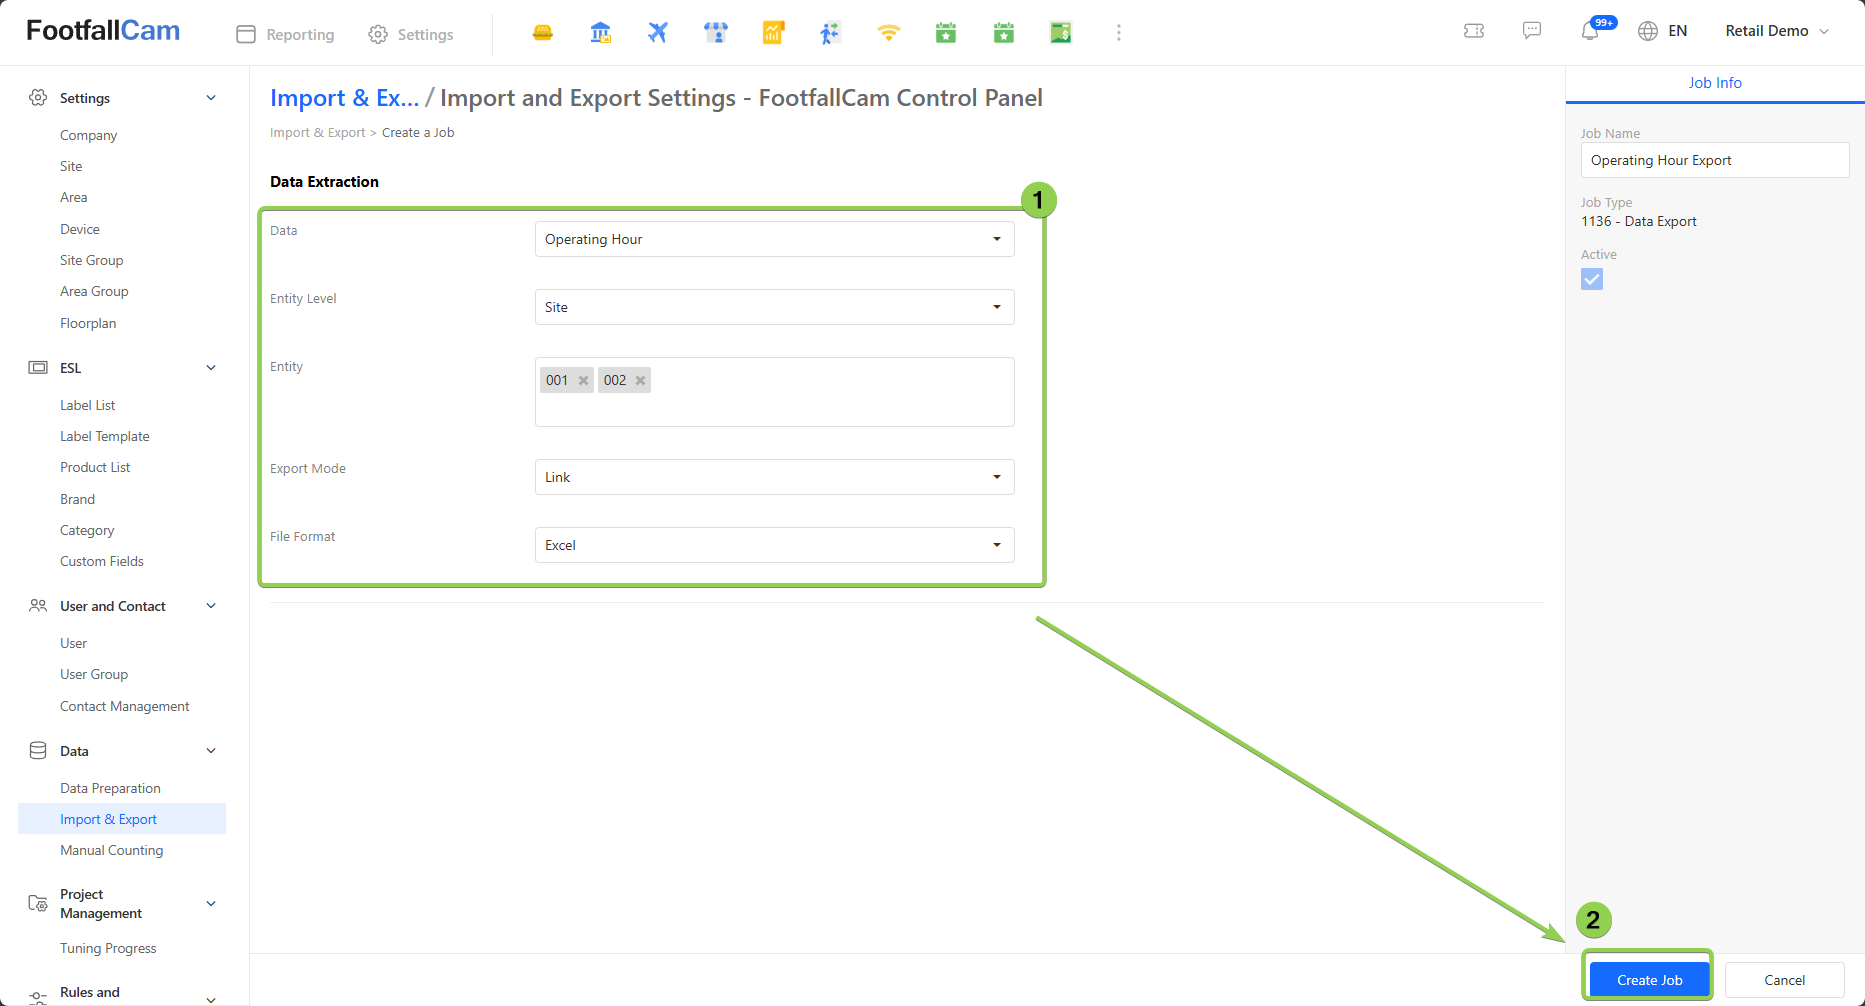
Step 2 - To retrieve current Standard Operating Hours, select 'Operating Hours' for Data and select 'site/area' for entity level depends on your requirement. Then, select the site you want to export the current Operating Hours for the Entity. Select 'Link ' for Export Mode and select 'Excel' for File Format. Next, click on the "Create Job" to create the export job.
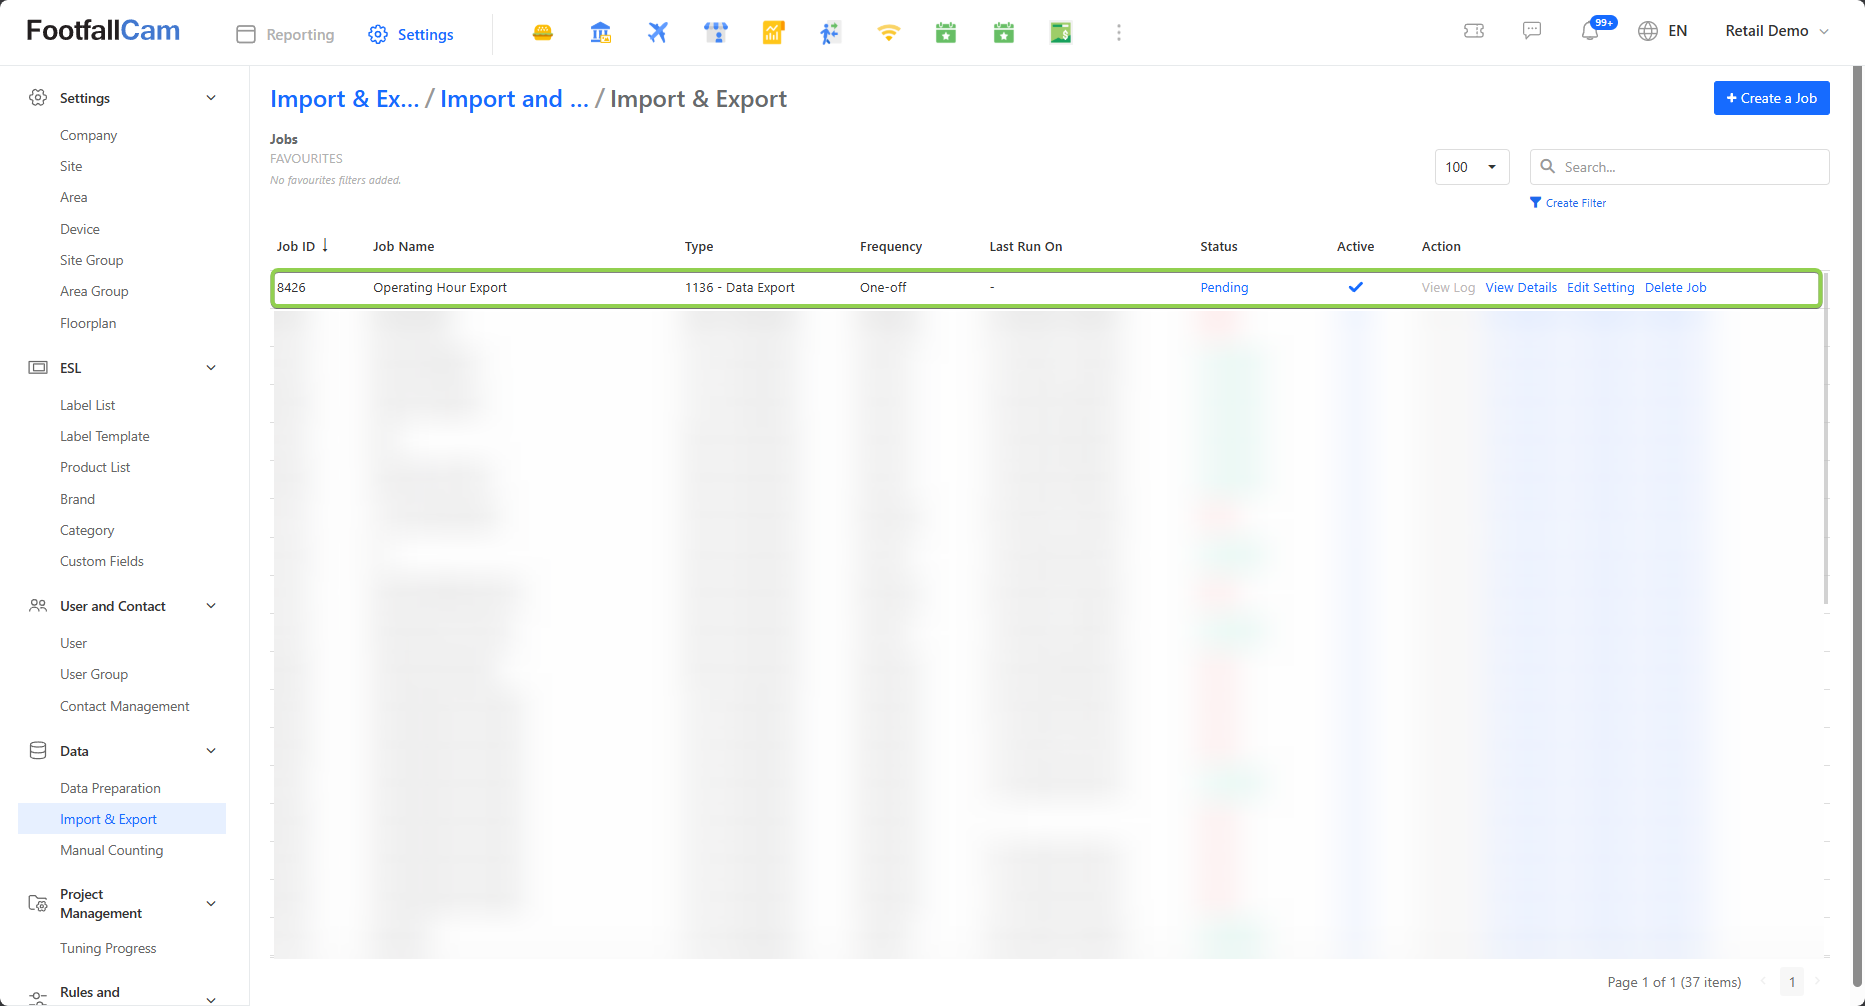
Step 3 - Go back to the job you created and wait for a few minutes for the job to run.
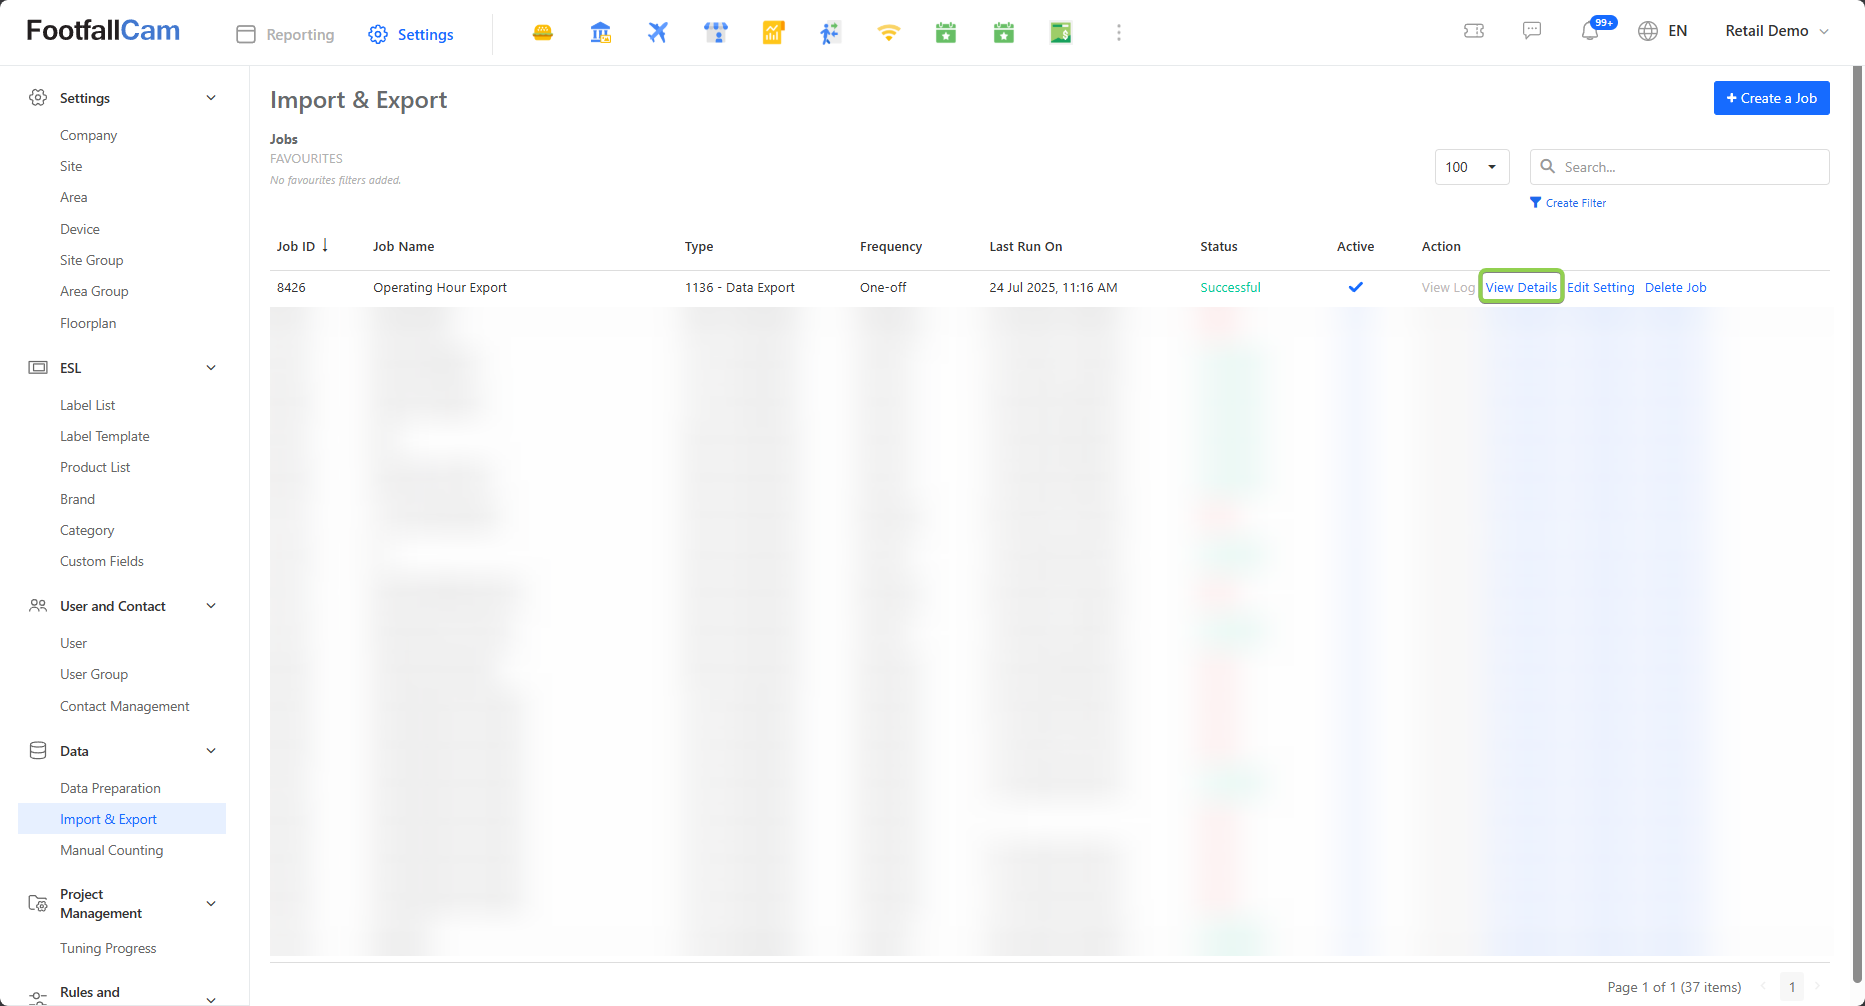
Step 4 - Refresh the page, and when the Status shows "Successful", click 'View Details'.
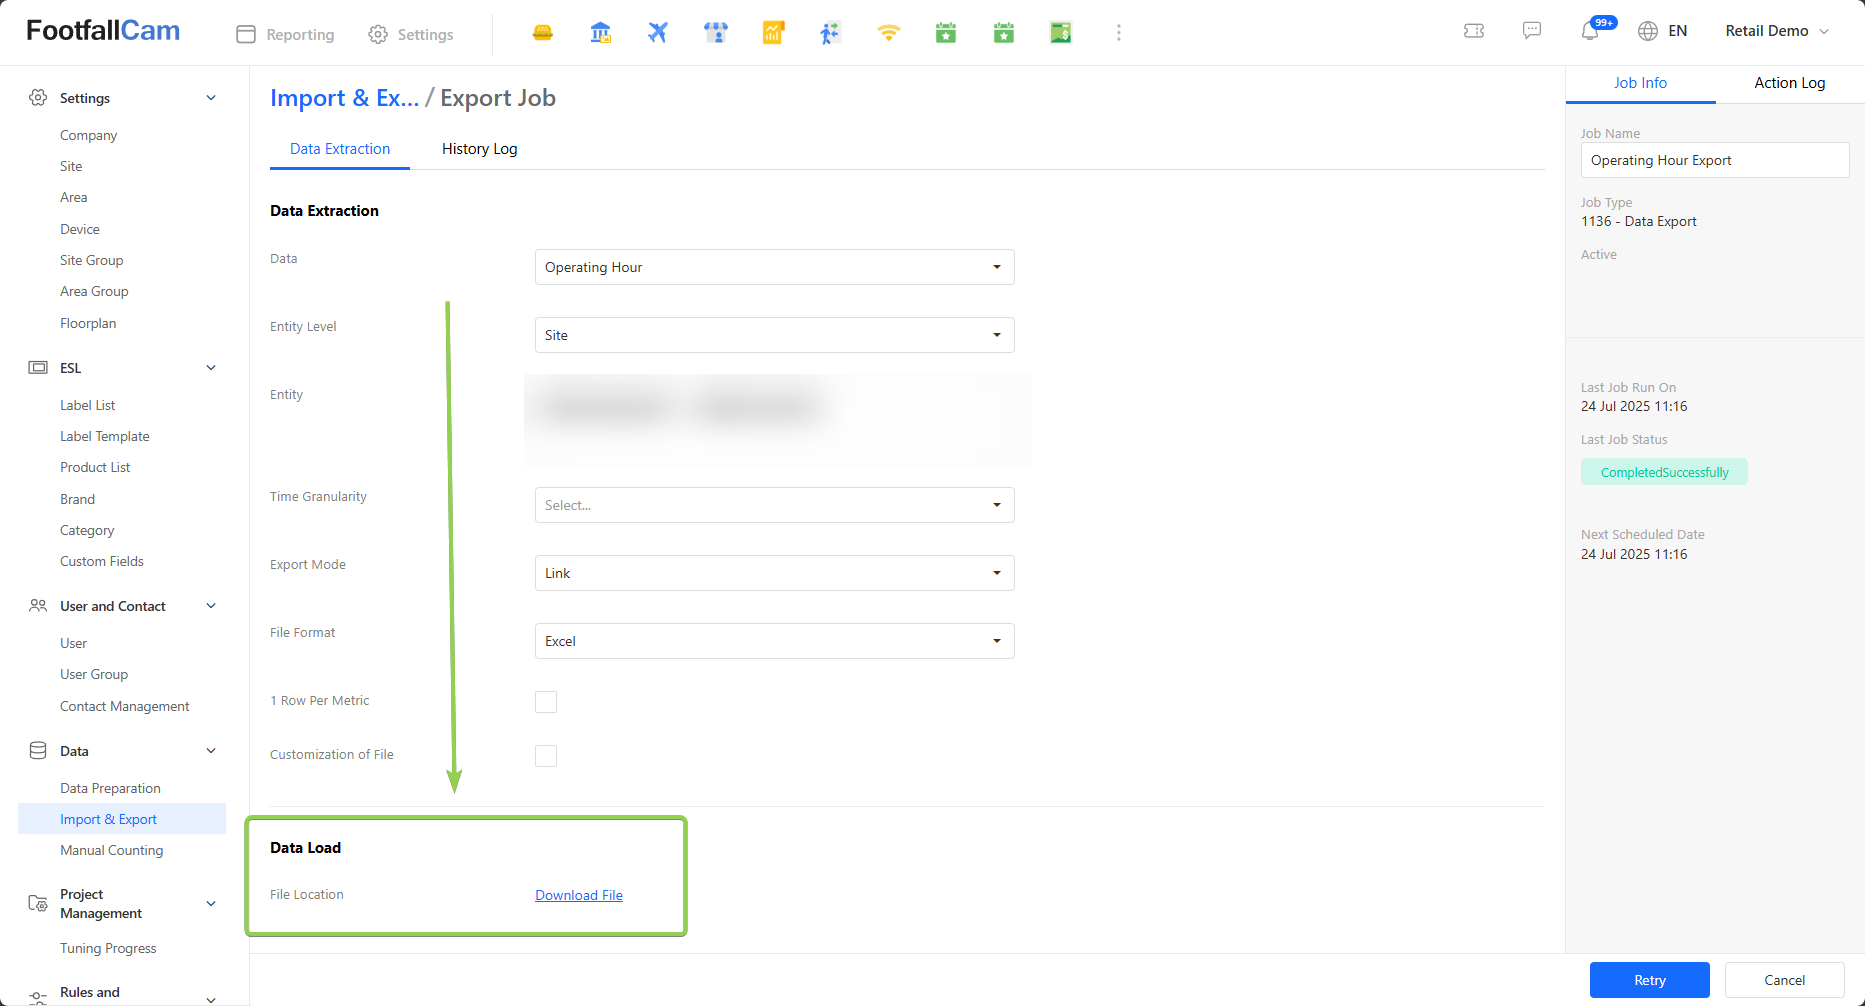
Step 5 - After open the page and click the download link to download the Excel file.
Step 6 - Open the excel file that you have downloaded and edit your operating hours.
Step 7 - For the column that is marked 1 in the screenshot below, change to either Open or Closed to indicate if the day is operating or not operating. For the columns that are marked as 2 is the starting and ending of the operating hours.![]()
Step 8 - Proceed to 3.4.2.2 to import your updated operating hours.
3.4.2.2 Standard Operating Hours Import
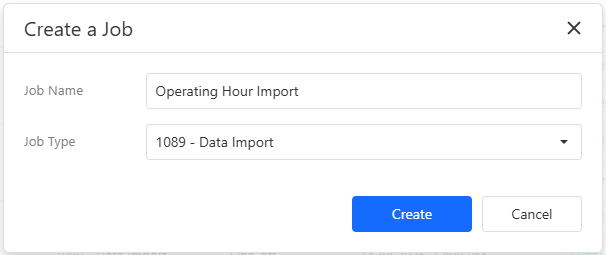
Step 1 - Please refer to step 1 to step 3 of Chapter 3.3 Data Import and Export to create a job and now please select 1089 - Data Import as the Job Type.
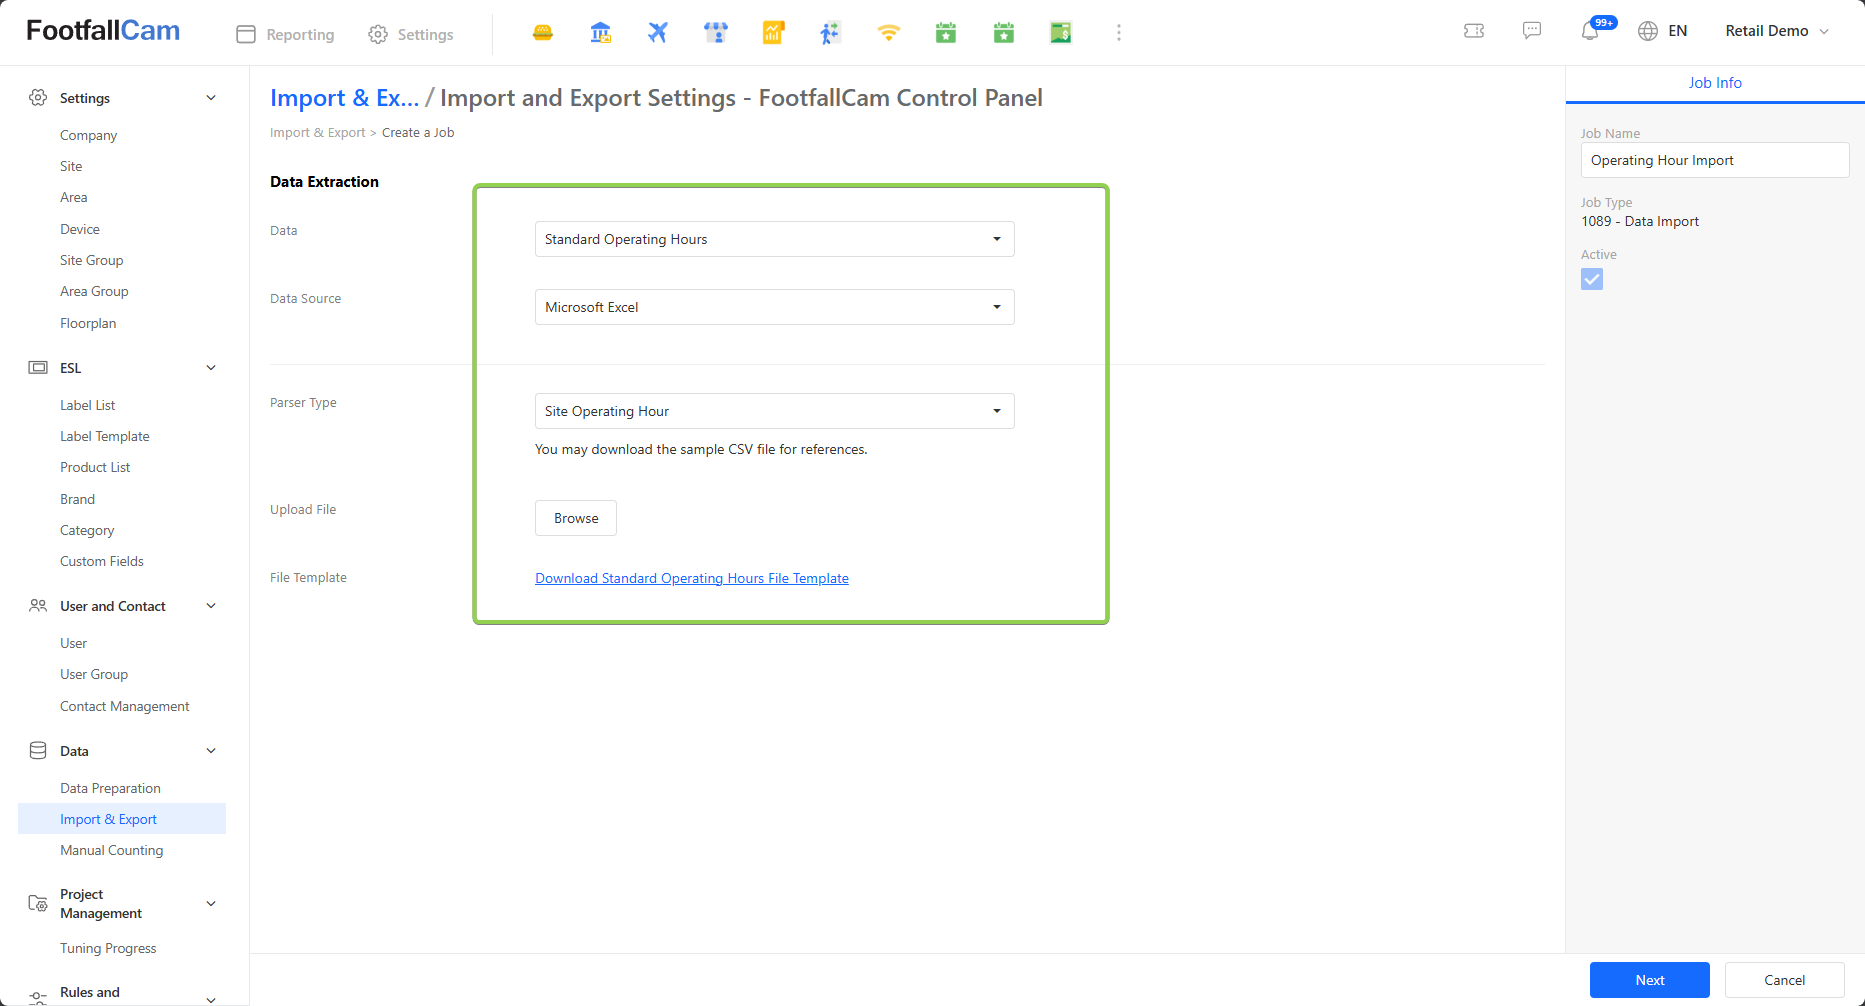
Step 2 - To upload Standard Operating Hours, select 'Standard Operating Hours' for Data and select 'Microsoft Excel' for the Data Source. For Parser Type, you can select either 'Site Operating Hour' or 'Area Operating Hour'.
Below are the fields found in the page:
| Field | Description |
| Data | The category of data to be imported to the database. |
| Parser Type | Choose the Parser Type for data import. Options available are Site Operating Hour and Area Operating Hour. |
| Upload File | To browse the file to upload for data import. Note that only one file can be uploaded at a time. |
Below are the available options for Entity Level:
| Entity Level | Description |
| Site | To import Standard Operating Hours for Sites. |
| Area | To import Standard Operating Hours for Areas. |
Step 3 - Both Entity Levels have their own sample Excel template that can be downloaded via their hyperlinks. Edit the data in the Excel file based on the provided format.
Below shows the available columns found in the template:
| Column | Description |
| Site Code (For Site Standard Operating Hours Template) | Site Code of an existing Site. |
| Area Code (For Area Standard Operating Hours Template) | Area Code of an existing Area found within an existing Site. |
| Monday (Open/Closed) | Indicates if the Site is open or closed at that particular day of the week. |
| Monday (Start) | Specifies the starting hour at that particular day. |
| Monday (End) | Specifies the closing hour at that particular day. |
Step 4 - Once ready for upload, click on 'Browse' and select the Excel file to upload. If file upload is successful, there will be an indicator stating that the file is uploaded.
Step 5 - Click on 'Next', set up the data load to One-off, and Click on 'Create Job' to begin the import process.
Step 6 - A popup message would appear indicating that the job has been successfully created.
Noted: If there are issues in the import process, a popup will appear with the error message. Read the error message and rectify the errors if needed. Below is an example of an error message.
3.4.3 Custom Operating Hours Update
Step 1 - Please refer to step 1 to step 3 of Chapter 3.3 Data Import and Export to create a job and now please select 1089 - Data Import as the Job Type.
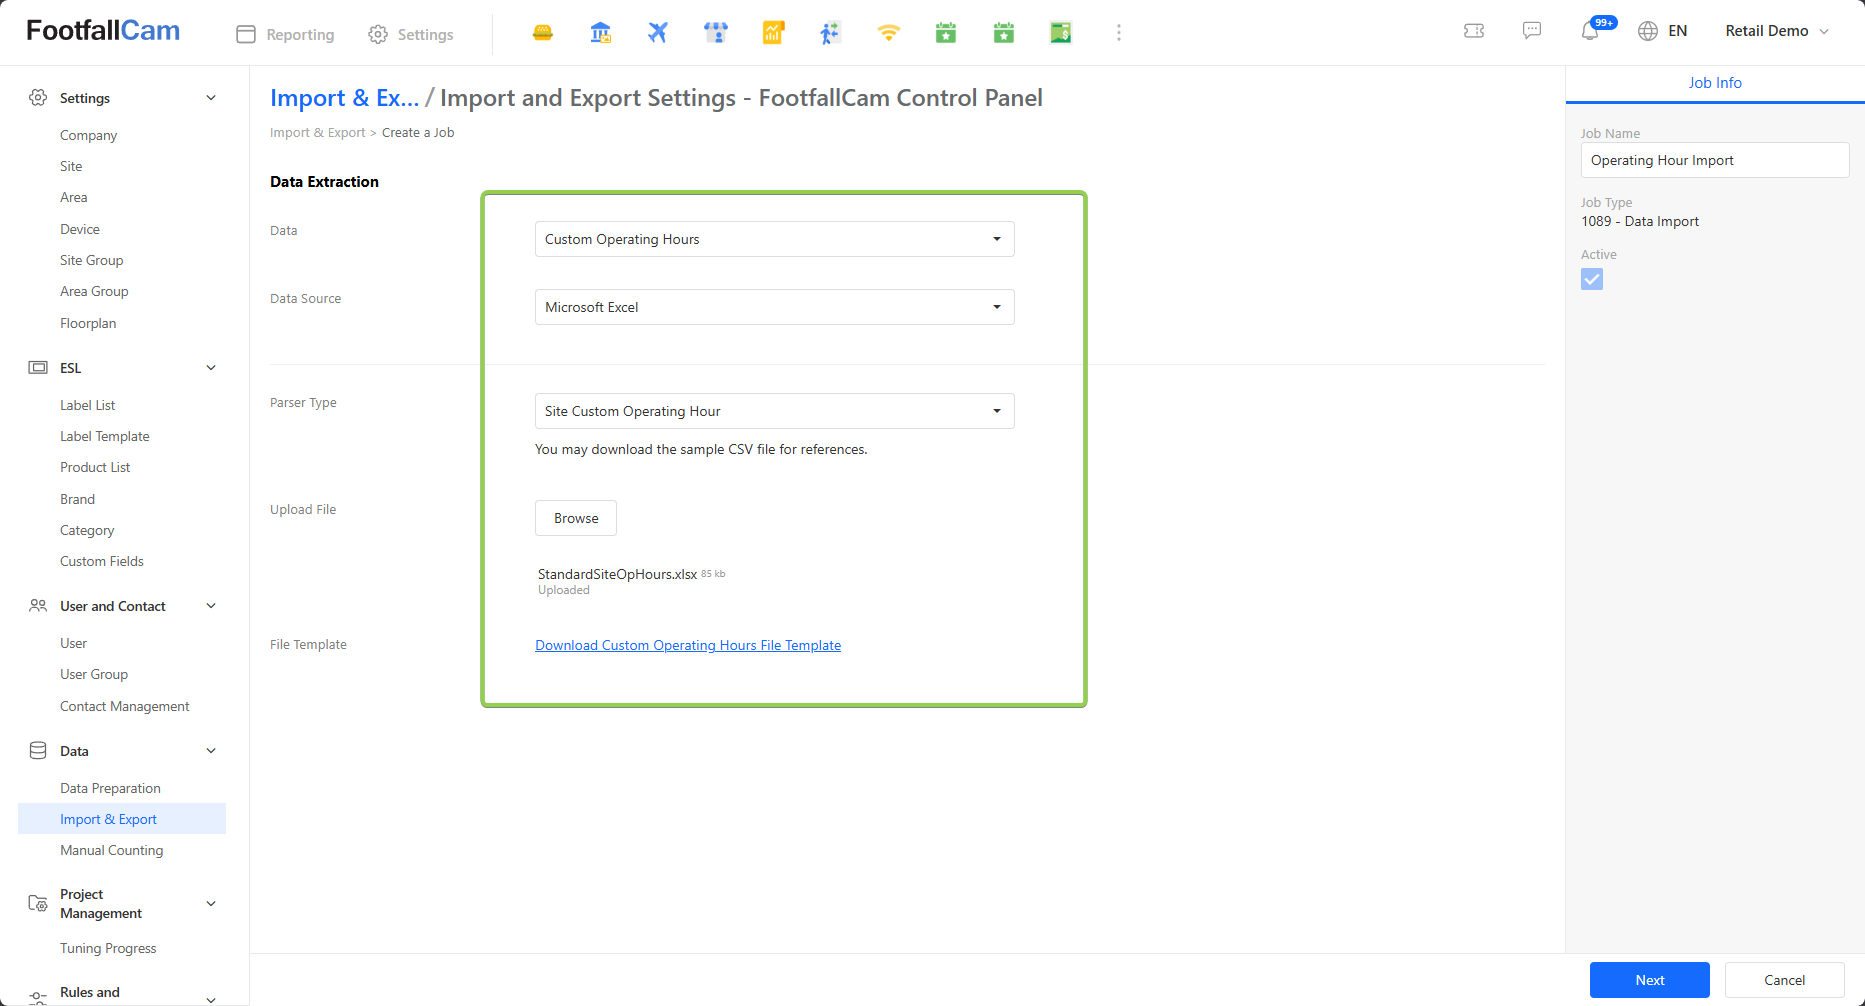
Step 2 - To import Custom Operating Hours Data, select 'Custom Operating Hours' for Data and select 'Microsoft Excel' for Data Source. Then, select 'Site Custom Operating Hour' for Parser Type.
Below are the fields found in the page:
| Field | Description |
| Data | The category of data to be imported to the database. |
| Parser Type | Choose the Parser Type to be involved for data import. |
| Upload File | To browse the file to upload for data import. Note that only one file can be uploaded at a time. |
Step 3 - A sample template for Custom Operating Hours data can be downloaded via the hyperlink. After downloading the template, edit the data in the Excel file based on the provided format.
Below shows the available columns found in the template:
| Column | Description |
| Site Code | Site Code of an existing Site. |
| Date | Specifies the date. Format is "YYYY-MM-DD". |
| Open/Closed | Specifies if the site is open or closed on that particular date. |
| Start Time | Specifies the starting hour at that particular date. |
| End Time | Specifies the closing hour at that particular date. |
| Reason | Specifies the reason for the Site to be open or closed on that particular date. |
Step 4 - Once ready for upload, click on 'Browse' and select the Excel file to upload. If file upload is successful, there will be an indicator stating that the file is uploaded.
Step 5 - Click on 'Next', set up the data load to One-off, and Click on 'Create Job' to begin the import process.
Step 7 - A popup message would appear indicating that the job has been successfully created.
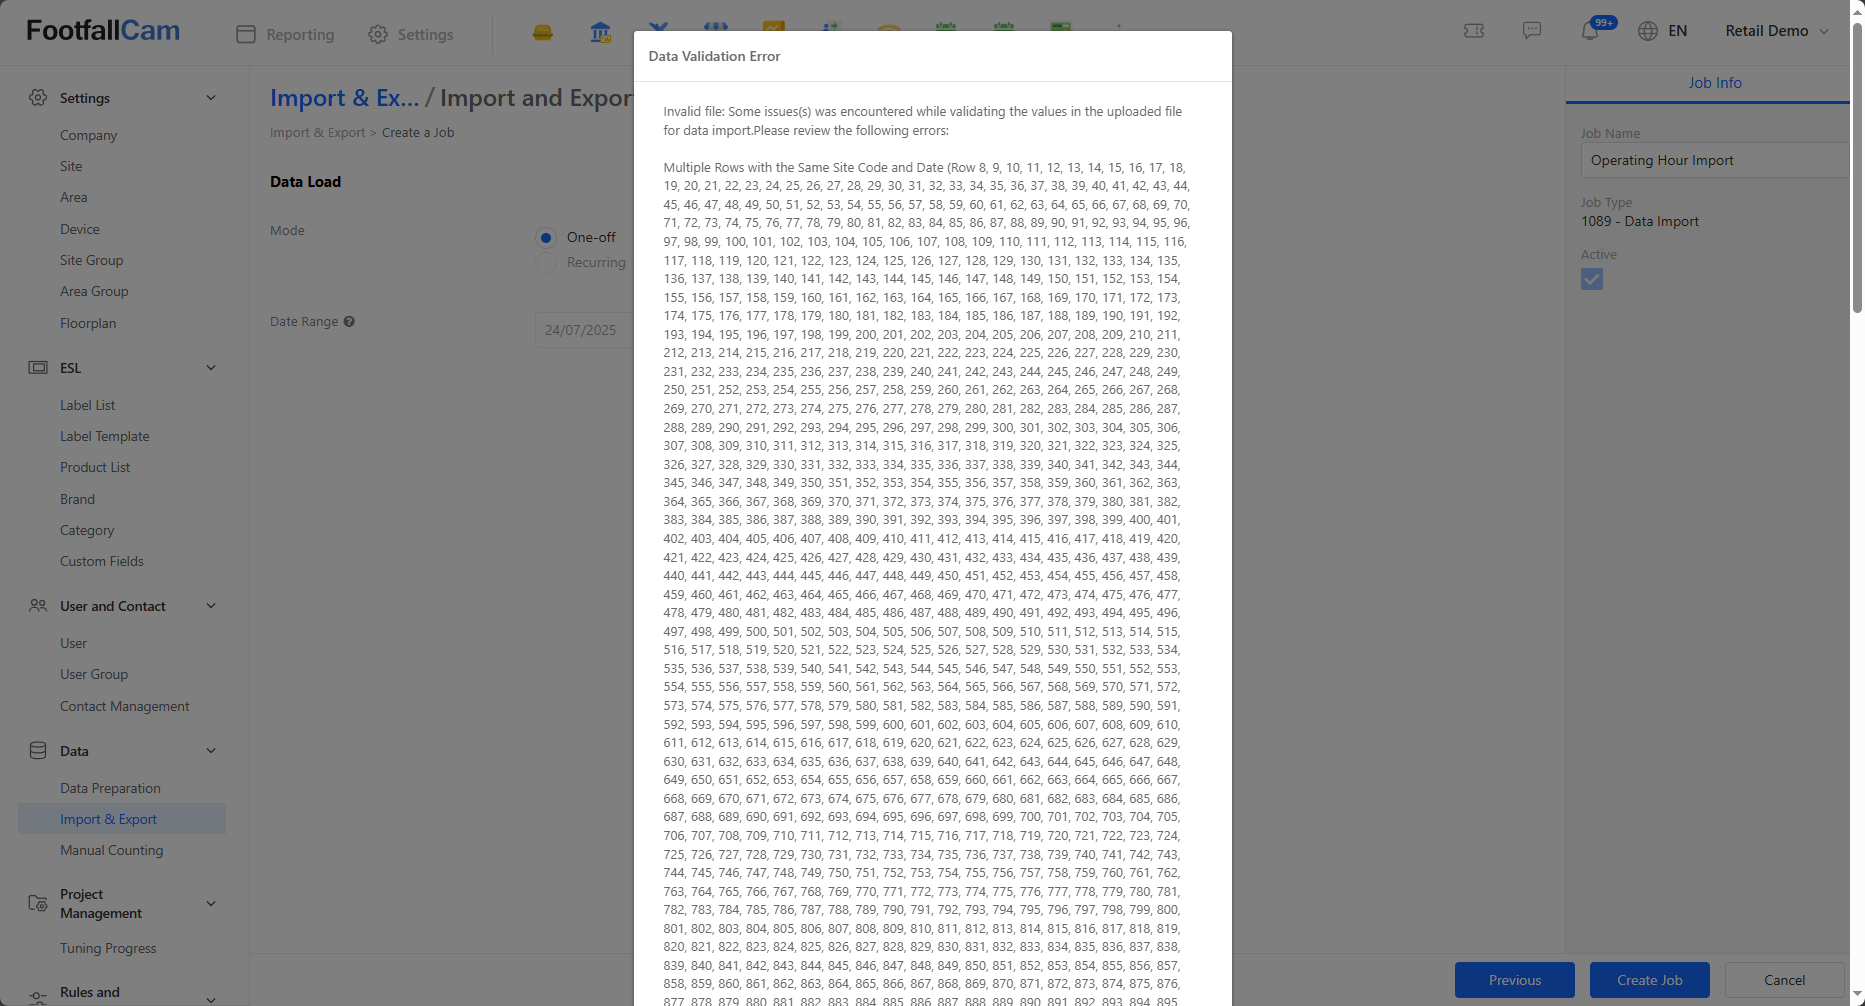
Noted: If there are issues in the import process, a popup will appear with the error message. Read the error message and rectify the errors if needed. Below is an example of an error message.
3.5 Area Settings Data
3.5.1 Bulk Area Creation
Step 1 - Please refer to step 1 to step 3 of Chapter 3.3 Data Import and Export to create a job and select 1089 - Data Import as the Job Type.
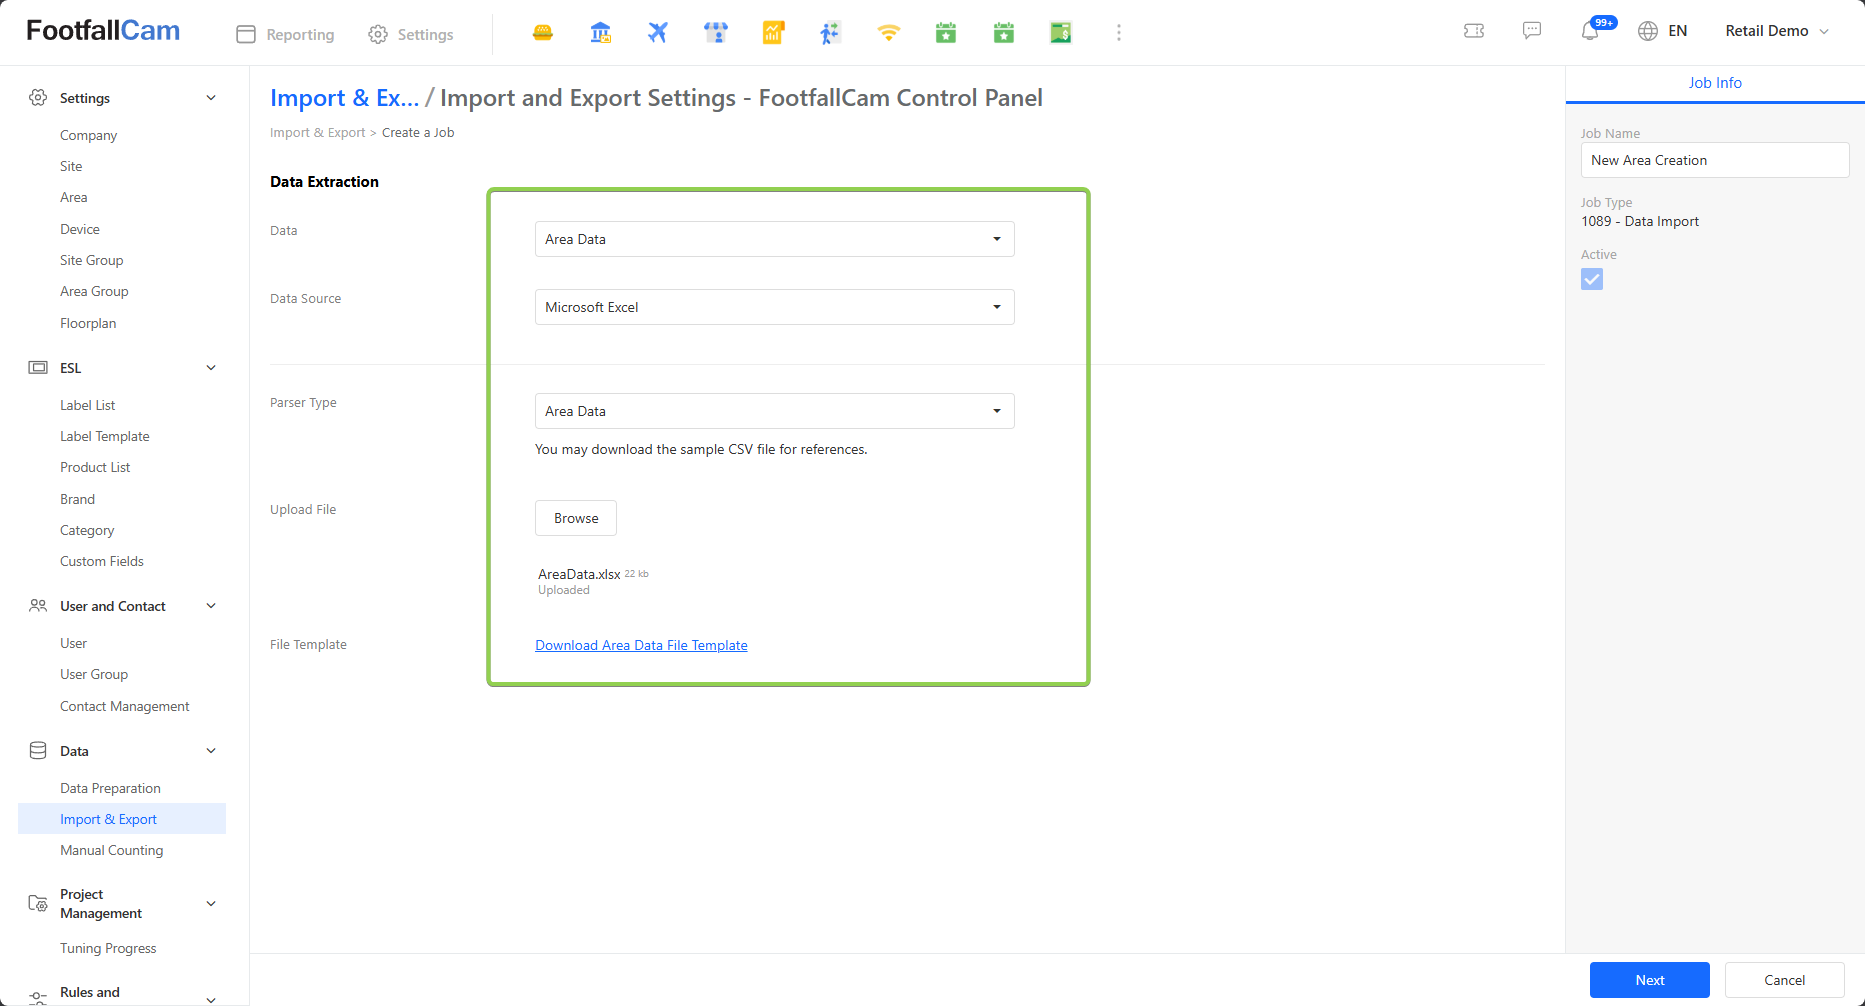
Step 2 - To import New Area Data, select 'Area Data' for Data. Then, select 'Microsoft Excel' for Data Source and select 'Area Data' for Parser Type.
Below are the fields found in the page:
| Field | Description |
| Data | The category of data to be imported to the database. |
| Data Source | Source from which data is extracted for processing and analysis. |
| Upload File | To browse the file to upload for data import. Note that only one file can be uploaded at a time. |
| File Template | Download a sample template for Area Data. |
Step 3 - A sample template for Area Data can be downloaded via the hyperlink. After downloading the template, edit the data in the Excel file based on the provided format.
Below shows the available columns found in the template:
| Sheet | Column | Description |
| Area Data | AreaName | Name of the new Area. |
| AreaCode | Code of the new Area. | |
| Description | Description of the new Area. An empty description is acceptable. |
|
| AreaGroup | Existing Area Group for the new Area. An empty Area Group is acceptable. |
|
| SiteCode | The Site Code of an existing Site. |
Step 4 - Upload the Area Data Excel file by clicking on 'Browse' and selecting your Excel file. If file upload is successful, there will be an indicator stating that the file is uploaded.
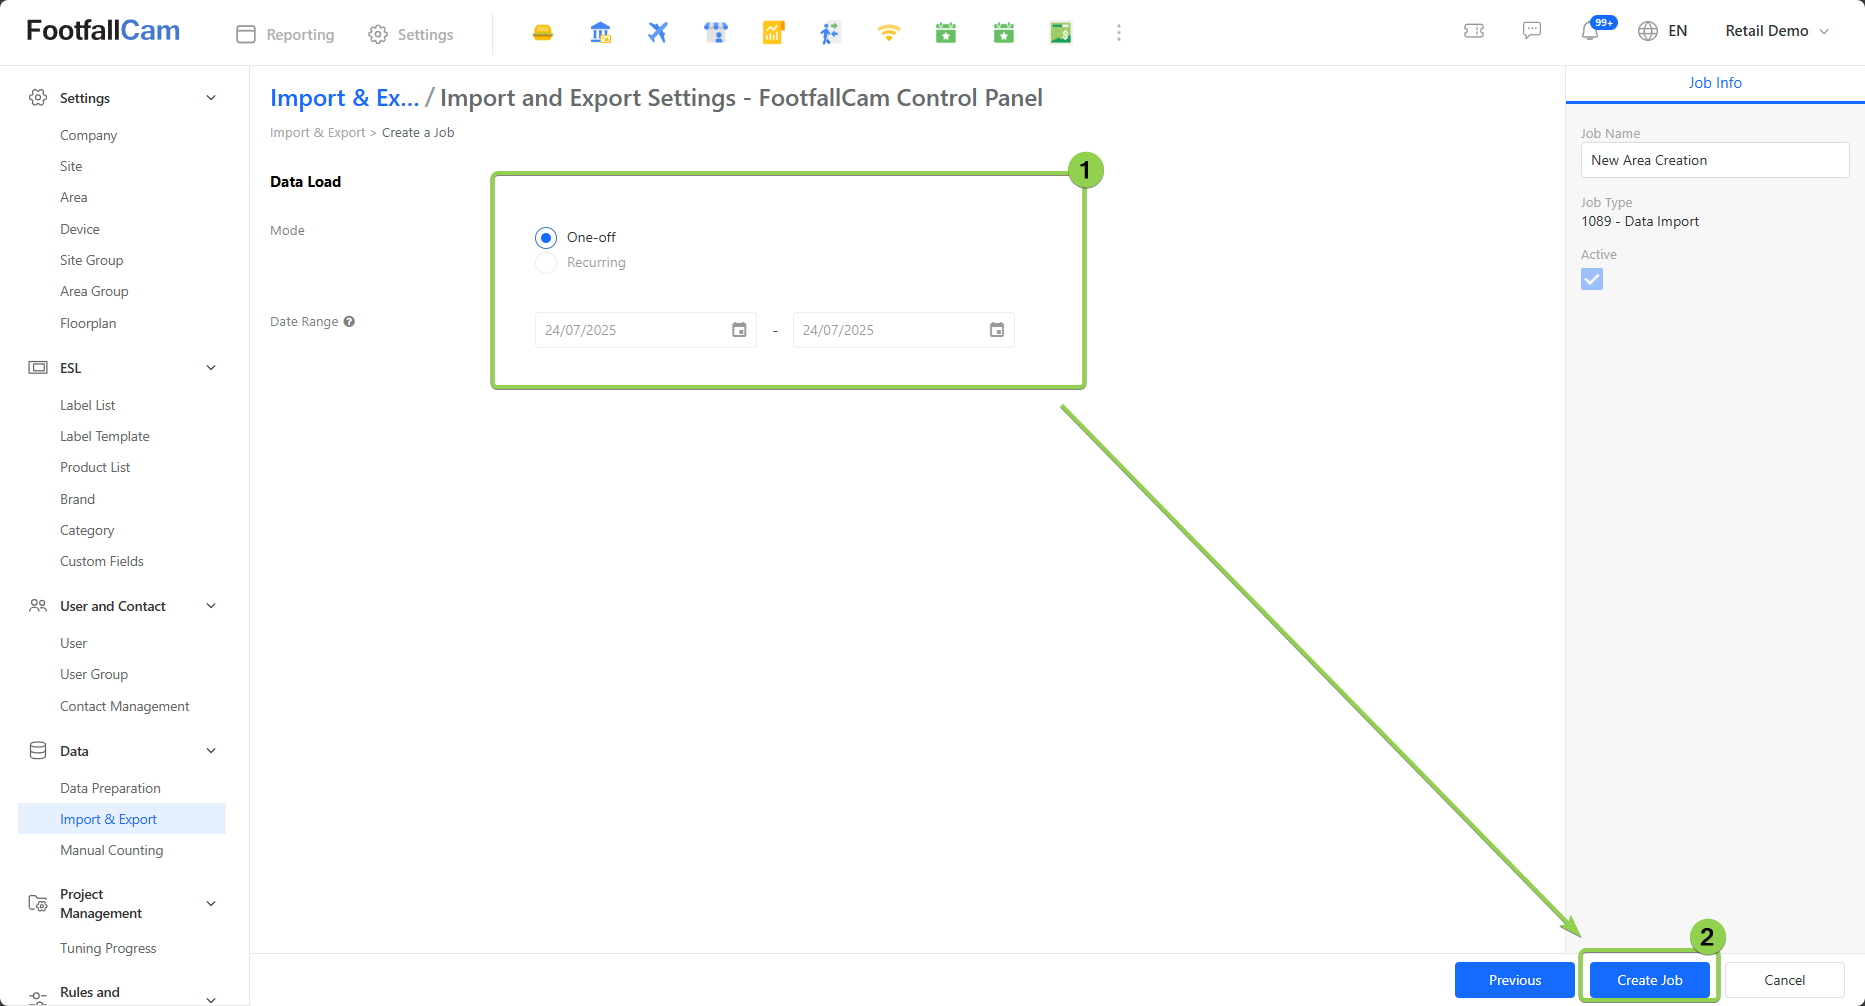
Step 5 - Click on 'Next', set up the data load to One-off, and Click on 'Create Job' to begin the import process.
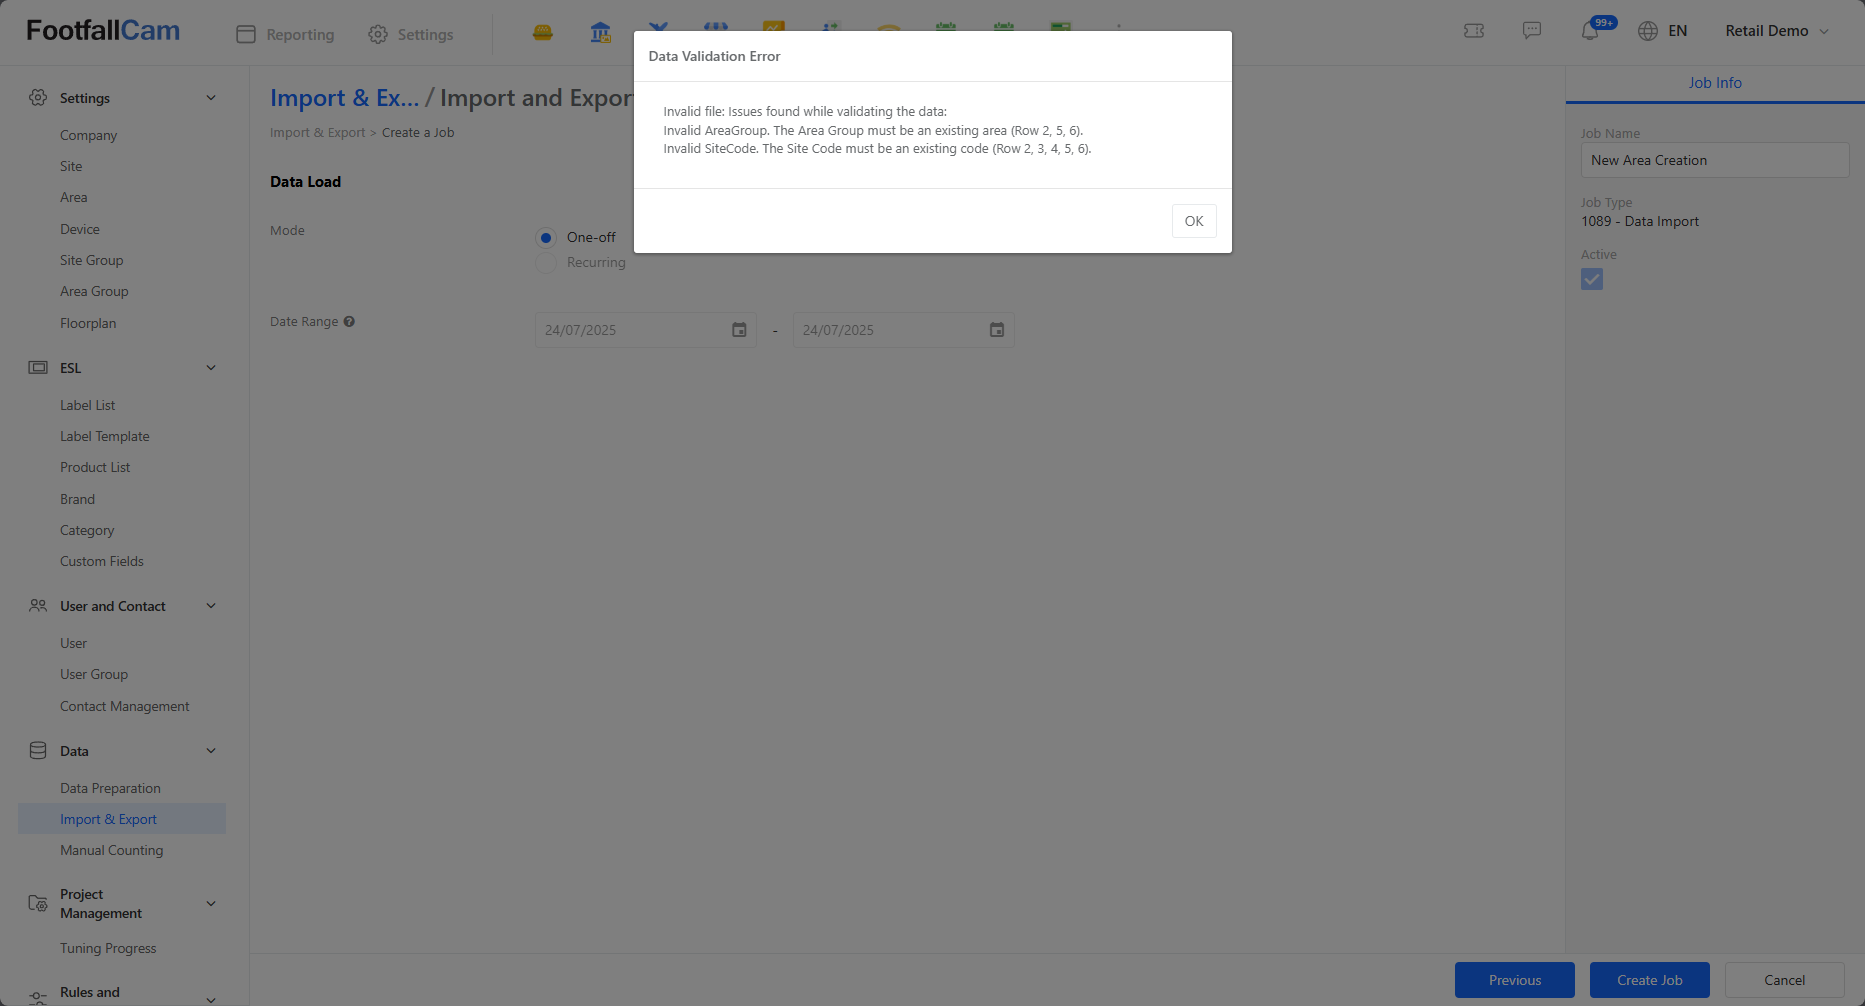
Step 6 - A popup message will shown if the job is created successfully. Otherwise, an error message will be shown.
Noted: If there are issues in the import process, a popup will appear with the error message. Read the error message and rectify the errors if needed. Below is an example of an error message.
3.6 User Settings Data
Stay tuned! The new feature will be ready soon.
3.7 Time Table Import (Movie, Class, Church)
Step 1 - Please refer to step 1 to step 3 of Chapter 3.3 Data Import and Export to create a job and select 1089 - Data Import as the Job Type.
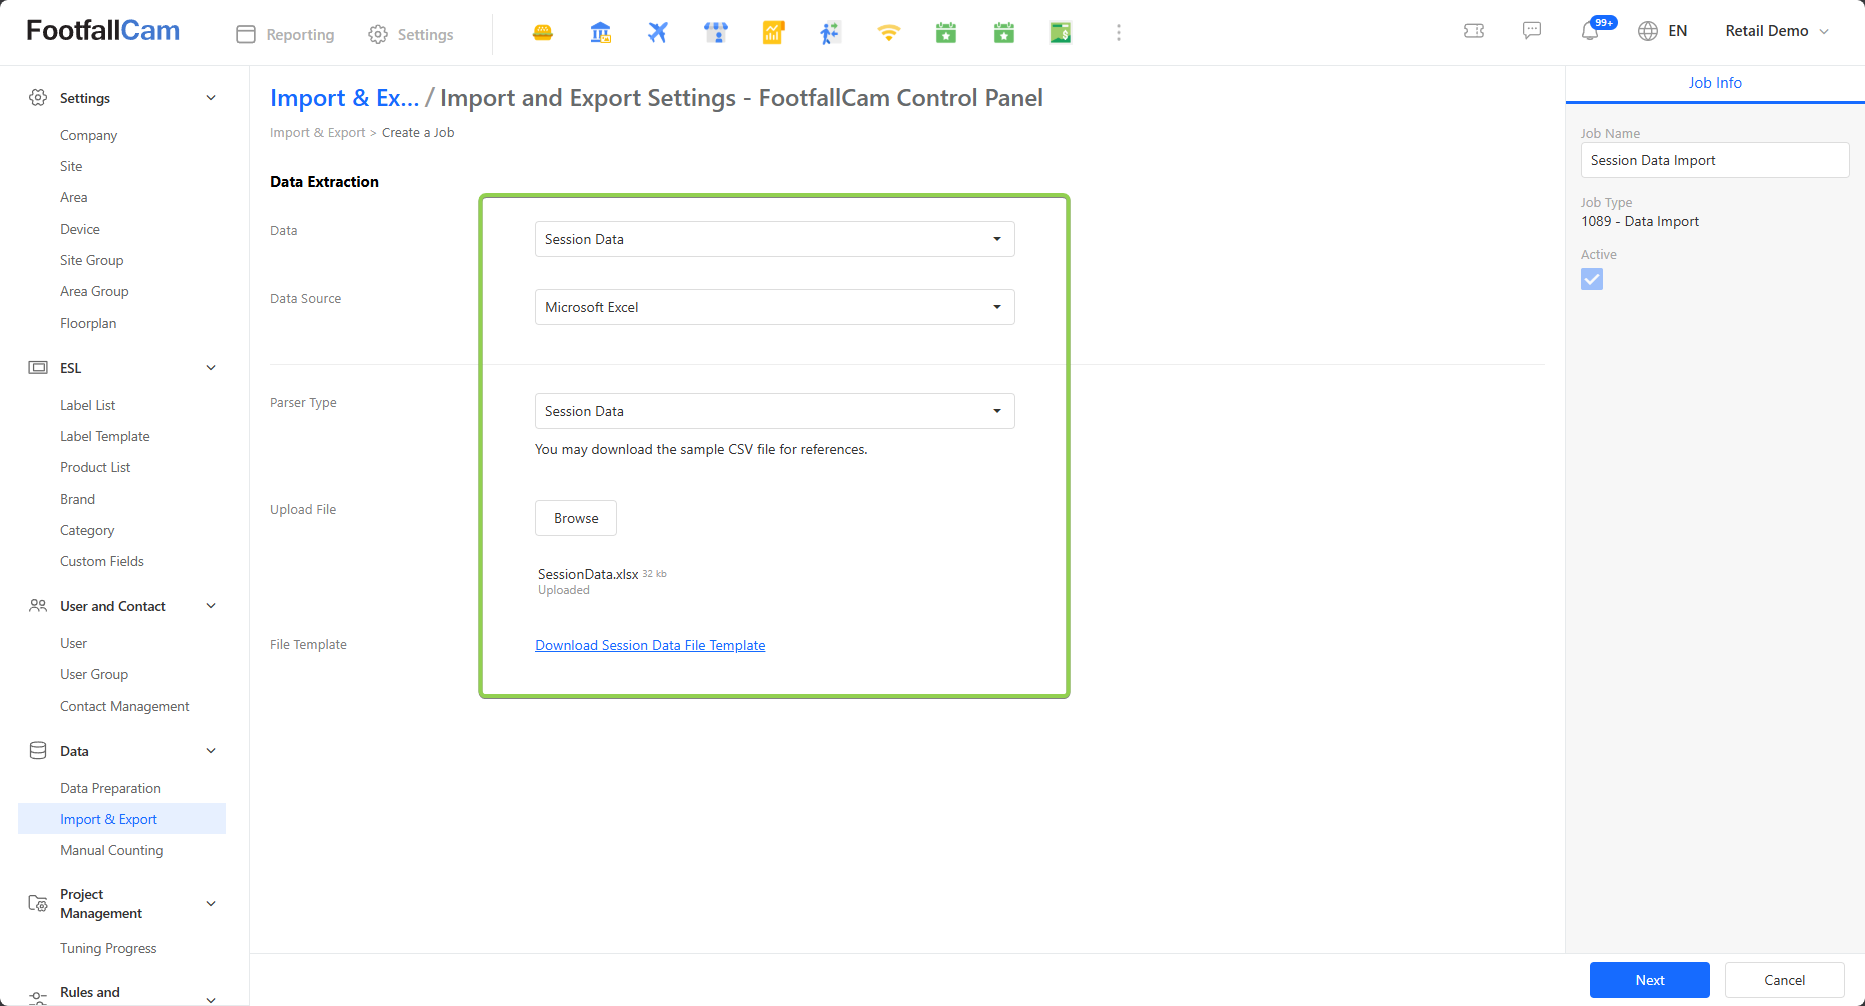
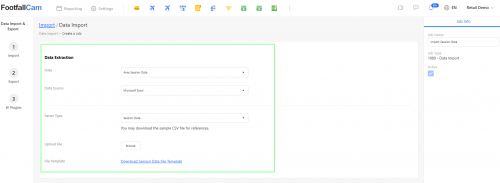
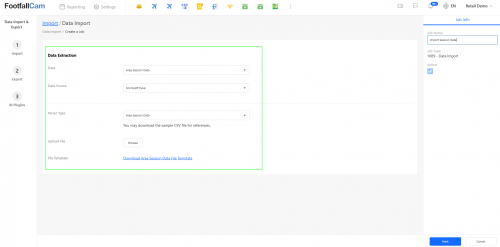
Step 2 - To import Timetable Data, select 'Session Data' for Data and select 'Microsoft Excel' for Data Source. Then, select 'Session Data' for Parser Type.
Below are the fields found in the page:
| Field | Description |
| Data | The category of data to be imported to the database. |
| Parser Type | Choose the Parser Type to be involved for data import. |
| Upload File | To browse the file to upload for data import. Note that only one file can be uploaded at a time. |
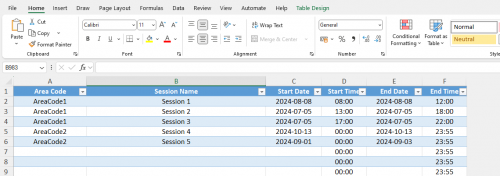
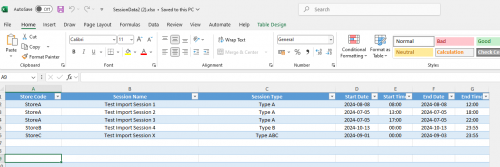
Step 3 - A sample template for Session Data can be downloaded via the hyperlink. After downloading the template, edit the data in the Excel file based on the provided format.
Below shows the available columns found in the template:
| Column | Description |
| Area Code | The area code of an existing Area. |
| Session Name | The name of the session. |
| Start Date | The starting date of the session. |
| Start Time | The starting time of the session. |
| End Date | The ending date of the session. |
| End Time | The ending time of the session. |
Step 4 - Once ready for upload, click on 'Browse' and select the Excel file to upload. If file upload is successful, there will be an indicator stating that the file is uploaded.
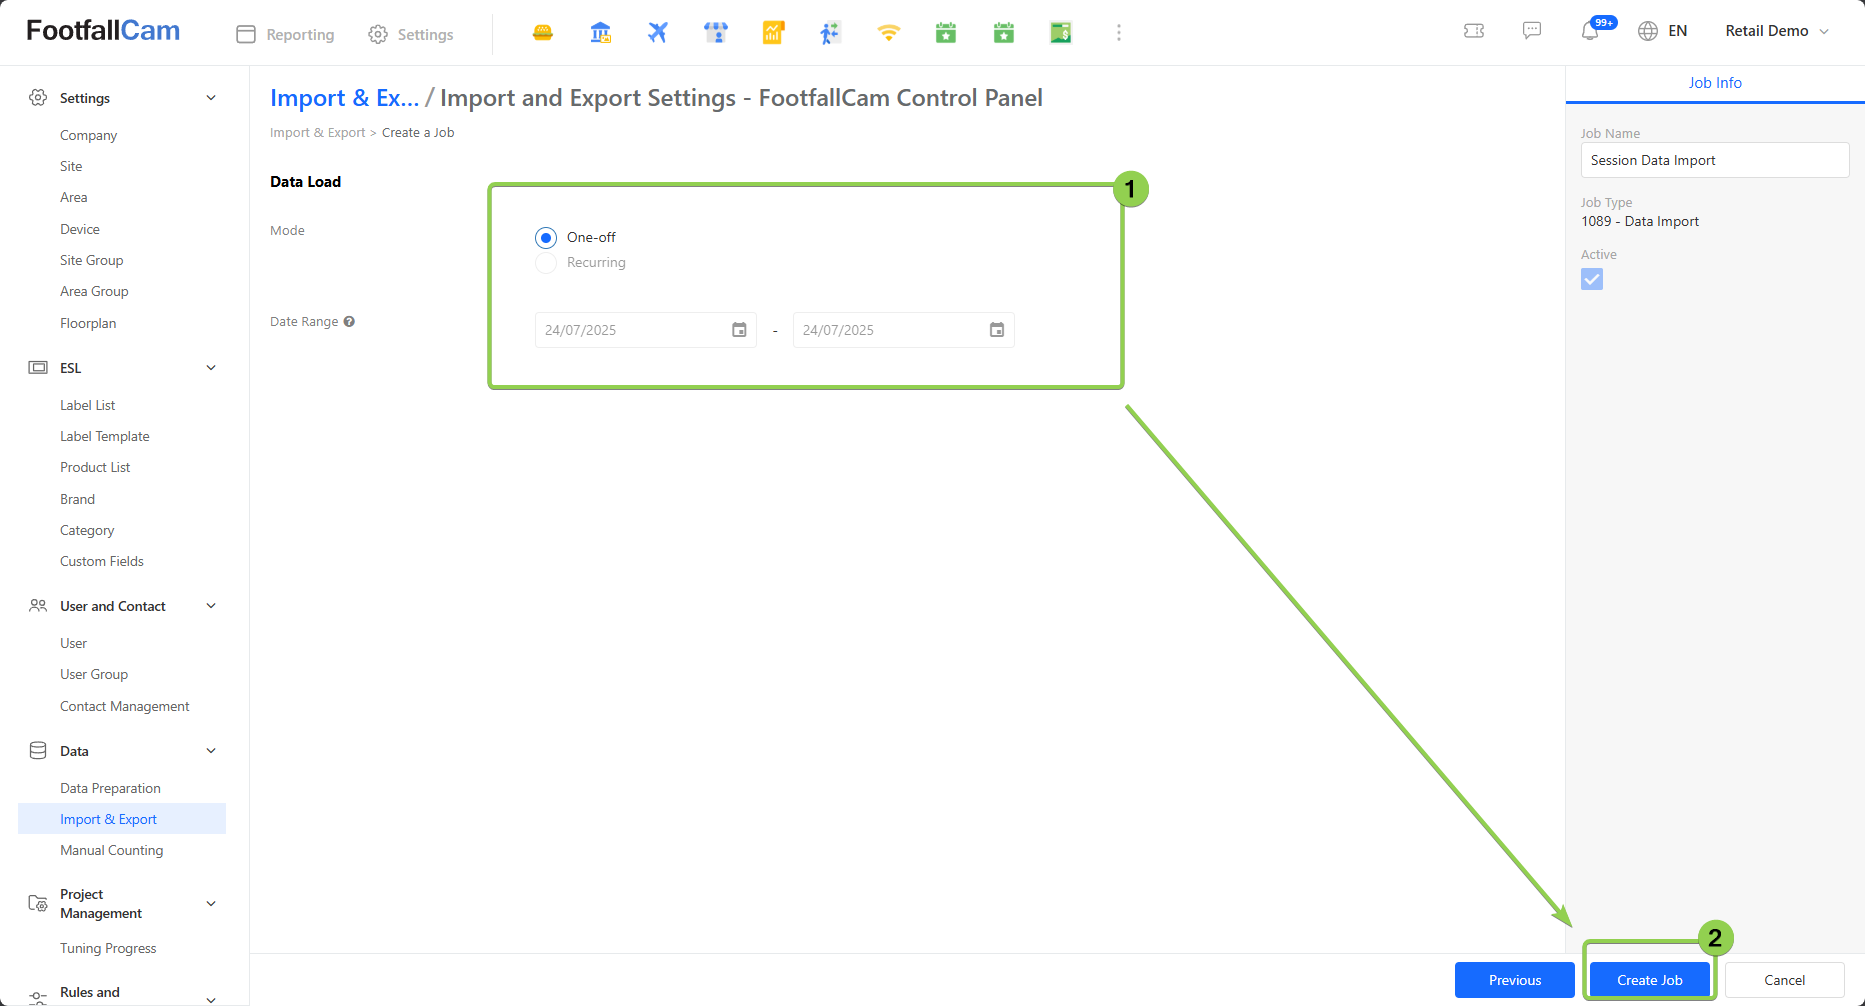
Step 5 - Click on 'Next', set up the data load to One-off, and click on 'Create Job' to begin the import process.
Step 7 - A popup message would appear indicating that the job has been successfully created.
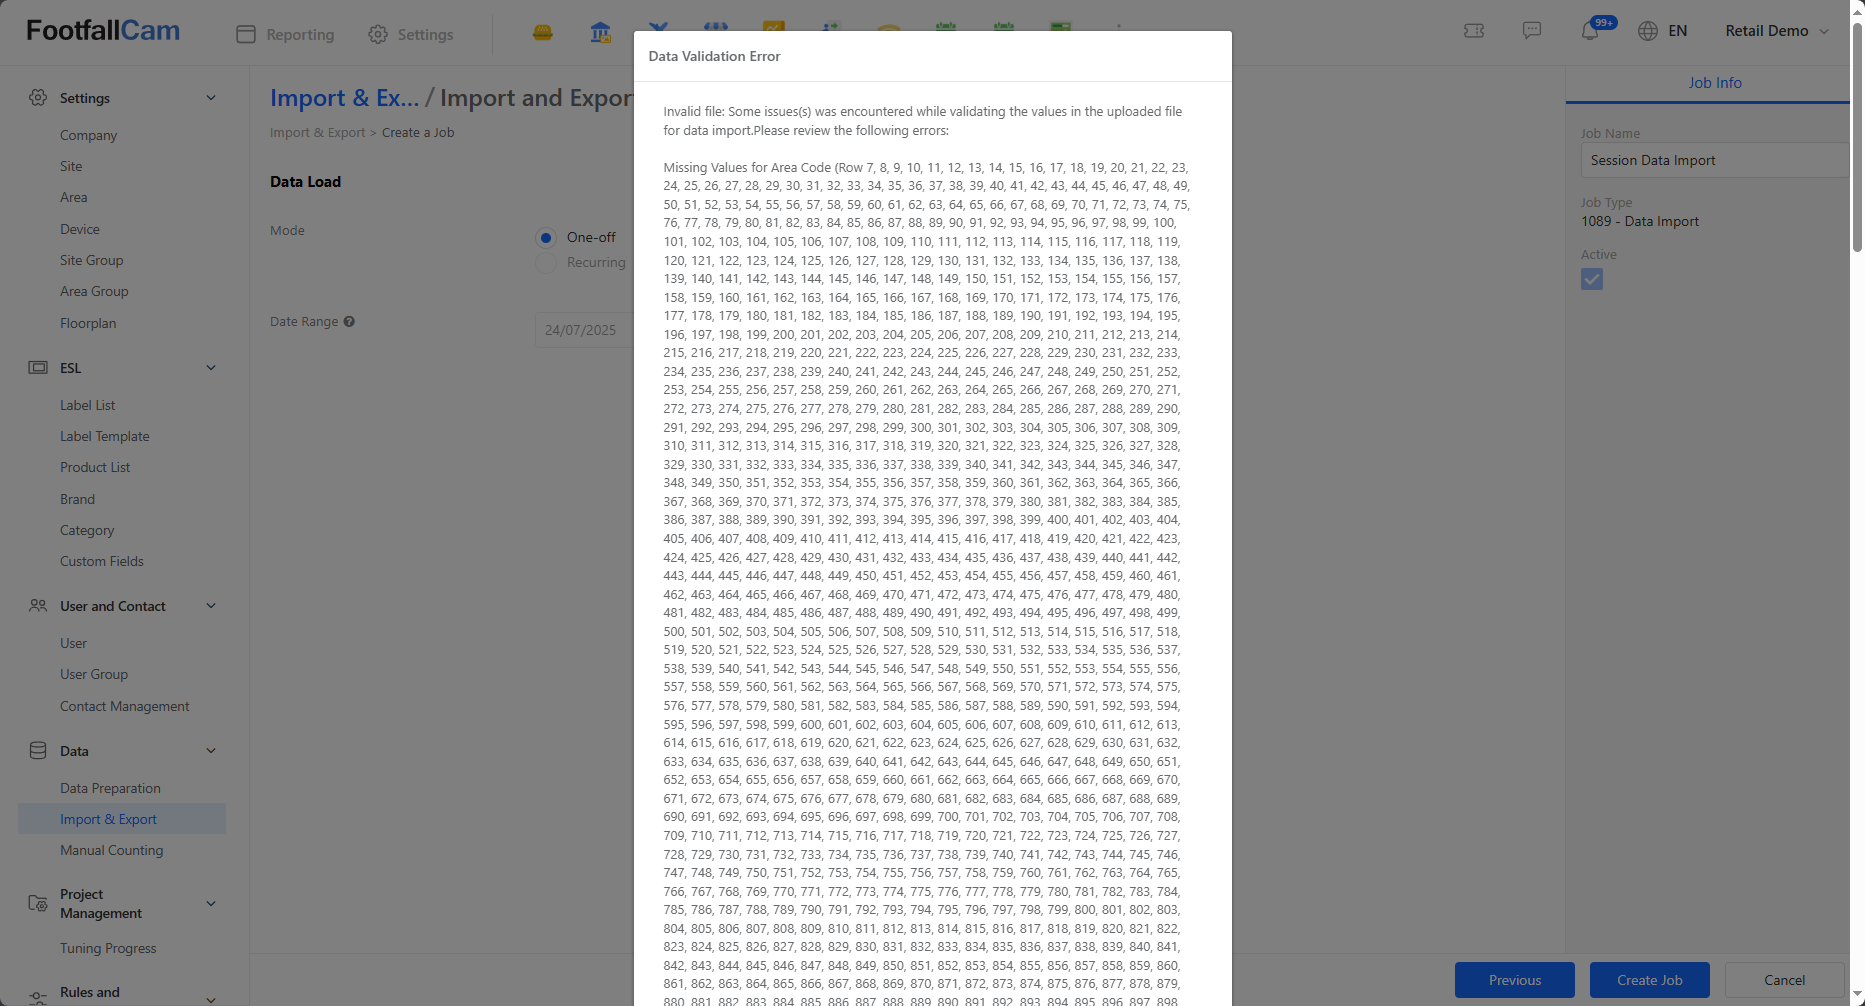
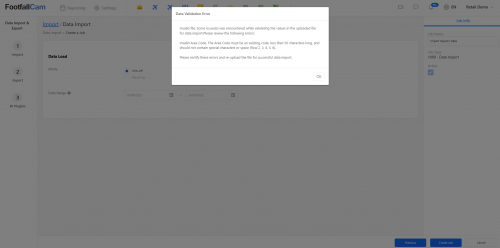
Noted: If there are issues in the import process, a popup will appear with the error message. Read the error message and rectify the errors if needed. Below is an example of an error message.
3.8 Staff Data
Step 1 - Please refer to step 1 to step 3 of Chapter 3.3 Data Import and Export to create a job and select 1089 - Data Import as the Job Type.
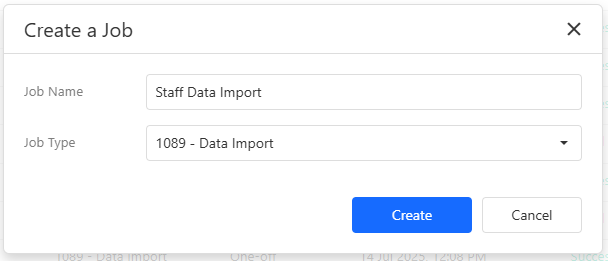
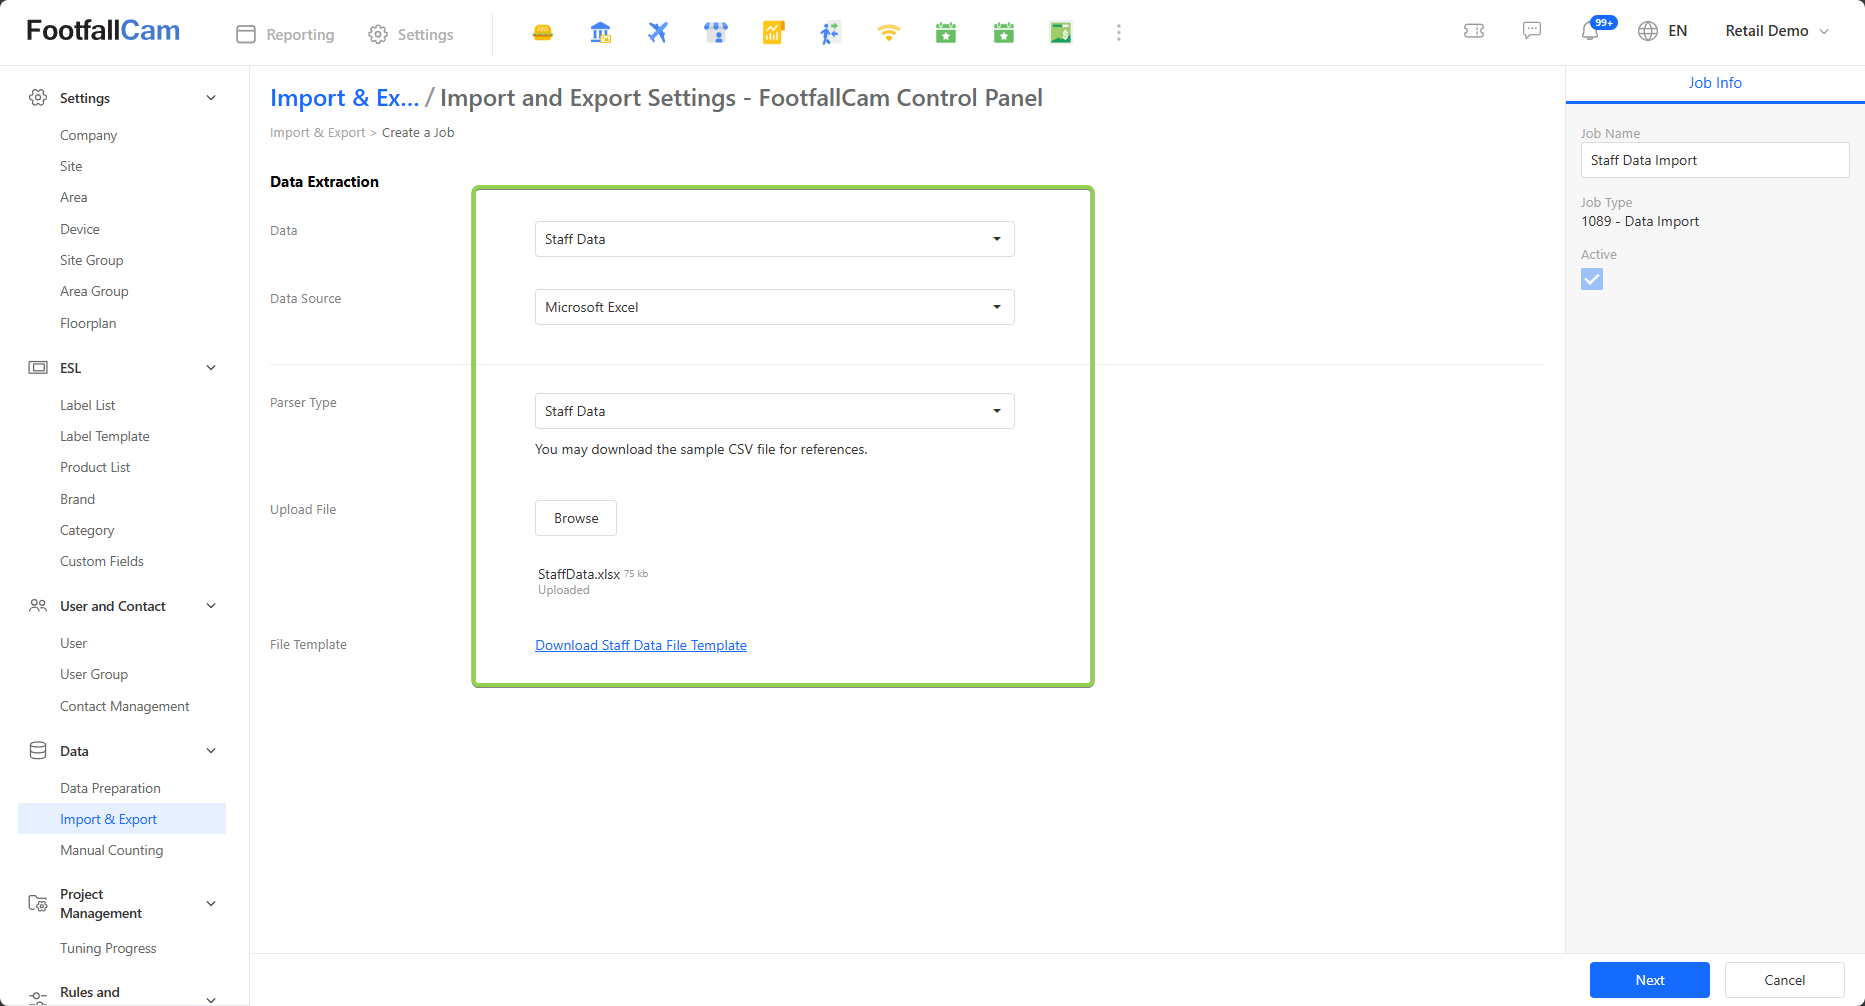
Step 2 - To import Staff Data, select 'Staff Data' for Data and select 'Microsoft Excel' for Data Source. Then, select 'Staff Data' for Parser Type.
Below are the fields found in the page:
| Field | Description |
| Data | The category of data to be imported to the database. |
| Parser Type | Choose the Parser Type to be involved in data import. |
| Upload File | To browse the file to upload for data import. Note that only one file can be uploaded at a time. |
Step 3 - A sample template for Staff data can be downloaded via the hyperlink. After downloading the template, edit the data in the Excel file based on the provided format. Do note that there are 3 sheets within the template.
Below shows the available columns found in the template:
| Sheet | Column | Description |
| Staff Data | Staff ID | ID of the staff member. |
| First Name | First name of the staff member. | |
| Last Name | Last name of the staff member. This field is optional and can be left blank. | |
| Designer | The job position of the staff member. | |
| Wage | Hourly wage of the staff member. | |
| Minimum Working Hours | Minimum working hours of the staff member. | |
| Maximum Working Hours | Maximum working hours of the staff member. | |
| Site Code | The Site Code of the Site the staff member works in. | |
| Staff Preference | Staff ID | ID of the staff member. Select the ID via the dropdown list. |
| Day Of Week | Specifies the day of the week. Can be chosen via dropdown list. | |
| Off Day | Specifies if the staff member has an off day on that particular day or not. | |
| Start Time | Starting time for the staff member on that particular day. | |
| End Time | Ending time for the staff member on that particular day. | |
| Schedule | Staff ID | ID of the staff member. Select the ID via the dropdown list. |
| Date | Specifies the date. Format is "YYYY-MM-DD". | |
| Start Time | Starting time in that particular date. | |
| End Time | Ending time in that particular date. | |
| Break Start Time | Starting time of lunch break at that particular date. | |
| Break End Time | Ending time of lunch break at that particular date. |
Step 4 - Once ready for upload, click on 'Browse' and select the Excel file to upload. If file upload is successful, there will be an indicator stating that the file is uploaded.
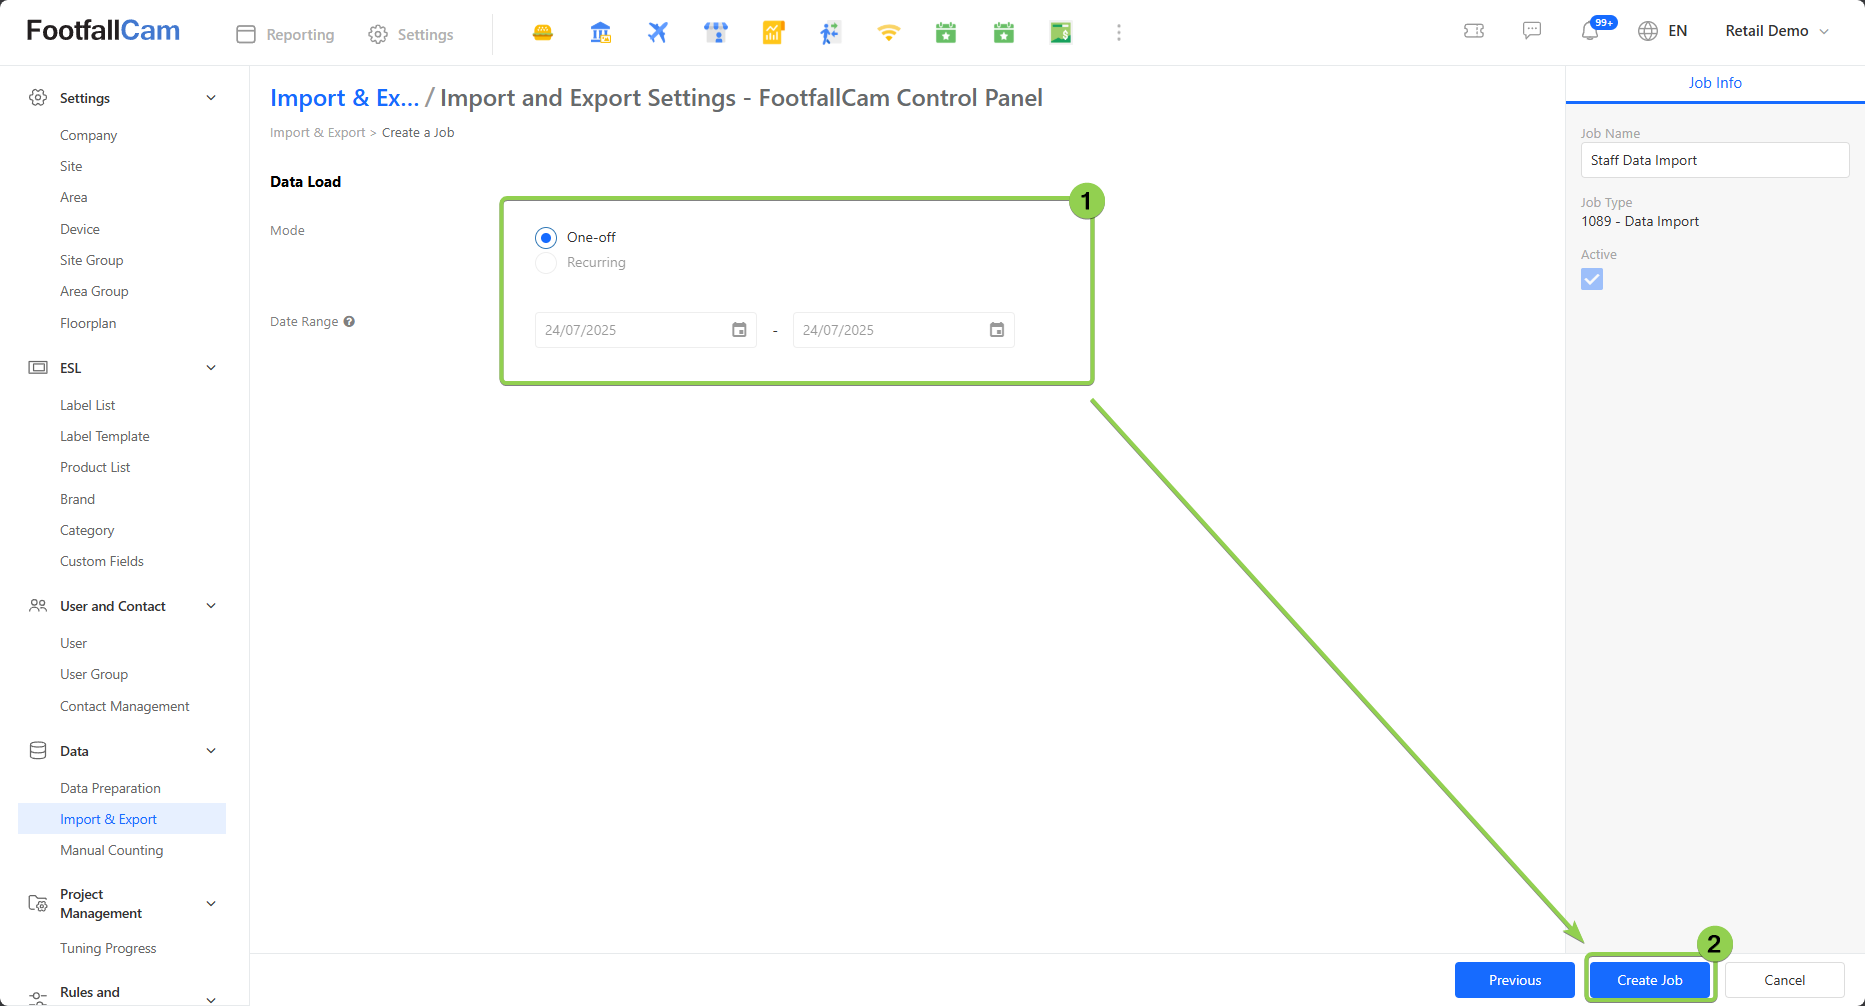
Step 5 - Click on 'Next', and set up the data load to One-off, and click on 'Create Job' to begin the import process.
Step 6 - A popup message would appear indicating that the job has been successfully created.
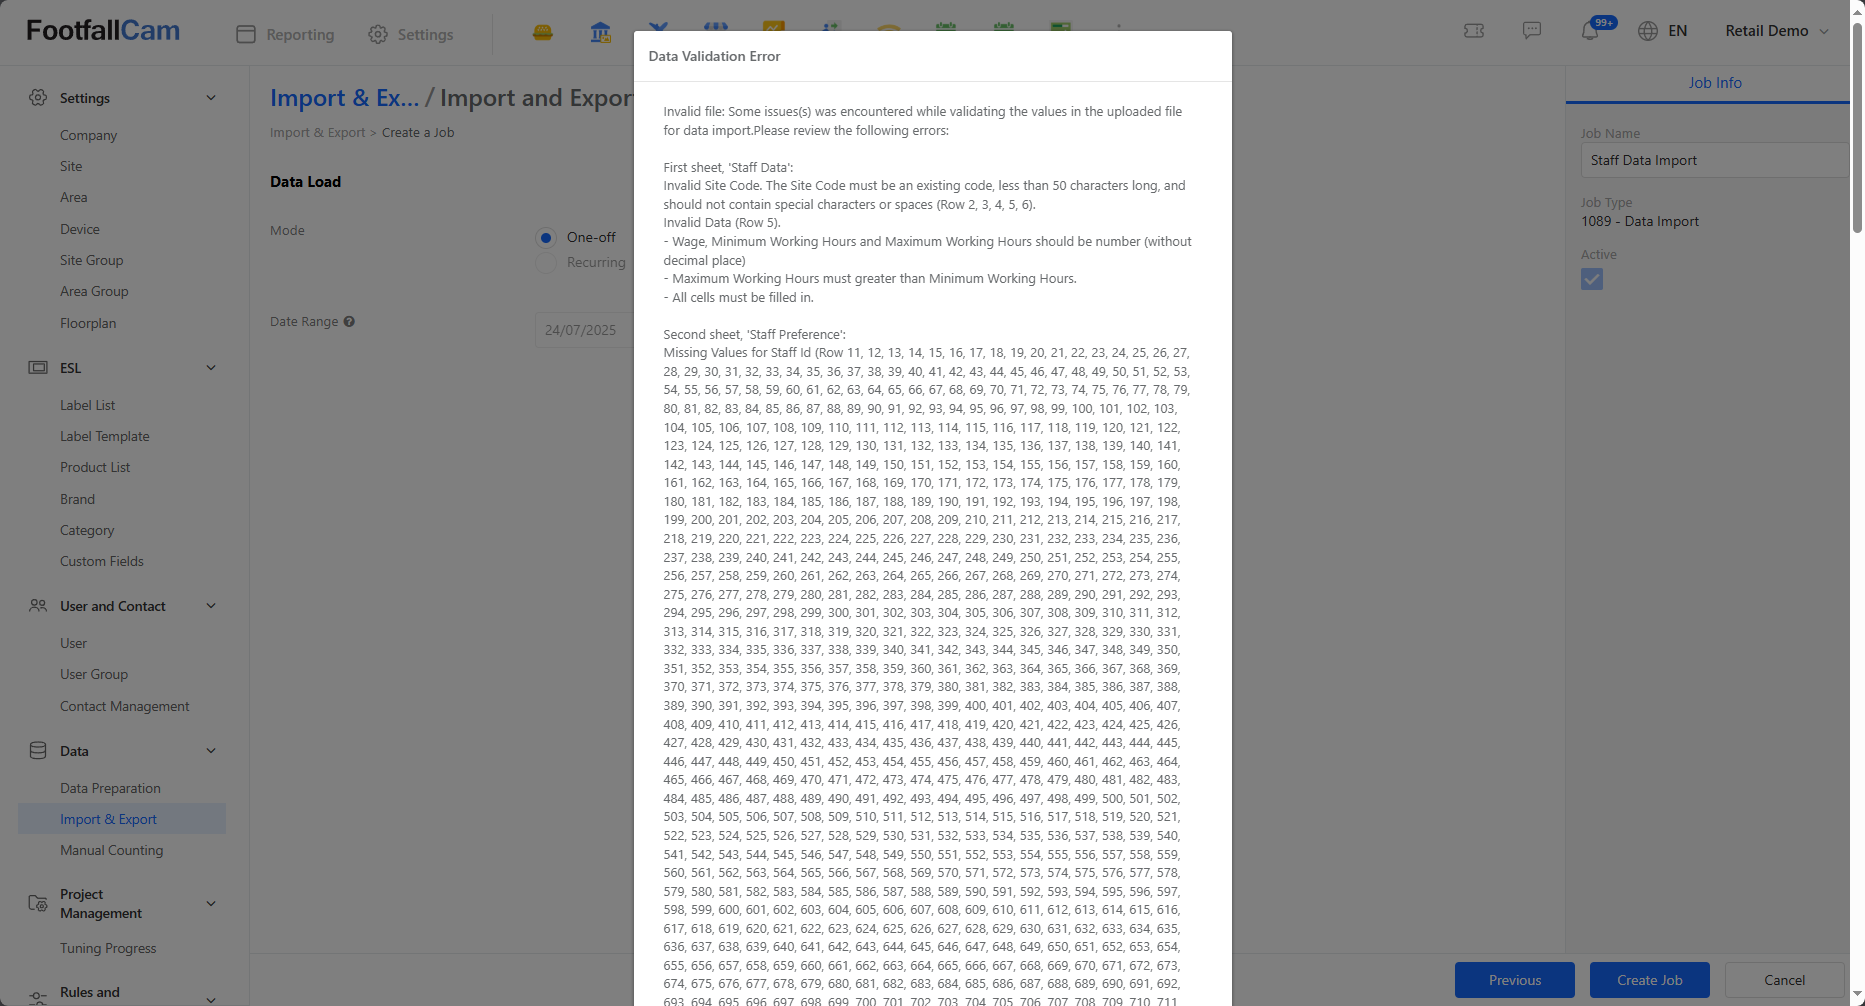
Noted: If there are issues in the import process, a popup will appear with the error message. Read the error message and rectify the errors if needed. Below is an example of an error message.
3.9 Bus Route
Stay tuned! The new feature will be ready soon.
3.10 ESL Product
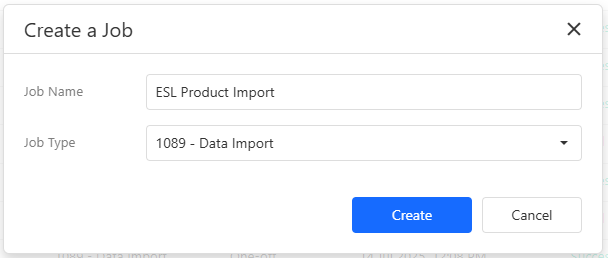
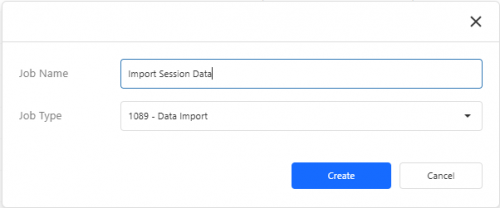
Step 1 - Please refer to step 1 to step 3 of Chapter 3.3 Data Import and Export to create a job and select 1089 - Data Import as the Job Type.
Step 2 - To create a new import job for ESL Product, select 'ESL Product' as the Data and select 'Microsoft Excel' as the Data Source. Then, select 'ESL Product' for Parser Type.
Step 3 - A sample template for the ESL data can be downloaded via the hyperlink. After downloading the template, edit the data in the Excel file based on the provided format. Do note that there are 2 sheets within the template.
Below are the available columns found in the template:
| Sheet | Column | Description |
| Brand and Category | Brand | The brand of the product |
| Category | The product category | |
| Product ID | The ID for the product | |
| Product Name | The name of the product | |
| Product Description | The product description | |
| Barcode | The product barcode, which only contains numbers | |
| QR Link | A valid QR link for the product | |
| Unit | The quantity of the product | |
| Unit of Measurement | The measurement used to describe the quantity of the product | |
| Product Price | Product ID | The ID for the product |
| Currency | The type of currency used to calculate the price of the product | |
| Normal Price | The normal price of the product | |
| Discounted Price | The discounted price of the product, this field can be empty | |
| Apply to Company Level? | Should the product price applied to all sites of the company? Select "TRUE" or "FALSE" | |
| Applicable Site(s) | The applicable sites for the price, if the previous answer is "FALSE", then write down the site code for the applicable site(s) |
Step 4 - Once the file is ready for upload, click on 'Browse' and select the Excel file to upload.
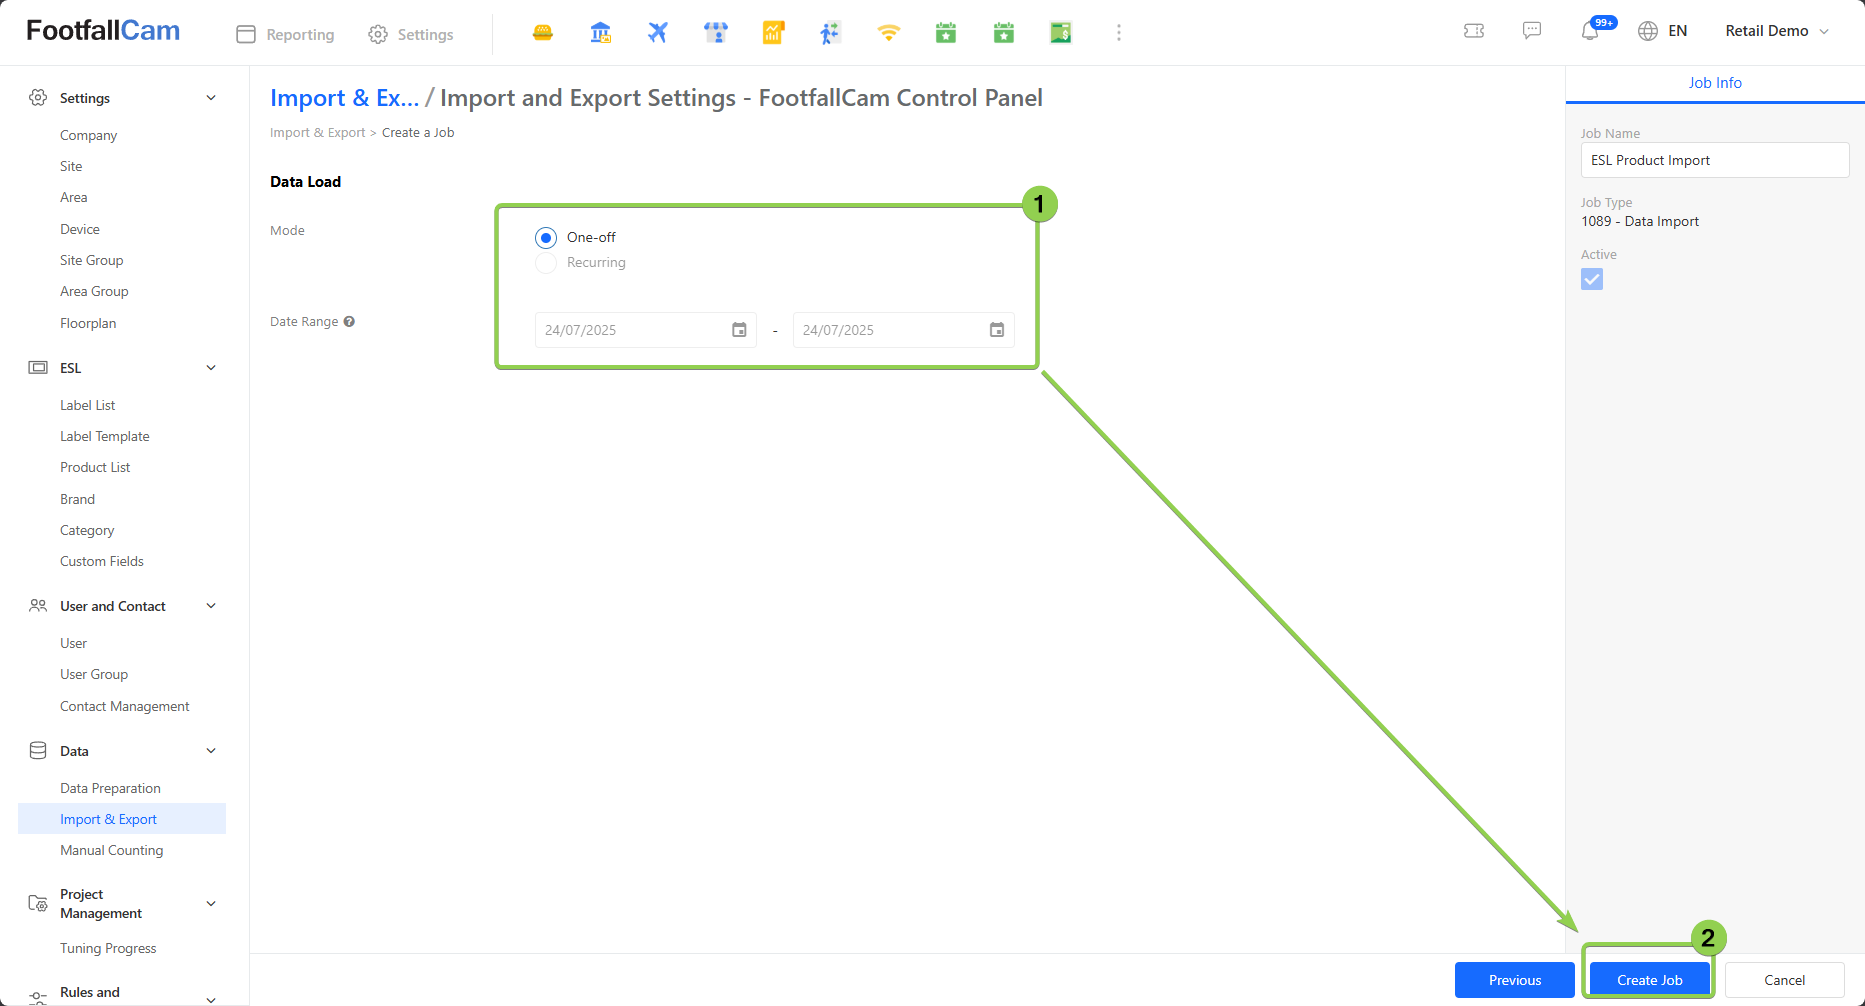
Step 5 - Once the file is uploaded successfully, click on 'Next' button and select 'Default Transformation'. The mode of Data will be on 'One-off' as default, click on 'Create Job' to begin the import process.
Step 6 - A popup message would appear indicating that the job has been successfully created.
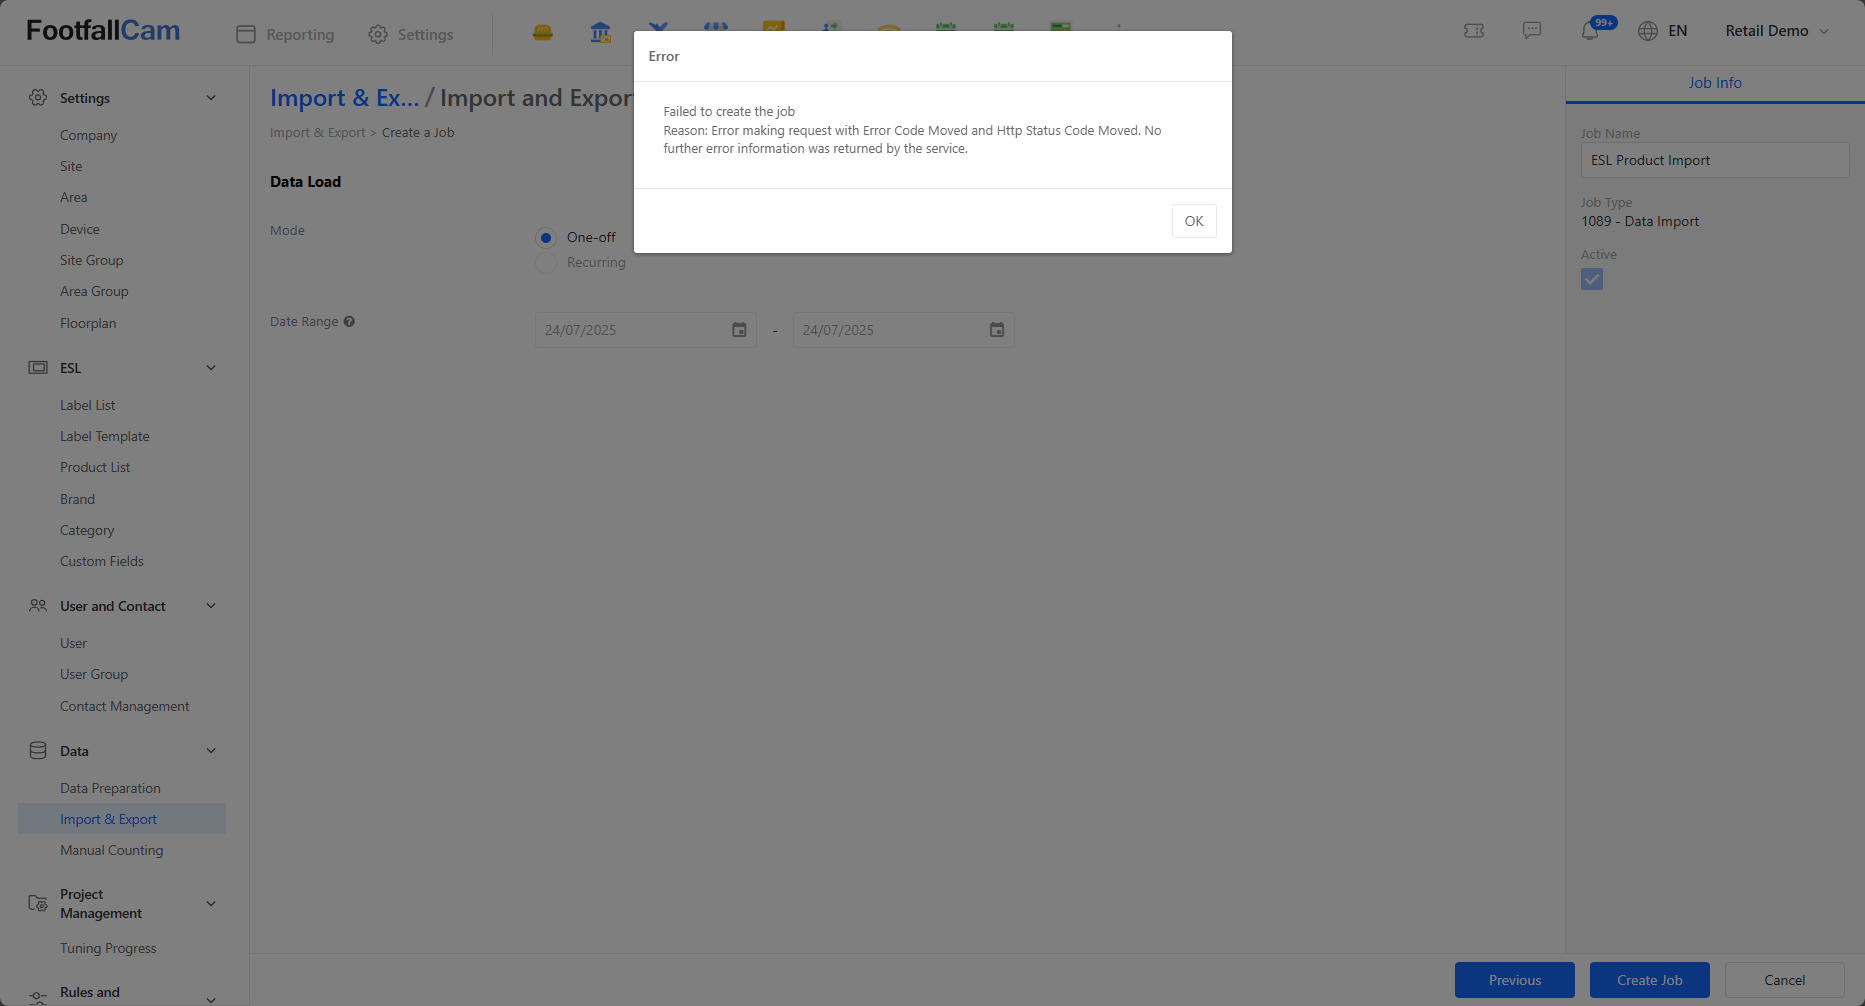
Noted: If there are issues in the import process, a popup will appear with the error message. Read the error message and rectify the errors if needed. Below is an example of an error message.
3.11 Area Session Data
3.11.1 Bulk Area Session Creation
Step 1 - Please refer to step 1 to step 3 of Chapter 3.3 Data Import and Export to create a job and select 1089 - Data Import as the Job Type.
Step 2 - To import New Area Session Data, select 'Area Session Data' for Data. Then, select 'Microsoft Excel' for Data Source and select 'Area Session Data' for Parser Type.
Below are the fields found in the page:
| Field | Description |
| Data | The category of data to be imported to the database. |
| Data Source | Source from which data is extracted for processing and analysis. |
| Upload File | To browse the file to upload for data import. Note that only one file can be uploaded at a time. |
| File Template | Download a sample template for Area Session Data. |
Step 3 - A sample template for Area Session Data can be downloaded via the hyperlink. After downloading the template, edit the data in the Excel file based on the provided format.
Below shows the available columns found in the template:
| Sheet | Column | Description |
| Session Data | Area Code | The Area code of an existing Area. |
| Session Name | Name of the new Area Session. | |
| Start Date | The Start Date of new Area Session. Date Format (yyyy-mm-dd). |
|
| Start Time | The Start Time of new Area Session. Time Format (hh:mm). |
|
| End Date | The End Date of new Area Session. Date Format (yyyy-mm-dd). |
|
| End Time | The End Time of new Area Session. Time Format (hh:mm). |
Step 4 - Upload the Area Session Data Excel file by clicking on 'Browse' and selecting your Excel file. If file upload is successful, there will be an indicator stating that the file is uploaded.
Step 5 - Click on 'Next', set up the data load to One-off, and Click on 'Create Job' to begin the import process.
Step 6 - A popup message will shown if the job is created successfully. Otherwise, an error message will be shown.
Noted: If there are issues in the import process, a popup will appear with the error message. Read the error message and rectify the errors if needed. Below is an example of an error message.
3.12 Session Data
3.12.1 Bulk Session Creation
Step 1 - Please refer to step 1 to step 3 of Chapter 3.3 Data Import and Export to create a job and select 1089 - Data Import as the Job Type.
Step 2 - To import New Area Session Data, select 'Session Data' for Data. Then, select 'Microsoft Excel' for Data Source and select 'Session Data' for Parser Type.
Below are the fields found in the page:
| Field | Description |
| Data | The category of data to be imported to the database. |
| Data Source | Source from which data is extracted for processing and analysis. |
| Upload File | To browse the file to upload for data import. Note that only one file can be uploaded at a time. |
| File Template | Download a sample template for Session Data. |
Step 3 - A sample template for Session Data can be downloaded via the hyperlink. After downloading the template, edit the data in the Excel file based on the provided format.
Below shows the available columns found in the template:
| Sheet | Column | Description |
| Session Data | Store Code | The Site code of an existing Site. |
| Session Name | Name of the new Session. | |
| Session Type | Type of the new Session. | |
| Start Date | The Start Date of new Session. Date Format (yyyy-mm-dd). |
|
| Start Time | The Start Time of new Session. Time Format (hh:mm). |
|
| End Date | The End Date of new Session. Date Format (yyyy-mm-dd). |
|
| End Time | The End Time of new Session. Time Format (hh:mm). |
Step 4 - Upload the Session Data Excel file by clicking on 'Browse' and selecting your Excel file. If file upload is successful, there will be an indicator stating that the file is uploaded.
Step 5 - Click on 'Next', set up the data load to One-off, and Click on 'Create Job' to begin the import process.
Step 6 - A popup message will shown if the job is created successfully. Otherwise, an error message will be shown.
Noted: If there are issues in the import process, a popup will appear with the error message. Read the error message and rectify the errors if needed. Below is an example of an error message.
3.13 Floorplan Data
Floorplan Data Export and Import feature enable users to export a desired floorplan from one site and import it into another environment (such as a different company, server, or site) without manually redrawing or recreating the floorplan.
The import process involves three main steps:
- Export: Export the selected site's floorplan(s) to a downloadable JSON file.
- Import: Upload the exported JSON file back into the portal to apply the same floorplan across the selected site.
- Link Areas and Devices: After importing, navigate to the Floorplan page to link the corresponding areas and devices to ensure proper mapping and functionality.
This process streamlines floorplan replication across environments, saves time, and ensures consistency while allowing for easy reconfiguration of area and device associations.
3.13.1 Floorplan Data Export
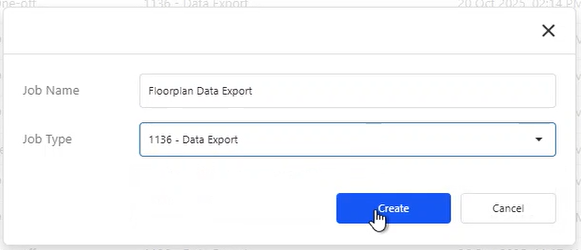
Step 1 - Please refer to step 1 to step 3 of Chapter 3.3 Data Import and Export to create a job and select 1136 - Data Export as the Job Type.
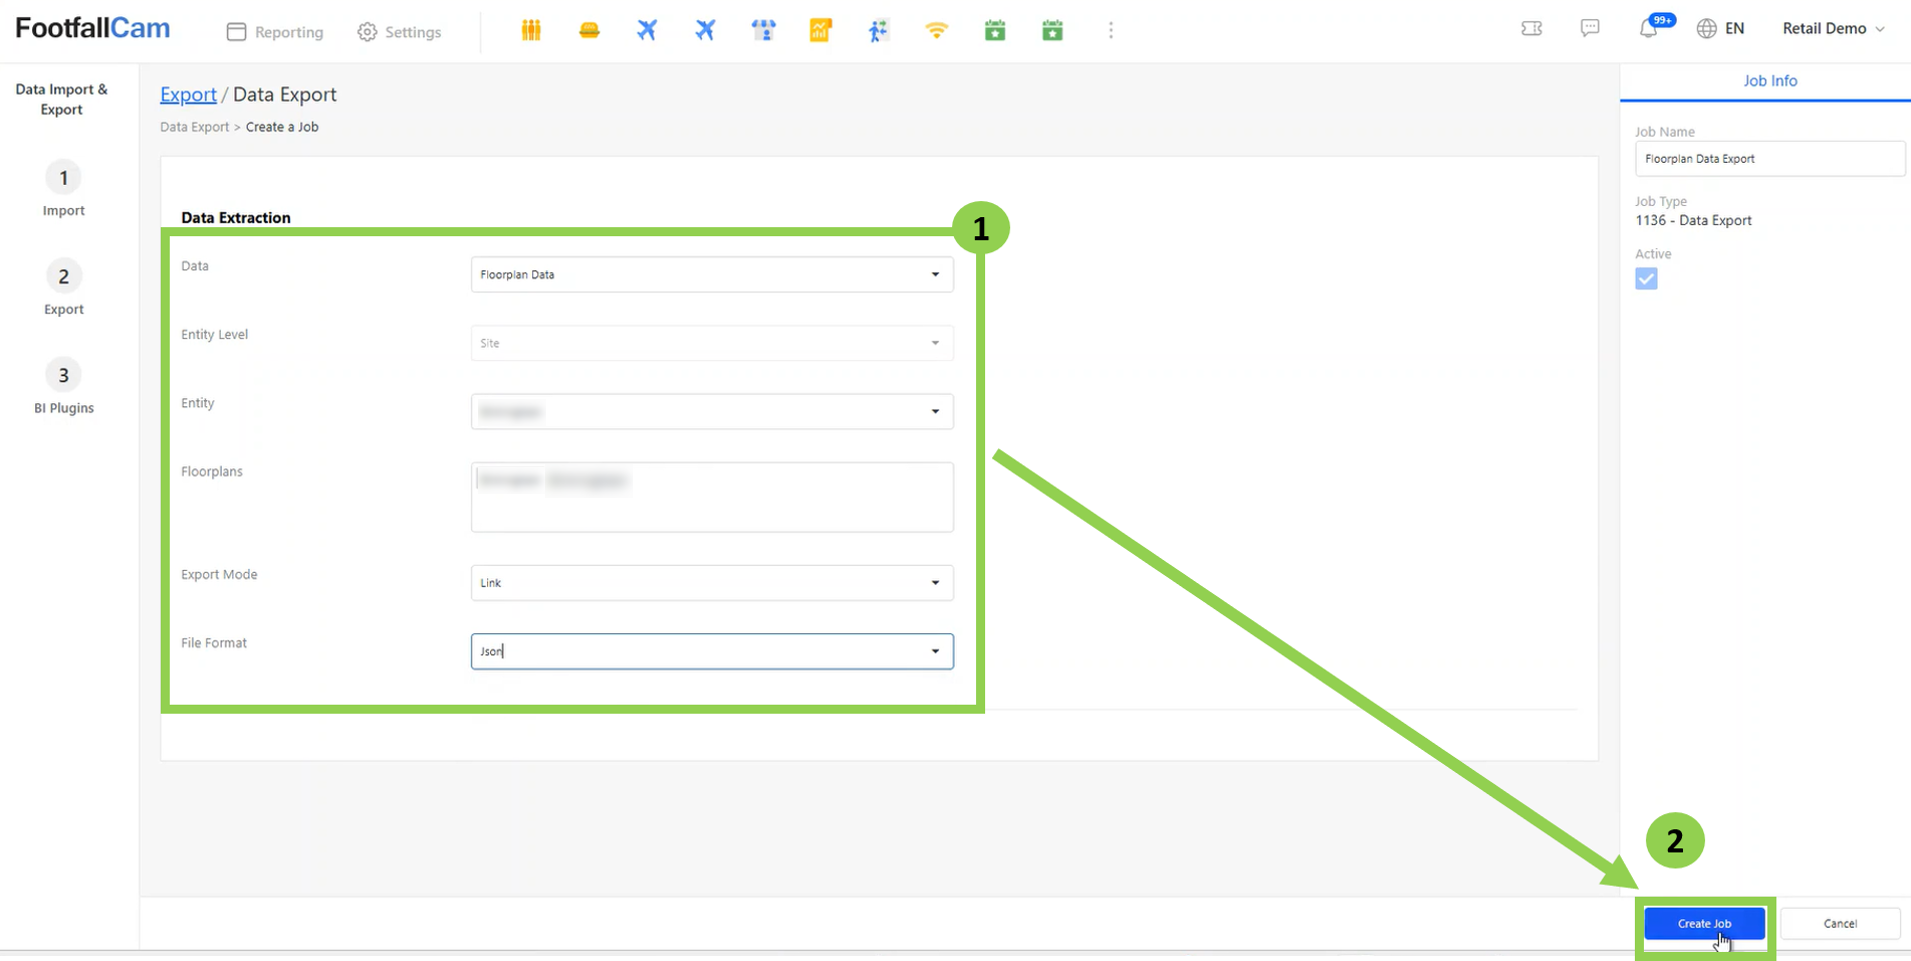
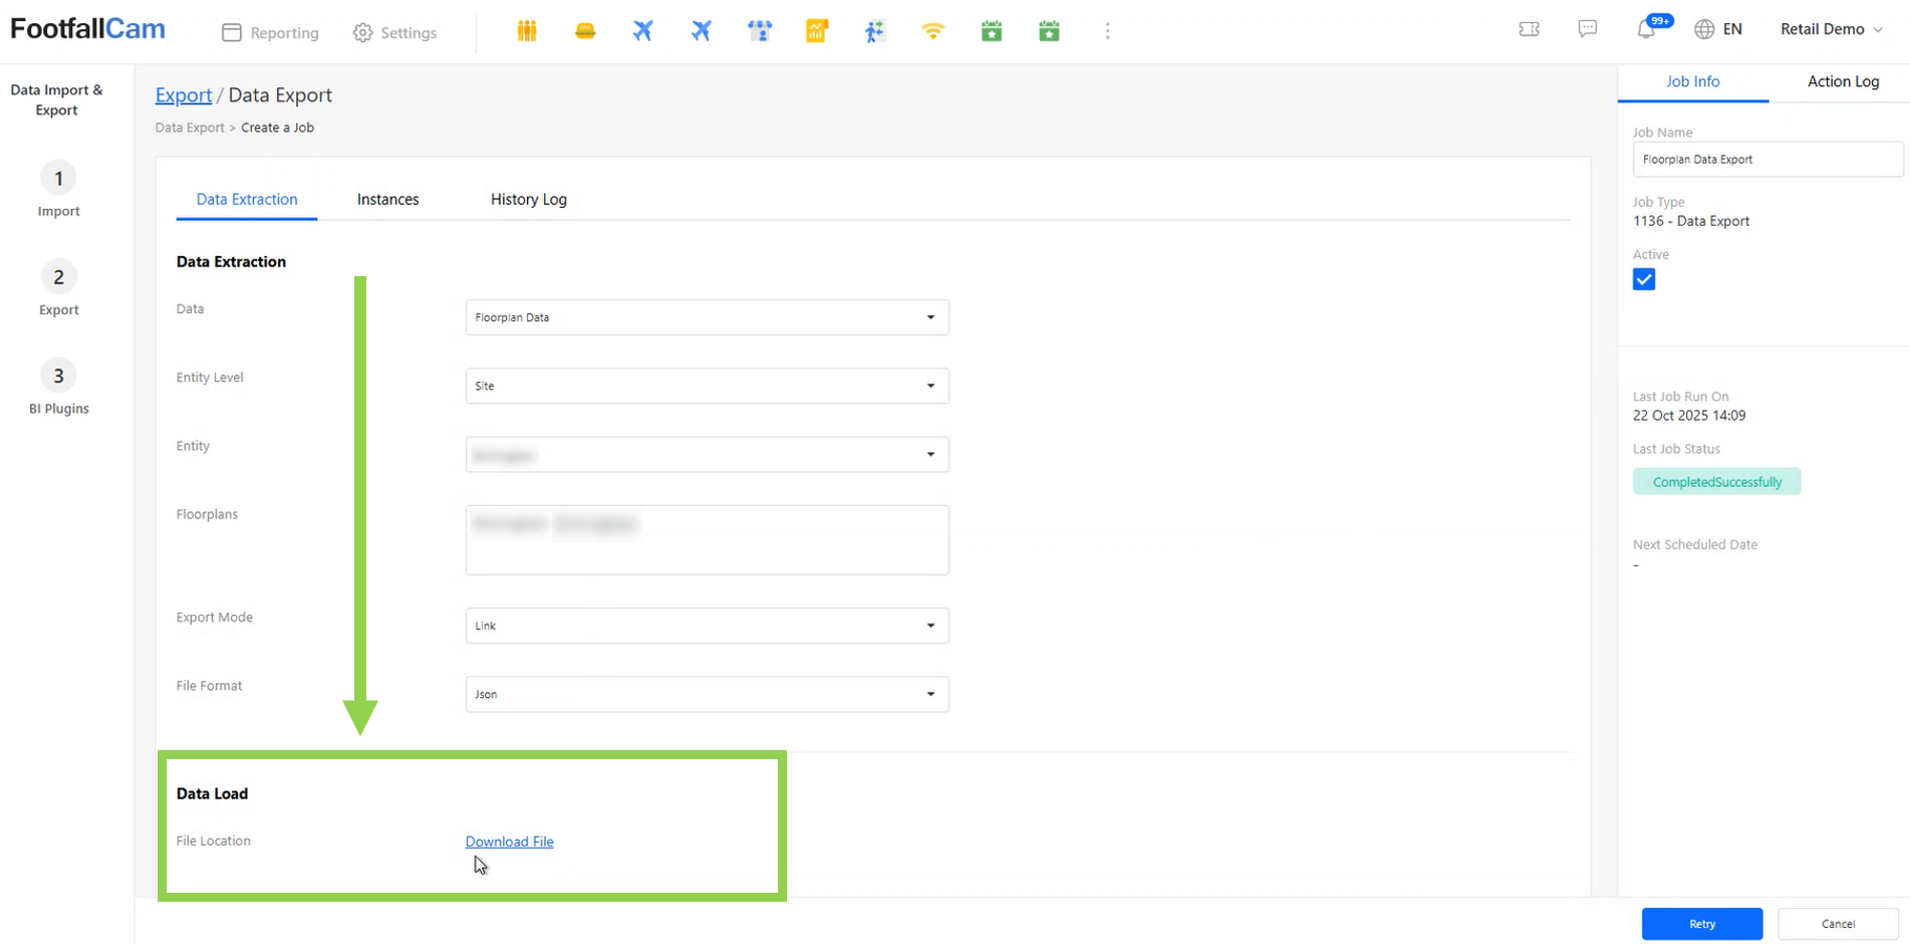
Step 2 - To retrieve site floorplan data, select 'Floorplan Data' for Data. Then, select the site for Entity and floorplan(s) for the Floorplans. Select 'Link' for Export Mode and select 'Json' for File Format. Next, click on the "Create Job" to create the export job.
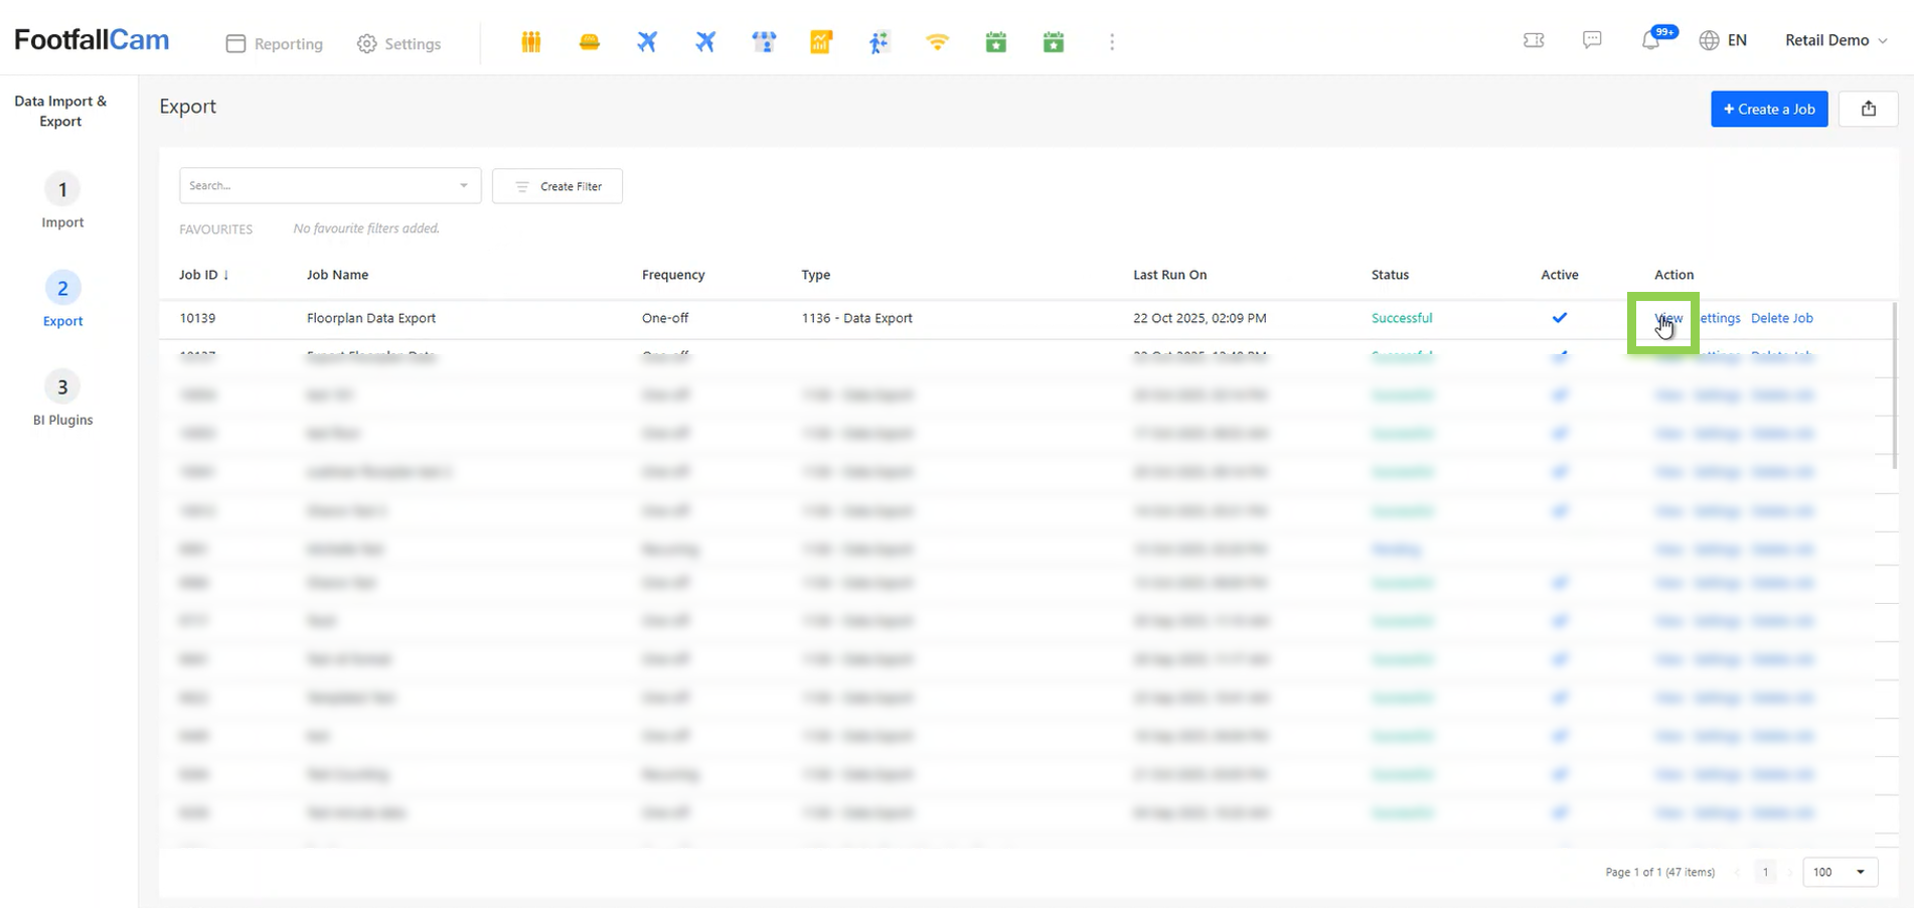
Step 3 - Go back to the job you created and wait for a few minutes for the job to run. Refresh the page, and when the Status shows "Successful", click 'View'.
Step 4 - After opening the page, click the download link to download the JSON file.
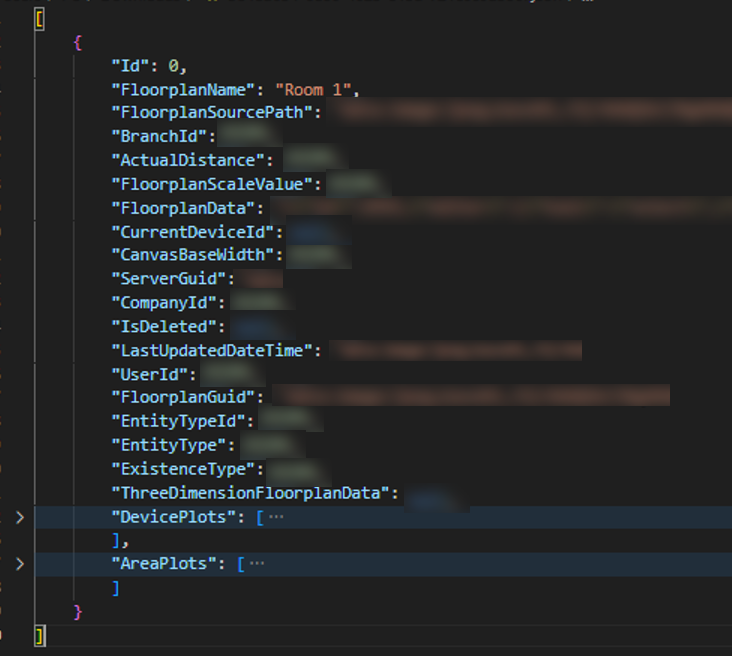
The downloaded file is in JSON format and contains all the data required to recreate the floorplan during import. Each { ... } block in the file represents one floorplan record and includes details such as:
- Floorplan name and image
- Scale and actual distance
- Layout and plotted data
- Site and company information
- Plotted devices and areas (if available)
Example of exported JSON structure:
Step 5 - Proceed to 3.13.2 to import the floorplan data.
3.13.2 Floorplan Data Import
Step 1 - Please refer to step 1 to step 3 of Chapter 3.3 Data Import and Export to create a job and select 1089 - Data Import as the Job Type.
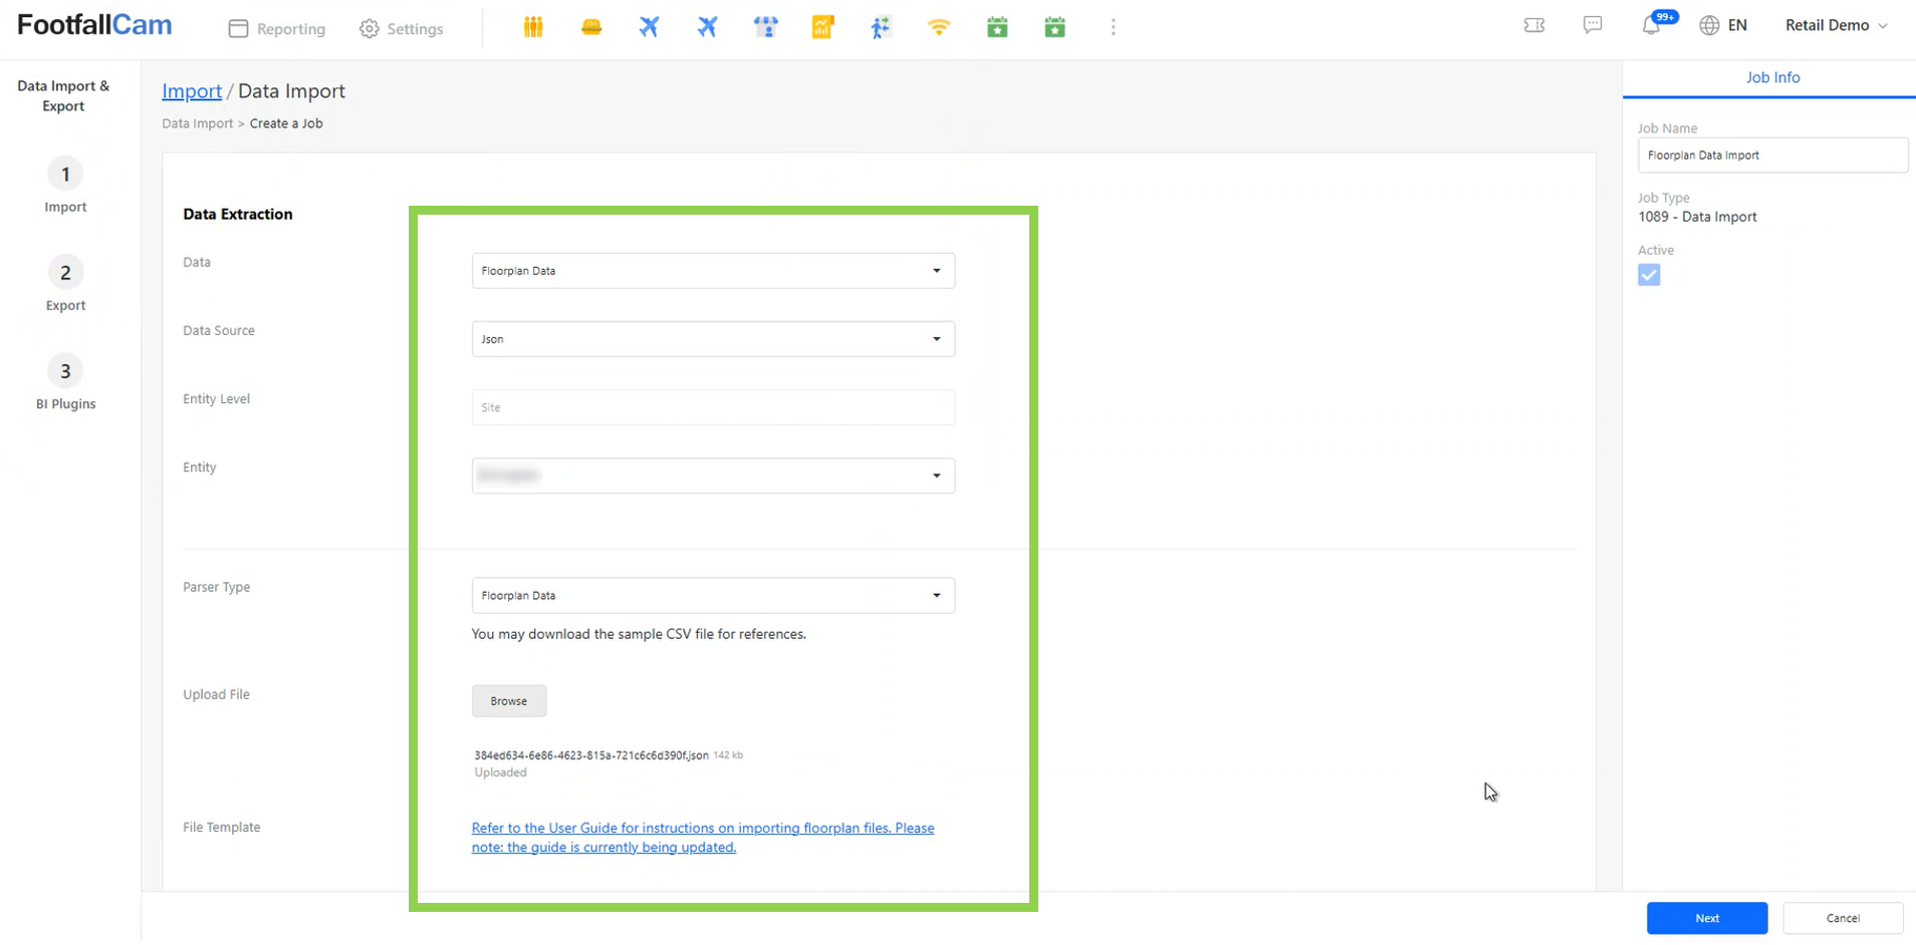
Step 2 - To upload floorplan data, select 'Floorplan Data' for Data and select 'Json' for the Data Source. Then, select one site that you want to import floorplan data to and select 'Floorplan Data' for Parser Type. Click on 'Browse' and select the exported JSON file to upload. If file upload is successful, there will be an indicator stating that the file is uploaded.
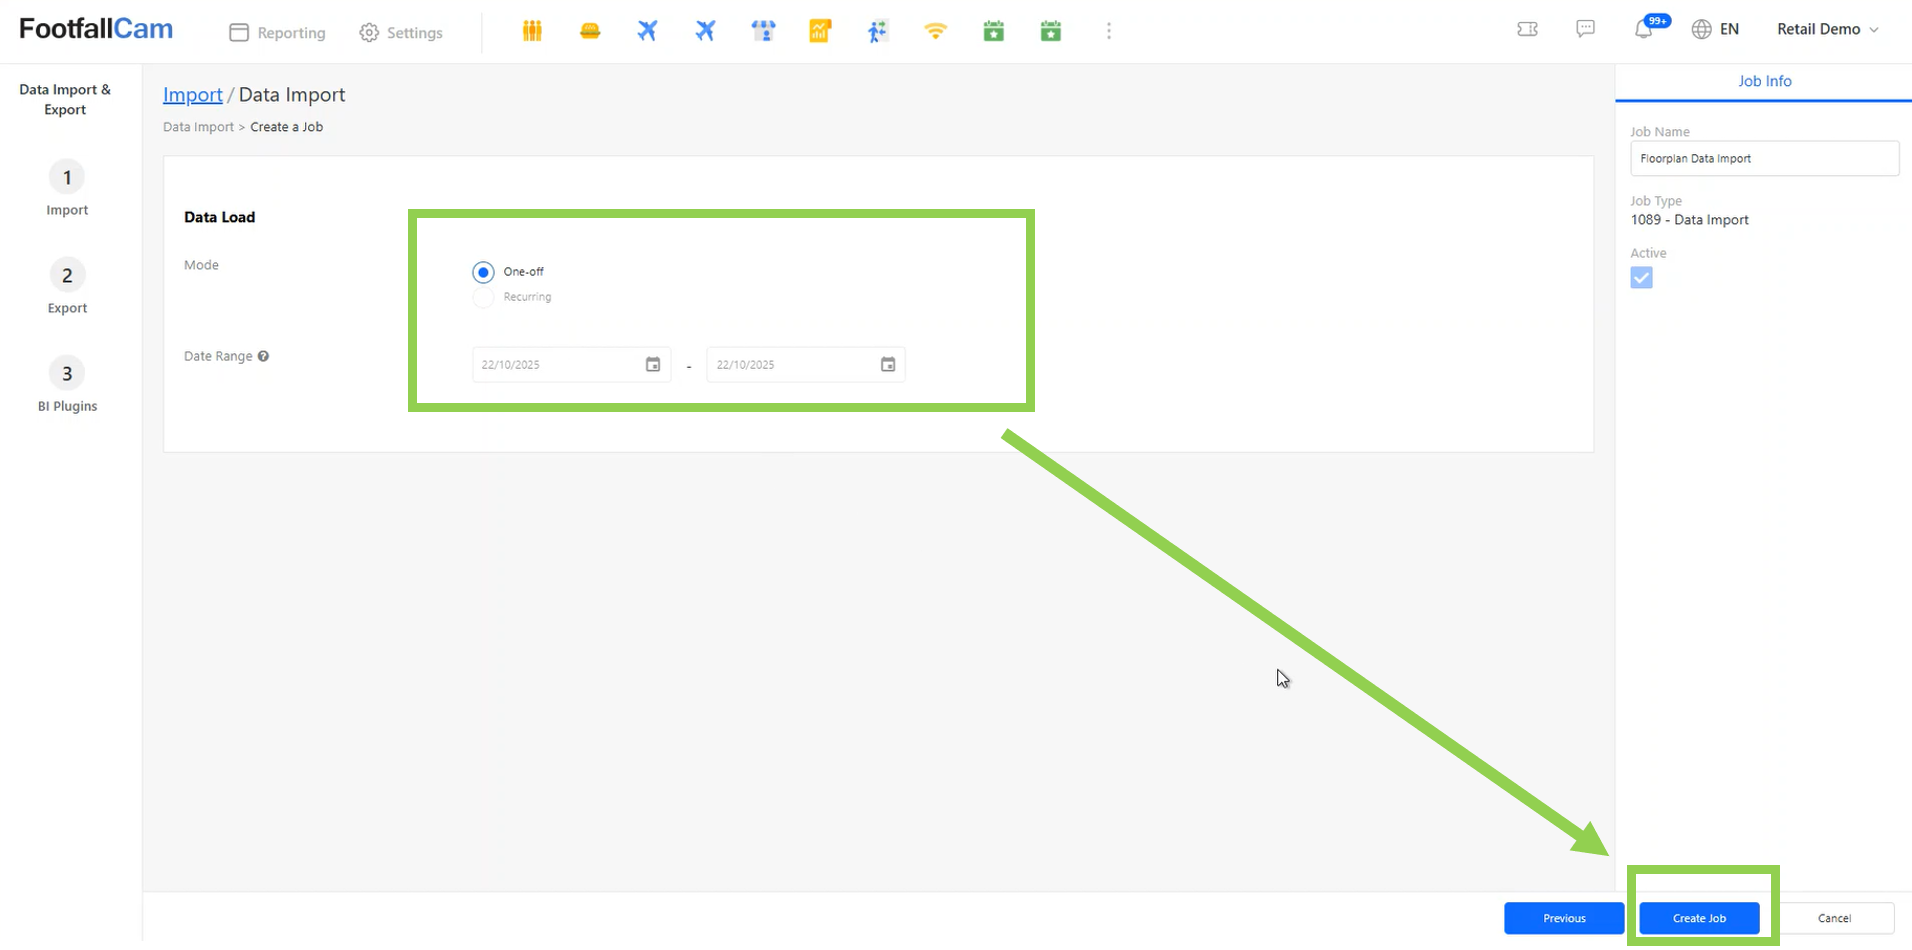
Step 3 - Click on 'Next', set up the data load to One-off, and click on 'Create Job' to begin the import process.
Step 4 - A popup message will shown if the job is created successfully. Otherwise, an error message will be shown.
3.13.3 Link Areas and Devices
Once the floorplan data import job has run successfully, follow these steps to link the corresponding areas and devices:
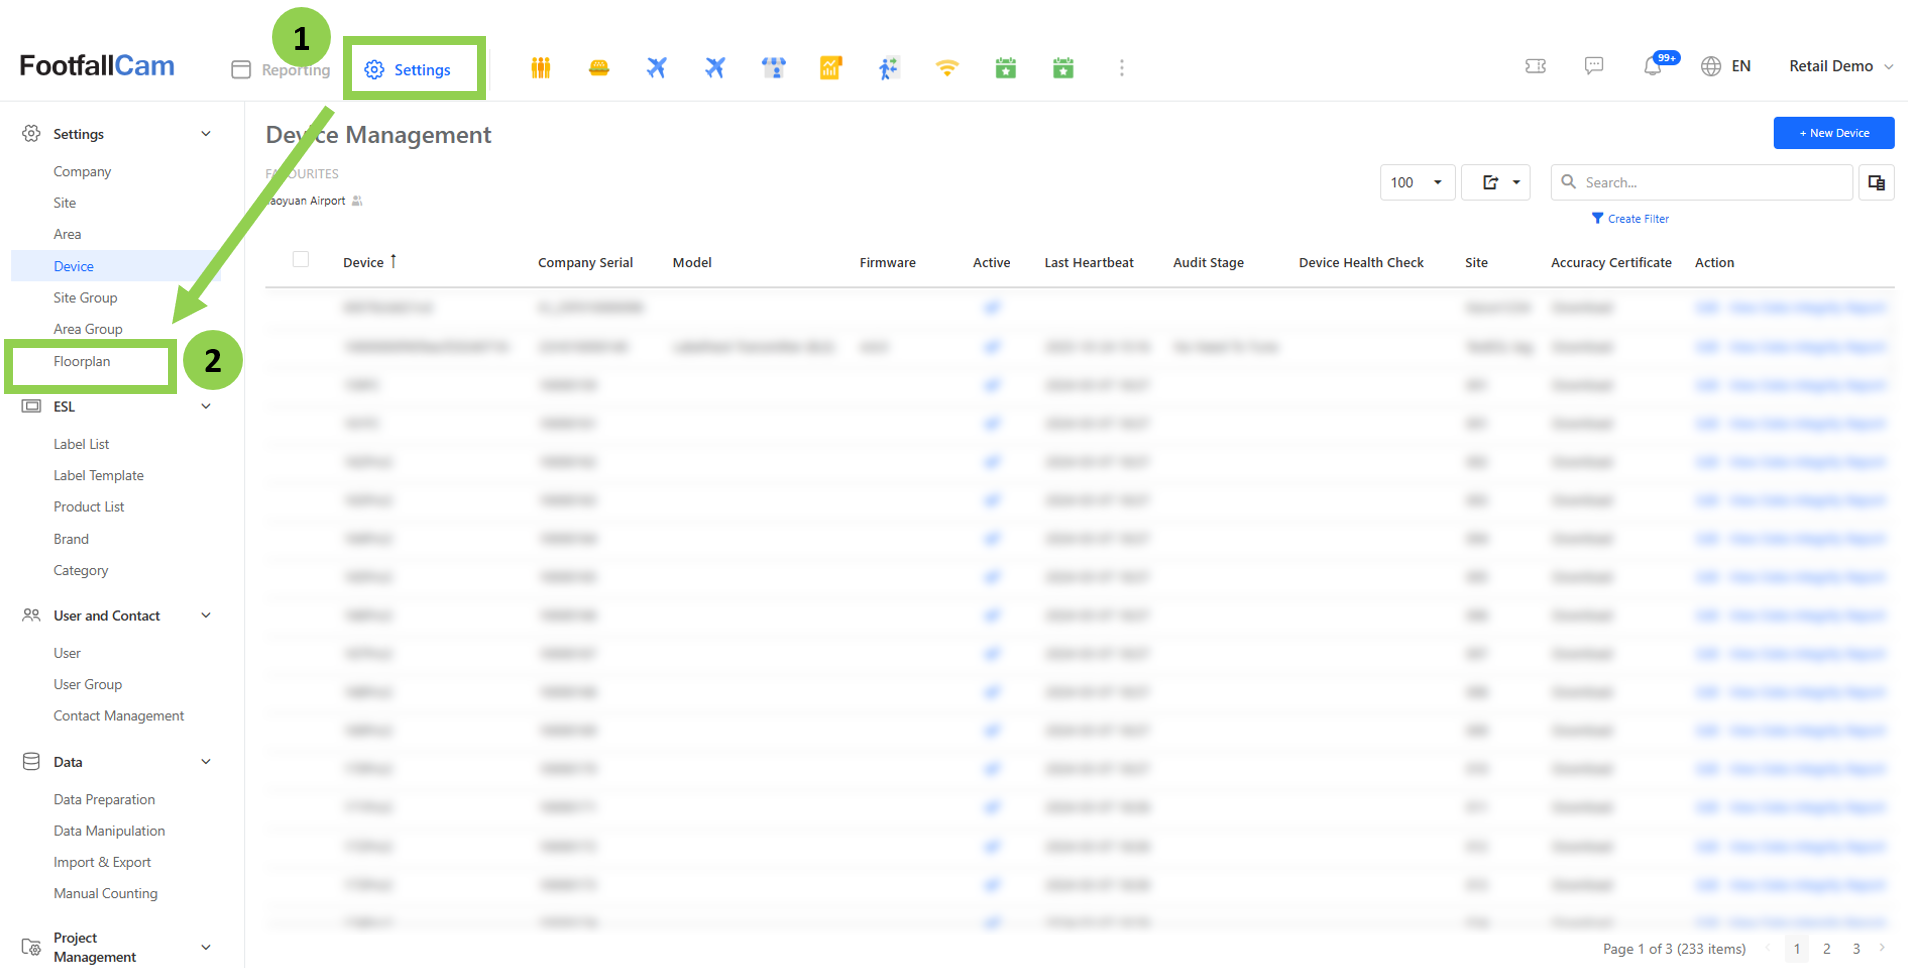
Step 1 - Go to Settings > Floorplan to access the list of available floorplans.
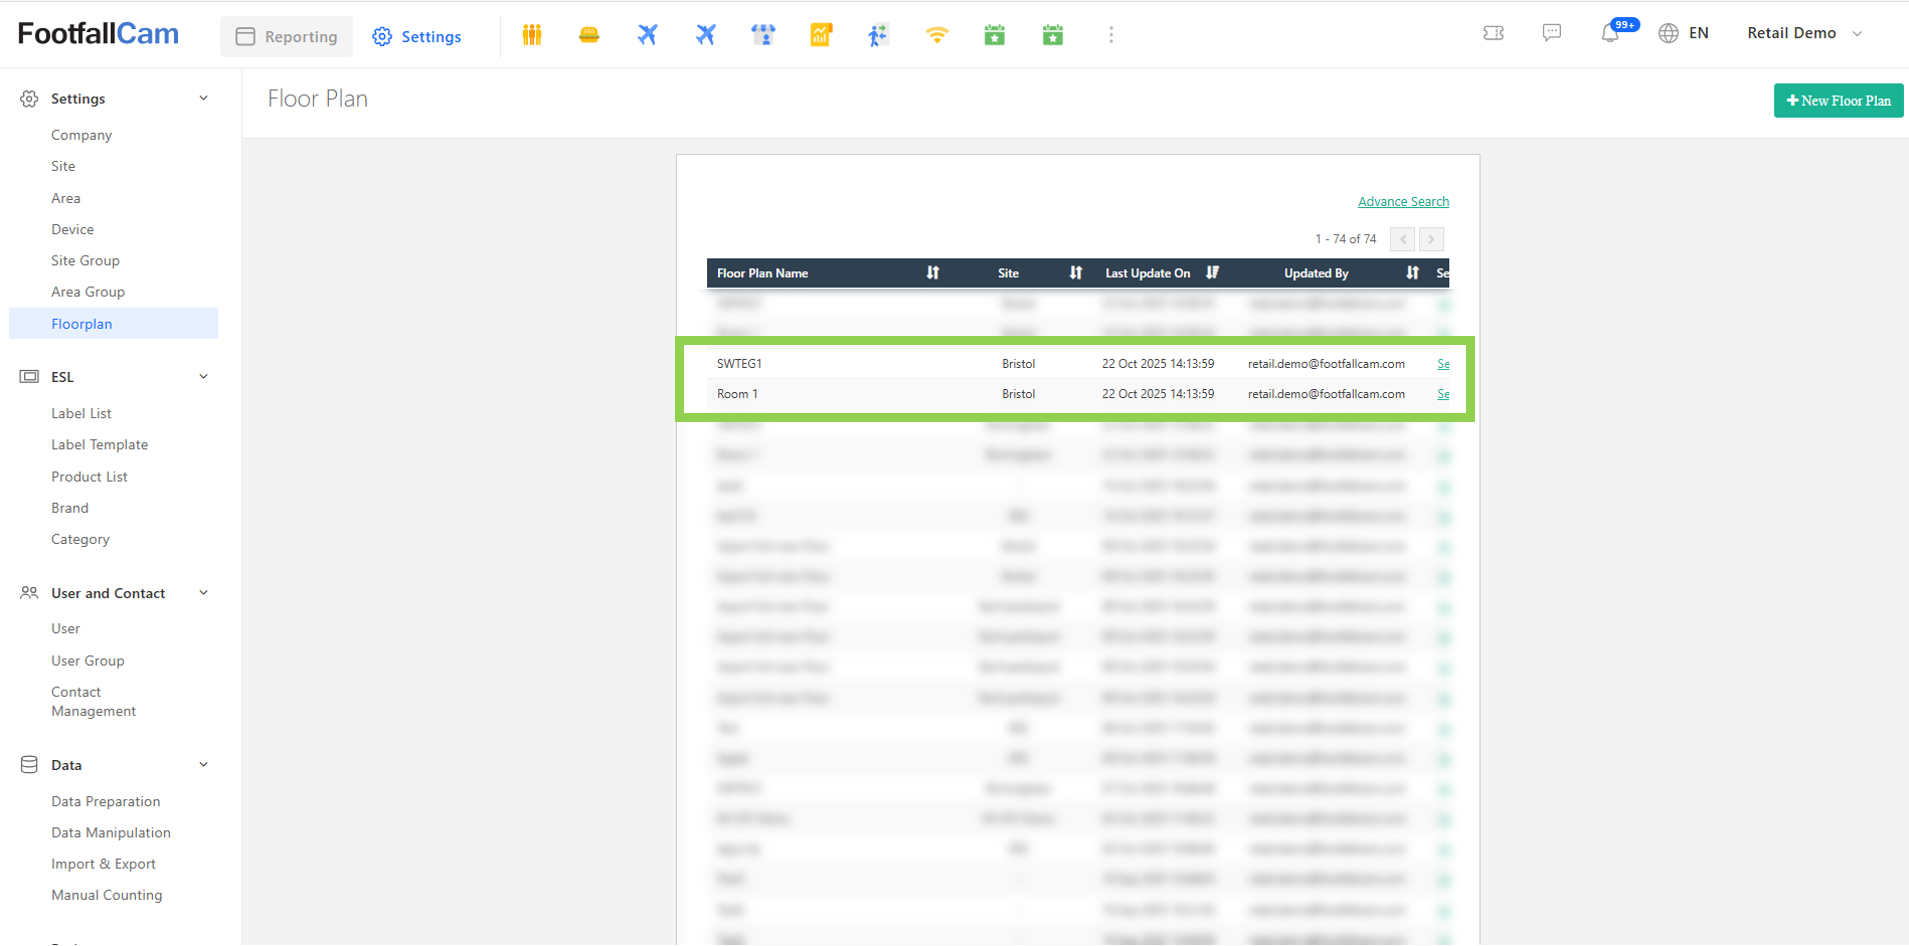
Step 2 - The imported floorplan will appear in the list.
- The Floor Plan Name will match the one selected during the data export.
- The Site will correspond to the site selected during the data import.
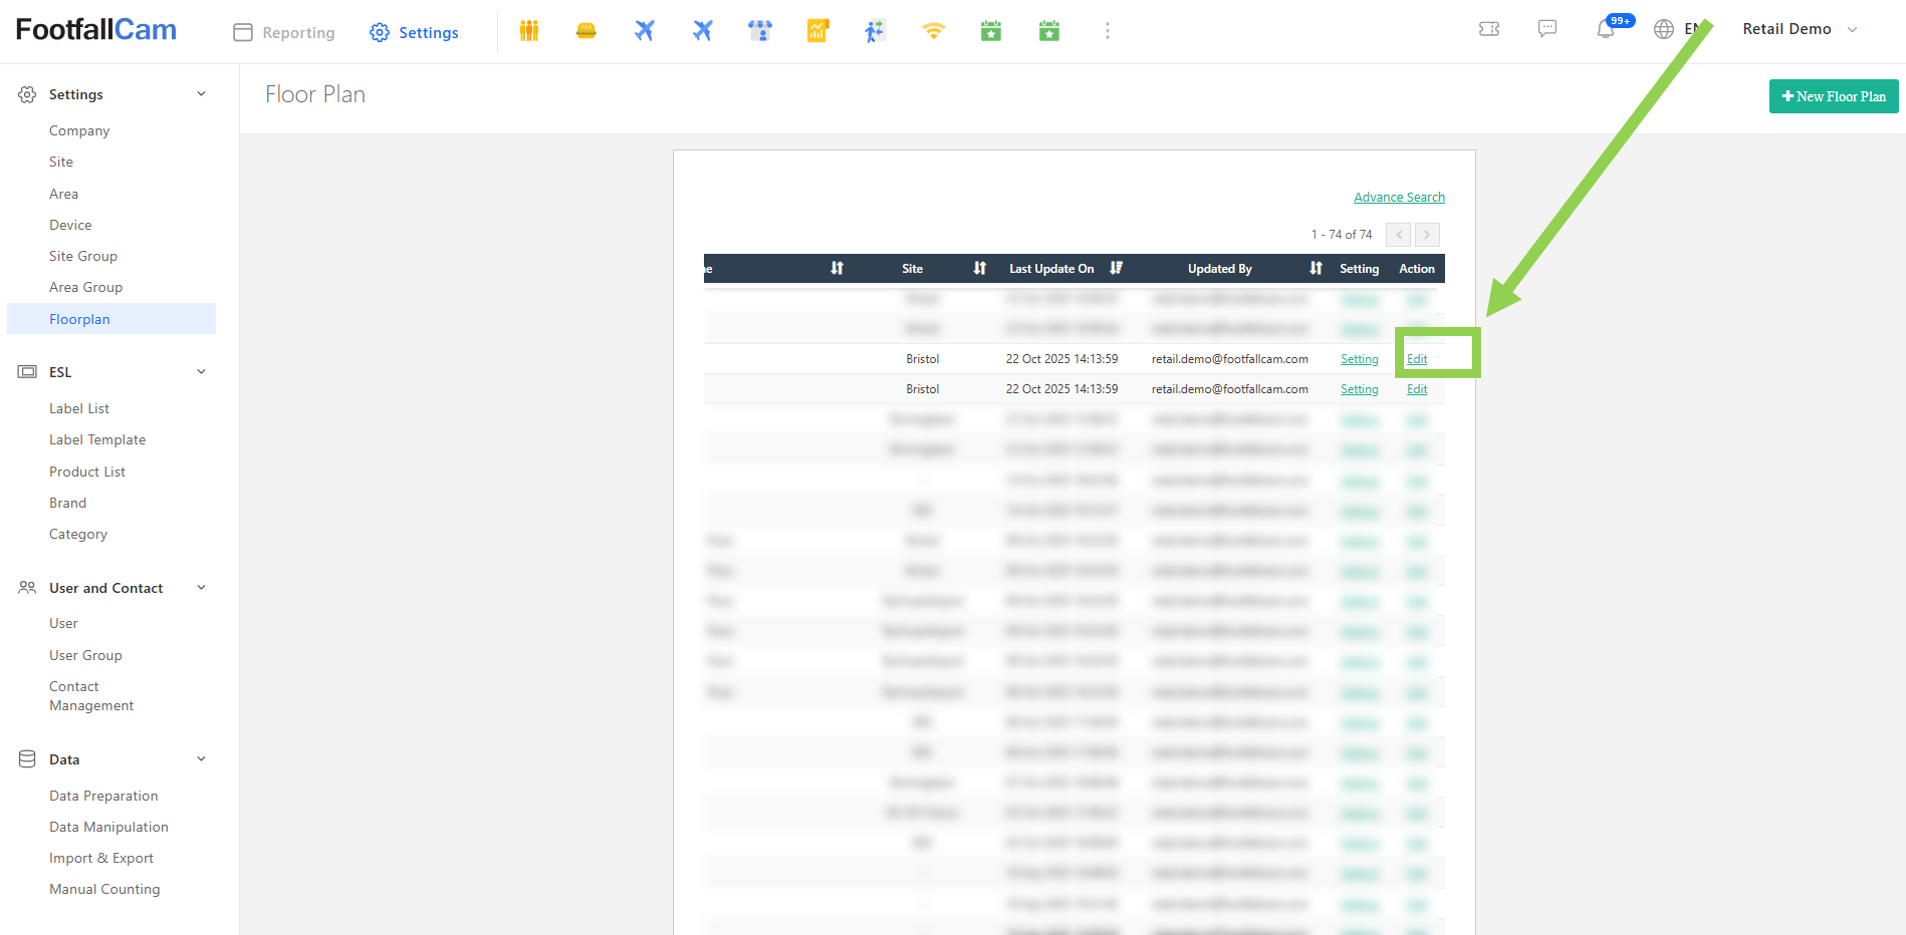
Step 3 - Locate the imported floorplan you want to update. Scroll to the right and click 'Edit'. You will be redirected to the Floor Plan Design Tool page.
Step 4 - In the Floorplan Design Tool, link the plotted devices and areas as needed.


